
Nexus 6P Daughterboard/Charging Port Replacement

What you need

Video Overview

  1. Nexus 6P Daughterboard/Charging Port Replacement: step 2, image 1 of 3 Nexus 6P Daughterboard/Charging Port Replacement: step 2, image 2 of 3 Nexus 6P Daughterboard/Charging Port Replacement: step 2, image 3 of 3
    • Heat up back glass panel.

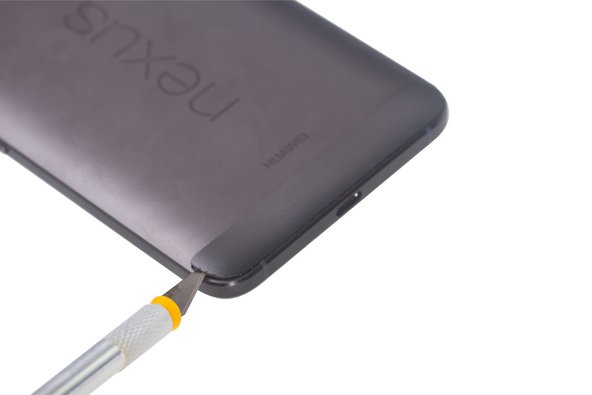
    • Use hobby knife to open a gap and cut the fierce sticker underneath rear glass panel.

    • The back glass panel is easily shattered and the adhesive underneath is fierce. So be careful to pry this part.

  2. Nexus 6P Daughterboard/Charging Port Replacement: step 3, image 1 of 3 Nexus 6P Daughterboard/Charging Port Replacement: step 3, image 2 of 3 Nexus 6P Daughterboard/Charging Port Replacement: step 3, image 3 of 3
    • Heat up bottom plastic panel.

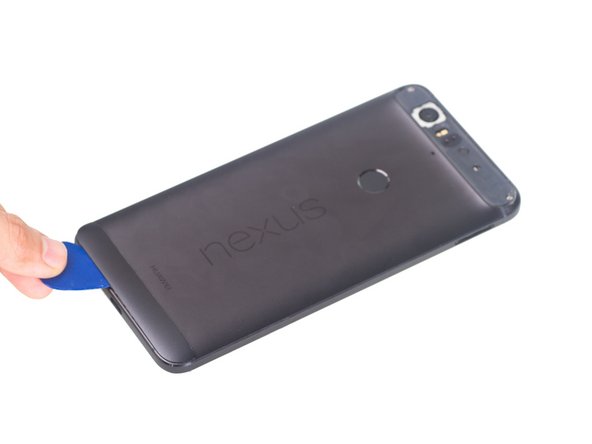
    • Use hobby knife to open a gap and insert guitar picks to cut adhesive underneath.

  3. Nexus 6P Daughterboard/Charging Port Replacement: step 4, image 1 of 3 Nexus 6P Daughterboard/Charging Port Replacement: step 4, image 2 of 3 Nexus 6P Daughterboard/Charging Port Replacement: step 4, image 3 of 3
    • Twist off 6 Phillips screws together.

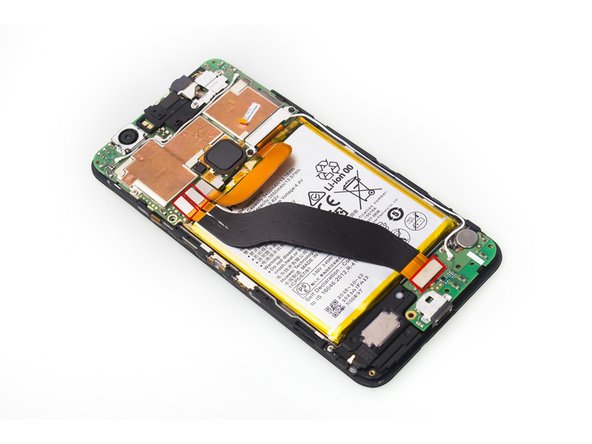
    • Insert guitar picks and plastic opening tool to separate front assembly from back cover.

    • Attention: These two parts fit tightly.It is the toughest part to separate. You can also try using heavy-duty suction cup to disassemble them.

  4. Nexus 6P Daughterboard/Charging Port Replacement: step 5, image 1 of 3 Nexus 6P Daughterboard/Charging Port Replacement: step 5, image 2 of 3 Nexus 6P Daughterboard/Charging Port Replacement: step 5, image 3 of 3
    • Unscrew one Phillips screw.

    • Remove metal bracket securing flex contactors.

    • Release 3 flex contactors and remove it .

    • This flex is used to connect motherboard and daughterboard.

  5. Nexus 6P Daughterboard/Charging Port Replacement: step 6, image 1 of 3 Nexus 6P Daughterboard/Charging Port Replacement: step 6, image 2 of 3 Nexus 6P Daughterboard/Charging Port Replacement: step 6, image 3 of 3
    • Disconnect signal cable contactor and twist off one Phillips screw.

    • Remove daughterboard.

  6. Nexus 6P Daughterboard/Charging Port Replacement: step 7, image 1 of 1
    • Here is the daughterboard. The charing port is attached here.

Witrigs

Member since: 11/24/15

69,451 Reputation

378 Guides authored

View Statistics:

Past 24 Hours: 0

Past 7 Days: 1

Past 30 Days: 5

All Time: 18,185