Nest Learning Thermostat 2nd Generation Base Motherboard Replacement

What you need

  1. Nest Learning Thermostat 2nd Generation Base Motherboard Replacement, Remove display from wall: step 1, image 1 of 3 Nest Learning Thermostat 2nd Generation Base Motherboard Replacement, Remove display from wall: step 1, image 2 of 3 Nest Learning Thermostat 2nd Generation Base Motherboard Replacement, Remove display from wall: step 1, image 3 of 3
    • Before disassembling your Nest Thermostat, be sure that your HVAC system is powered off.

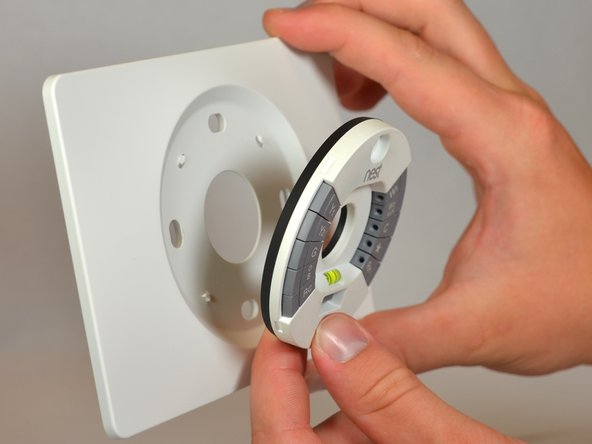
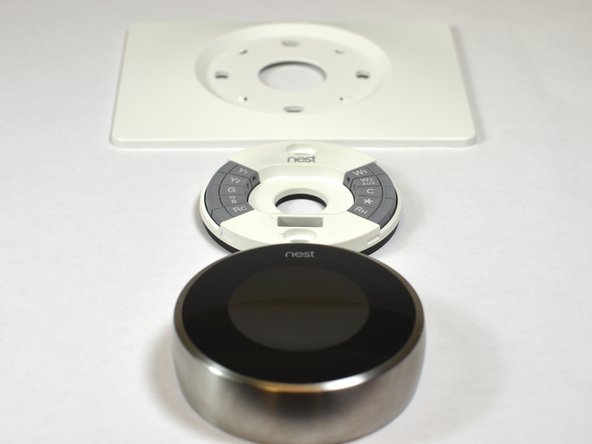
    • Grasp the display's metal outer ring with your fingers and pull directly away from the wall, leaving the base behind.

  2. Nest Learning Thermostat 2nd Generation Base Motherboard Replacement, Disconnect wires: step 2, image 1 of 3 Nest Learning Thermostat 2nd Generation Base Motherboard Replacement, Disconnect wires: step 2, image 2 of 3 Nest Learning Thermostat 2nd Generation Base Motherboard Replacement, Disconnect wires: step 2, image 3 of 3
    • Remember to turn off the power to your HVAC system and the thermostat.

    • Disconnect all wires from the grey spring-loaded connectors. This can be done using your fingers.

  3. Nest Learning Thermostat 2nd Generation Base Motherboard Replacement, Remove screws from wall: step 3, image 1 of 1
    • Remove the two 40mm screws from the base of the thermostat using a #0 Phillips screw driver.

  4. Nest Learning Thermostat 2nd Generation Base Motherboard Replacement, Remove base from trim plate: step 4, image 1 of 3 Nest Learning Thermostat 2nd Generation Base Motherboard Replacement, Remove base from trim plate: step 4, image 2 of 3 Nest Learning Thermostat 2nd Generation Base Motherboard Replacement, Remove base from trim plate: step 4, image 3 of 3
    • Unsnap the base from the trim plate (if used) using a plastic opening tool.

  5. Nest Learning Thermostat 2nd Generation Base Motherboard Replacement, Remove screws from back of base: step 5, image 1 of 2 Nest Learning Thermostat 2nd Generation Base Motherboard Replacement, Remove screws from back of base: step 5, image 2 of 2
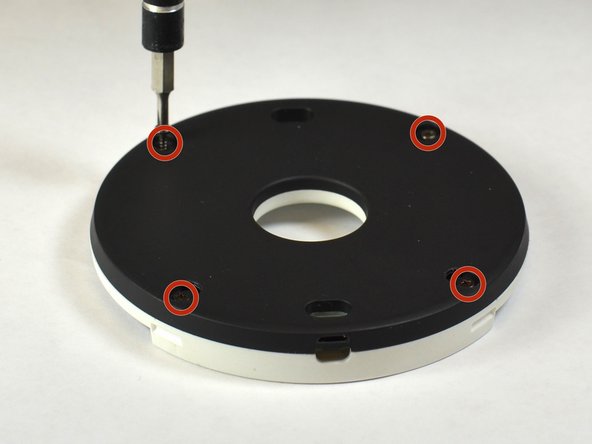
    • Turn the base over.

    • Remove the four 6 mm screws from the back of the base using a #0 Phillips screwdriver.

  6. Nest Learning Thermostat 2nd Generation Base Motherboard Replacement, Opening base: step 6, image 1 of 2 Nest Learning Thermostat 2nd Generation Base Motherboard Replacement, Opening base: step 6, image 2 of 2
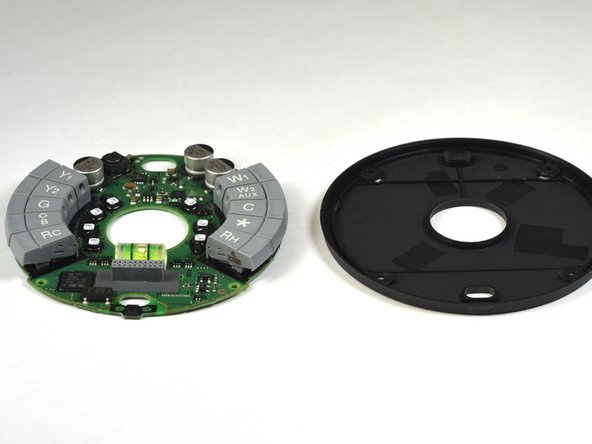
    • Pry the base mother board open from the side using the a plastic opening tool.

  7. Nest Learning Thermostat 2nd Generation Base Motherboard Replacement, Remove base motherboard from base back: step 7, image 1 of 3 Nest Learning Thermostat 2nd Generation Base Motherboard Replacement, Remove base motherboard from base back: step 7, image 2 of 3 Nest Learning Thermostat 2nd Generation Base Motherboard Replacement, Remove base motherboard from base back: step 7, image 3 of 3
    • The base mother board is only held together by light adhesive.

    • Pry the baseboard from the bottom using the flat end of a spudger.

Rachael Deptula

Member since: 09/03/14

1,102 Reputation

1 Guide authored

Team

USF Tampa, Team 11-5, Blackwell Fall 2014 Member of USF Tampa, Team 11-5, Blackwell Fall 2014

USFT-BLACKWELL-F14S11G5

5 Members

12 Guides authored

View Statistics:

Past 24 Hours: 2

Past 7 Days: 9

Past 30 Days: 50

All Time: 92,881