
Neo3Do Motherboard Replacement

What you need

  1. Neo3Do Motherboard Replacement, Back Panel: step 1, image 1 of 3 Neo3Do Motherboard Replacement, Back Panel: step 1, image 2 of 3 Neo3Do Motherboard Replacement, Back Panel: step 1, image 3 of 3
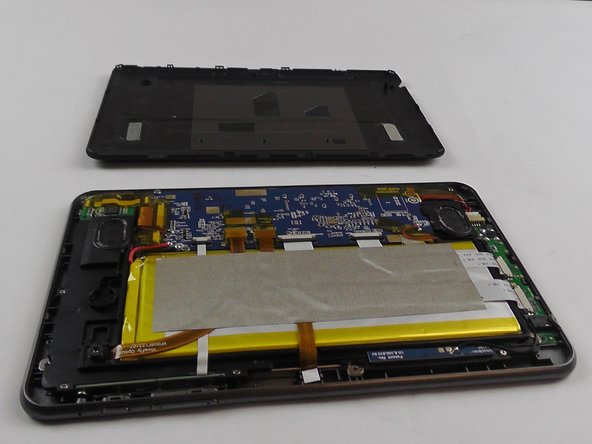
    • Turn the Neo3DO face down so that the logo is facing toward you.

    • Insert the plastic opening tool between the metal frame and the plastic back panel, as shown.

  2. Neo3Do Motherboard Replacement: step 2, image 1 of 2 Neo3Do Motherboard Replacement: step 2, image 2 of 2
    • Gently pry the back panel upwards.

    • Ensure the tool does not slip into the device and damage the internals.

  3. Neo3Do Motherboard Replacement: step 3, image 1 of 2 Neo3Do Motherboard Replacement: step 3, image 2 of 2
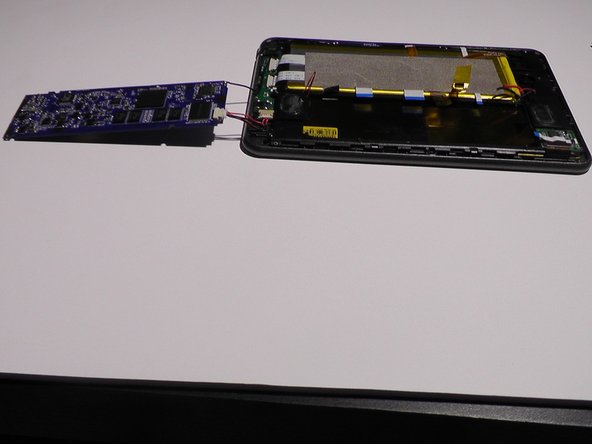
    • Once the back panel has been pried away from the bottom and sides of the Neo3DO, lift the back panel up and away from the tablet.

  4. Neo3Do Motherboard Replacement: step 4, image 1 of 1
    • When replacing the back panel, place the top edge of the back panel against the top edge of the Neo3DO, as shown.

    • The top edge of the device is the edge closest to the camera. The top of the back panel is the side with the hole for the camera.

  5. Neo3Do Motherboard Replacement, Motherboard: step 5, image 1 of 3 Neo3Do Motherboard Replacement, Motherboard: step 5, image 2 of 3 Neo3Do Motherboard Replacement, Motherboard: step 5, image 3 of 3
    • Remove all the tape attached to the motherboard.

  6. Neo3Do Motherboard Replacement: step 6, image 1 of 3 Neo3Do Motherboard Replacement: step 6, image 2 of 3 Neo3Do Motherboard Replacement: step 6, image 3 of 3
    • Pull out the black tabs using the plastic spudger.

    • All sockets that require the same step are marked in the first photo.

  7. Neo3Do Motherboard Replacement: step 7, image 1 of 2 Neo3Do Motherboard Replacement: step 7, image 2 of 2
    • Remove the wire belt from the socket.

  8. Neo3Do Motherboard Replacement: step 8, image 1 of 3 Neo3Do Motherboard Replacement: step 8, image 2 of 3 Neo3Do Motherboard Replacement: step 8, image 3 of 3
    • Lift the black tab and then remove the wire belt.

  9. Neo3Do Motherboard Replacement: step 9, image 1 of 3 Neo3Do Motherboard Replacement: step 9, image 2 of 3 Neo3Do Motherboard Replacement: step 9, image 3 of 3
    • Lift the black tab and then remove the wire belt.

  10. Neo3Do Motherboard Replacement: step 10, image 1 of 3 Neo3Do Motherboard Replacement: step 10, image 2 of 3 Neo3Do Motherboard Replacement: step 10, image 3 of 3
    • Grip the side of the tab and pull upwards to remove it from the socket.

    • All sockets that require the same step are marked in the first photo.

    • Gripping the wire belt and pulling upwards may cause damage, be sure to avoid it.

  11. Neo3Do Motherboard Replacement: step 11, image 1 of 2 Neo3Do Motherboard Replacement: step 11, image 2 of 2
    • Remove the screws using the J0 head screwdriver.

    • All screws that require the same step are marked in the first photo.

  12. Neo3Do Motherboard Replacement: step 12, image 1 of 3 Neo3Do Motherboard Replacement: step 12, image 2 of 3 Neo3Do Motherboard Replacement: step 12, image 3 of 3
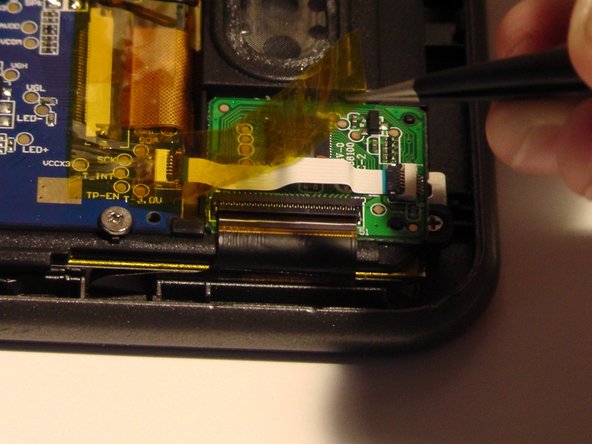
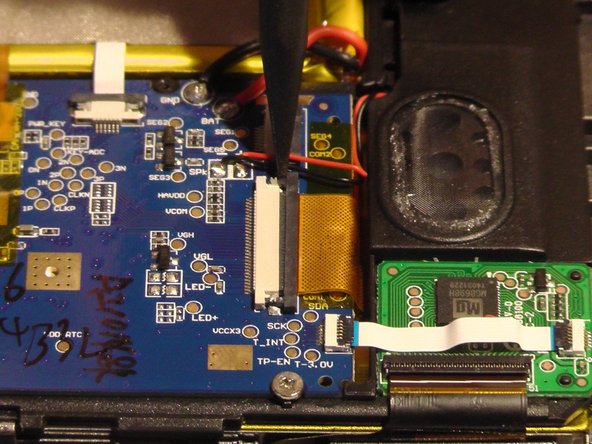
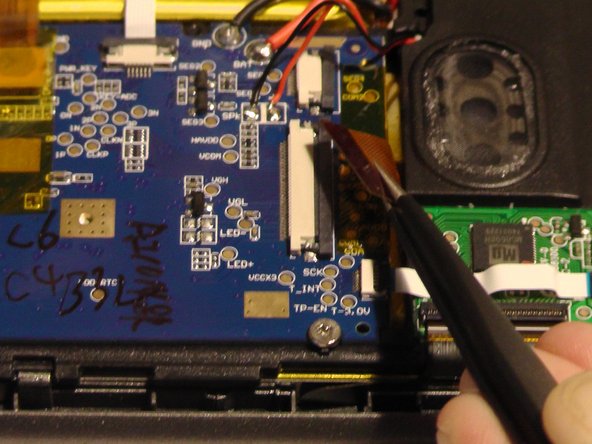
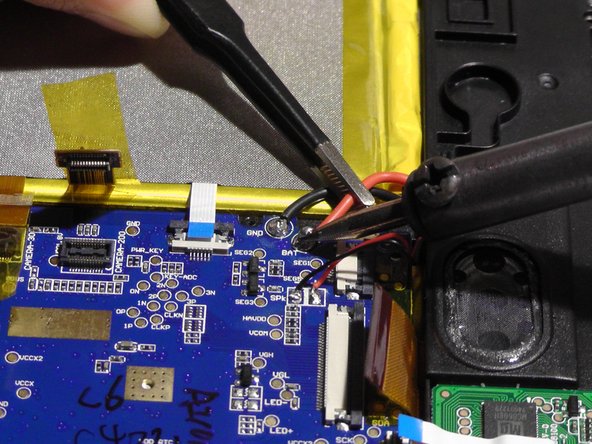
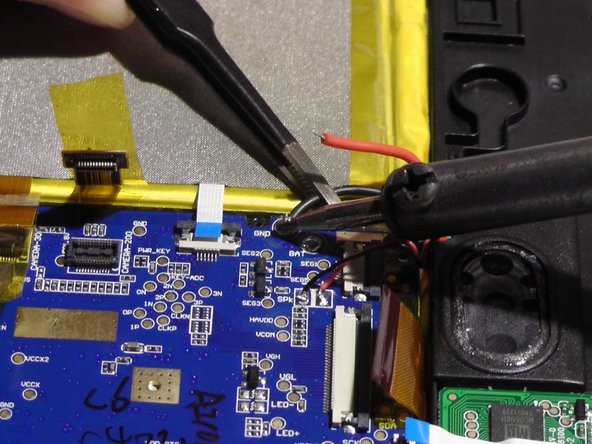
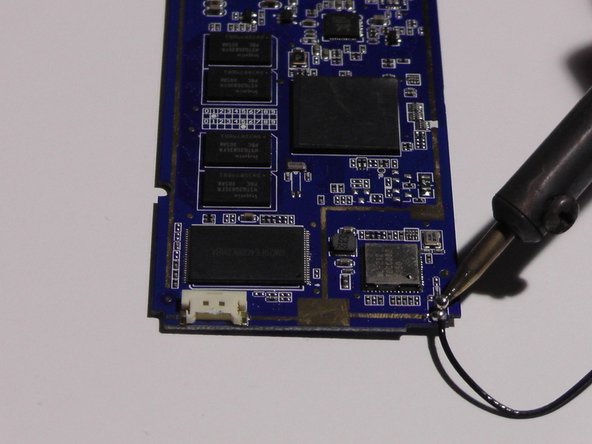
    • Grip the active(red) wire and apply the soldering tool until the solder is soft enough for the wire to be removed.

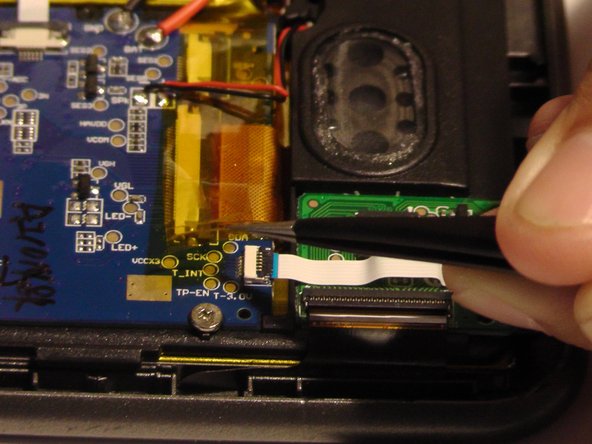
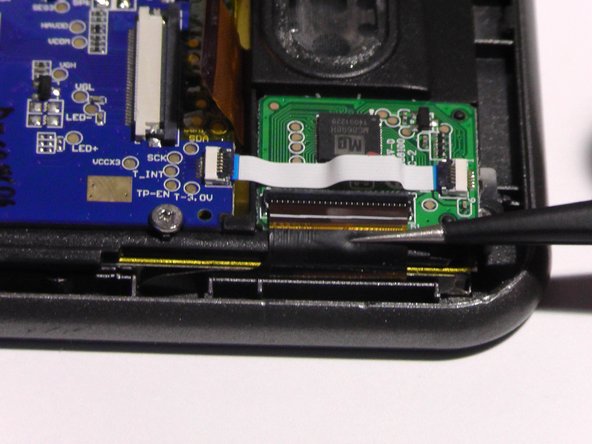
    • Repeat the same process to remove the neutral(black) wire.

    • All wires that require the same steps are marked in the first photo.

    • The soldering tool is extremely hot, use with caution.

  13. Neo3Do Motherboard Replacement: step 13, image 1 of 3 Neo3Do Motherboard Replacement: step 13, image 2 of 3 Neo3Do Motherboard Replacement: step 13, image 3 of 3
    • Use the flat end of the plastic spudger to remove the motherboard and turn it underside-up.

  14. Neo3Do Motherboard Replacement: step 14, image 1 of 2 Neo3Do Motherboard Replacement: step 14, image 2 of 2
    • Remove the plug from the motherboard socket.

  15. Neo3Do Motherboard Replacement: step 15, image 1 of 3 Neo3Do Motherboard Replacement: step 15, image 2 of 3 Neo3Do Motherboard Replacement: step 15, image 3 of 3
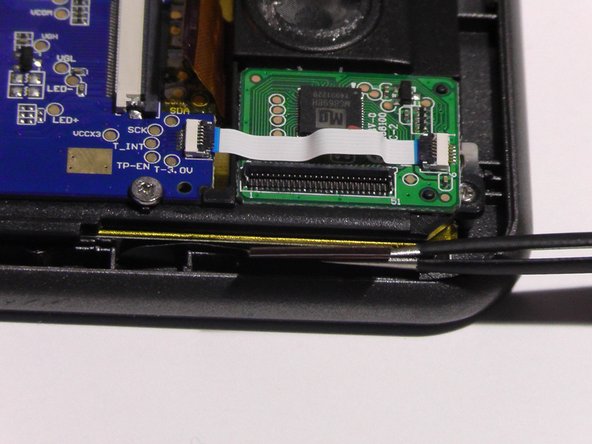
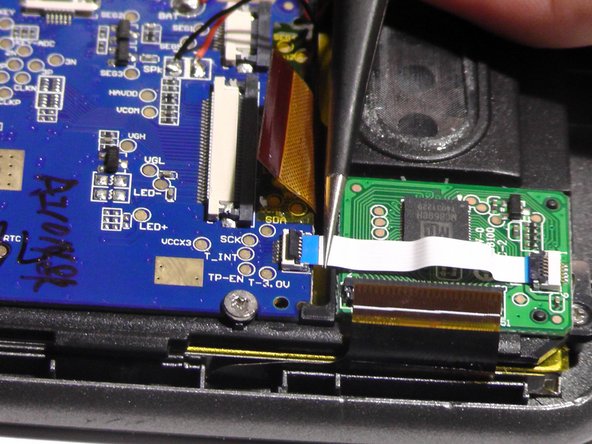
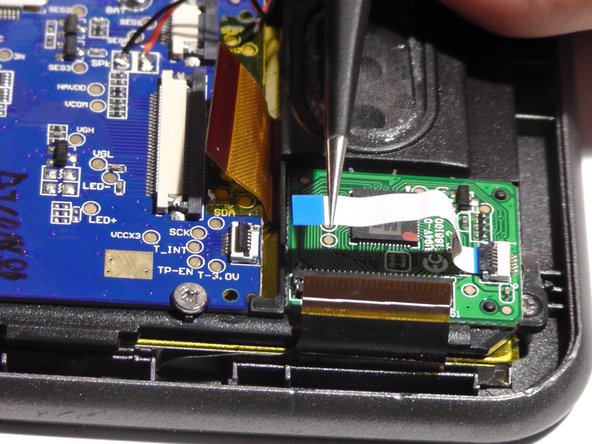
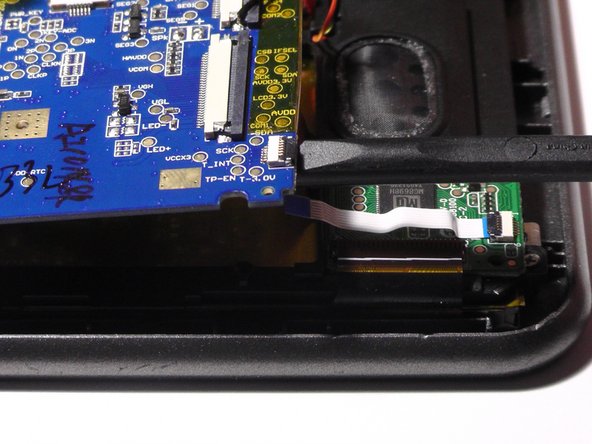
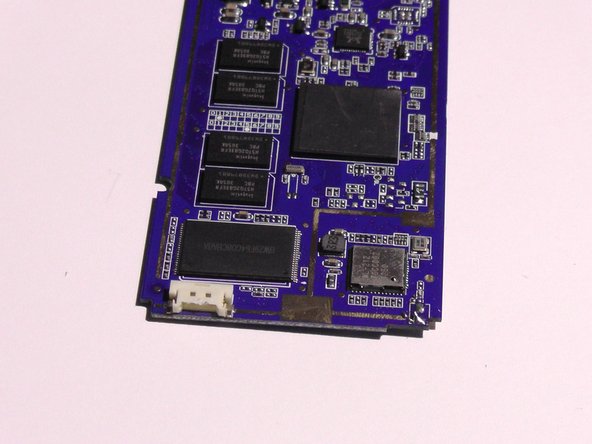
    • Grip the wire and apply the soldering tool until the solder is soft enough for the wire to be removed.

    • The soldering tool is extremely hot, use with caution.

Daniel Evans

Member since: 09/26/16

431 Reputation

4 Guides authored

Team

USF Tampa, Team 14-3, Eyestone Fall 2016 Member of USF Tampa, Team 14-3, Eyestone Fall 2016

USFT-EYESTONE-F16S14G3

3 Members

12 Guides authored

View Statistics:

Past 24 Hours: 0

Past 7 Days: 0

Past 30 Days: 1

All Time: 128