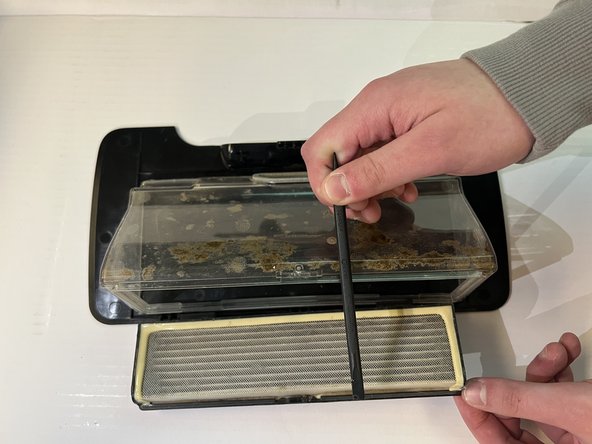
Neato BOTVAC CONNECTED Filter Replacement

What you need

  1. Neato BOTVAC CONNECTED Filter Replacement, Battery: step 1, image 1 of 1
    • Place the top of the Neato Botvac Connected against a flat surface.

  2. Neato BOTVAC CONNECTED Filter Replacement: step 2, image 1 of 2 Neato BOTVAC CONNECTED Filter Replacement: step 2, image 2 of 2
    • Remove the two 5.5 mm screws with a Phillips #2 screwdriver.

  3. Neato BOTVAC CONNECTED Filter Replacement: step 3, image 1 of 2 Neato BOTVAC CONNECTED Filter Replacement: step 3, image 2 of 2
    • Using the spudger, remove the panel covering the battery.

  4. Neato BOTVAC CONNECTED Filter Replacement: step 4, image 1 of 3 Neato BOTVAC CONNECTED Filter Replacement: step 4, image 2 of 3 Neato BOTVAC CONNECTED Filter Replacement: step 4, image 3 of 3
    • Gently remove the connecting wires attached to the battery.

    • The wires are attached to the vacuum through a clip.

  5. Neato BOTVAC CONNECTED Filter Replacement: step 5, image 1 of 1
    • Using the spudger, gently remove the battery from the device.

  6. Neato BOTVAC CONNECTED Filter Replacement, Filter: step 6, image 1 of 1
    • Flip the cleaner around and locate the front panel.

  7. Neato BOTVAC CONNECTED Filter Replacement: step 7, image 1 of 1
    • Gently remove the front panel by opening it with a spudger.

  8. Neato BOTVAC CONNECTED Filter Replacement: step 8, image 1 of 2 Neato BOTVAC CONNECTED Filter Replacement: step 8, image 2 of 2
    • Use the spudger to gently remove the paper filter.

Conclusion

To reassemble your device, follow these instructions in reverse order.

Justin Silva

Member since: 03/20/23

645 Reputation

5 Guides authored

Team

0 Comments

Add Comment

View Statistics:

Past 24 Hours: 0

Past 7 Days: 0

Past 30 Days: 2

All Time: 56