Introduction
Other good videos:
https://youtu.be/fidHKn-J-0M?list=PLHnuY...
Even though this one is not in english its easy to follow and the most detailed:
What you need
Video Overview
-
-
Remove back cover.
-
Shove the sim card remover or blunt (not sharp!) metal object into the hole that is inside the sim card slot. There is a specific hole that appears to designed to allow you push the back cover off with a small metal rod.
-
The leather back seems very fragile. It folded and bent easily so peel back with extreme caution and go slowly.
-
-
-
Note that it might not be obvious from the pictures, but the black "lattice" in the picture and on the inside of the cover is the adhesive. All of this portion must be pried loose (carefully!) for the back to come off. I used tweezers to pry off the center portions.
-
-
-
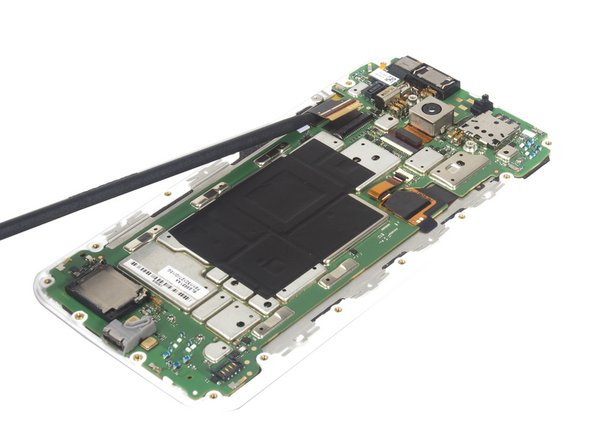
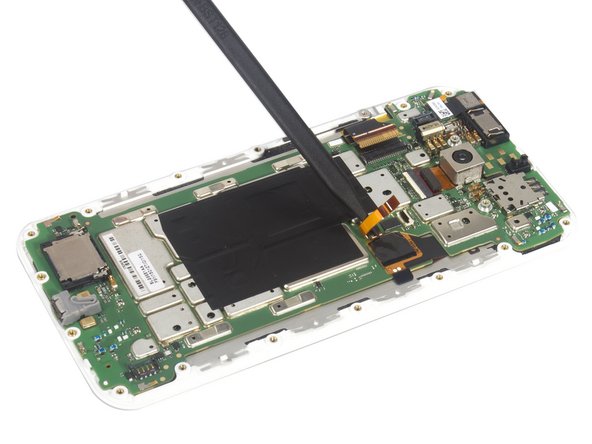
Remove those two rubber covers which securing power button connecting flex connector and battery connector.
-
-
-
-
Tips: The LCD screen is difficult to separate from bezel even though by heat. So you'd better prepare the screen replacement parts with bezel together. And the metal shield can be removed easily.
-
-
-
The newly purchased screen will likely not have speaker grills so you must remove them from the broken screen and put them onto the new screen
-
On both the upper and lower speakers remove the speaker foam that is adhered lightly. Peel away gently. This foam will not be reused so its ok if it gets torn.
-
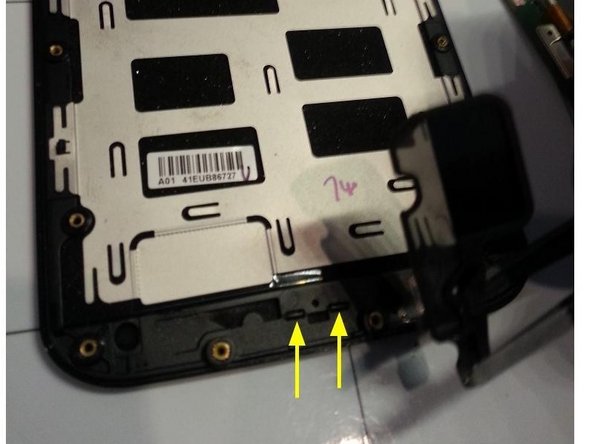
Locate the two tabs that holds the speaker grill in place. Highlighted in photo with yellow arrows.
-
Push out the speaker grill by forcing either one of those two tabs out of the frame by pushing onto the tab with a tweezer end. It requires a bit of force and it will pop out.
-
The photo only show the lower speaker grill removal, but the upper speaker grill is removed in the same manner.
-
-
-
After removal of both speaker grills they can be put into the new screen. Wait until the phone is fully reassembled to put the old grills into the new screen.
-
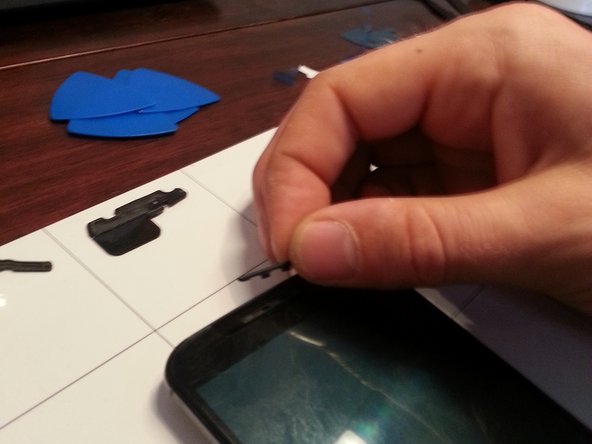
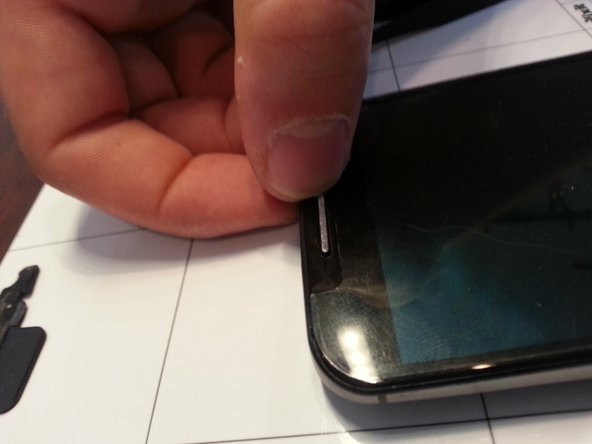
Align the two tabs of the grill with the two slots in the new screen
-
Carefully push the grill into the two slots. Start by pushing with your thumb and nail over one tab and only push one of the two tabs in at a time. A lot of pushing pressure is required so be careful not to damage the new screen.
-
If you are unable to push the grills in with your thumbs, try placing the grills in position and then pushing the screen face-down against a flat surface.
-
After one of the tabs is into the slot then the second tab can be pushed into the slot with some additional pressure. Both speaker grills can be replaced in this manner.
-
A couple people reported breaking their newly installed screen while popping in the speaker grill. Its also OK to not even install the cosmetic speaker grill.
-