Introduction
Follow this guide to replace the screen for the Motorola Moto E5 Play.
For your safety, discharge your existing battery below 25% before disassembling your phone. This reduces the risk of a dangerous thermal event if the battery is accidentally damaged during the repair.
What you need
-
-
Insert your fingernail or the flat end of a spudger into the notch on the bottom right corner of the phone.
-
Pry with your fingernail or twist the spudger to release the back cover's clips from the phone.
-
-
-
Insert your fingernail or the flat end of a spudger into the seam on the bottom of the phone and slide it along the edge to release the clips holding the back cover to the phone.
-
-
-
Continue sliding your fingernail or spudger along the seam around the rest of the phone to release the remaining clips.
-
-
-
Insert your fingernail or the flat end of the spudger into the notch at the bottom of the battery.
-
Pry with your fingernail or spudger to free the battery from its recess.
-
-
-
Remove the thirteen 3.5 mm-long T5 Torx screws securing the motherboard and daughterboard covers to the phone's frame.
-
-
-
Insert the flat end of a spudger into the seam on the bottom of the daughterboard cover.
-
Twist the spudger slightly to unclip the daughterboard cover.
-
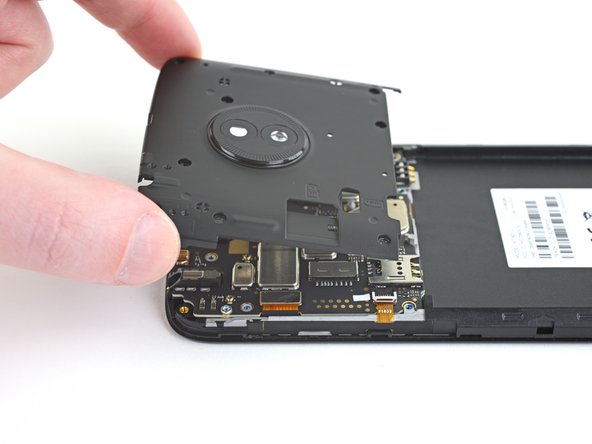
Remove the daughterboard cover.
-
-
-
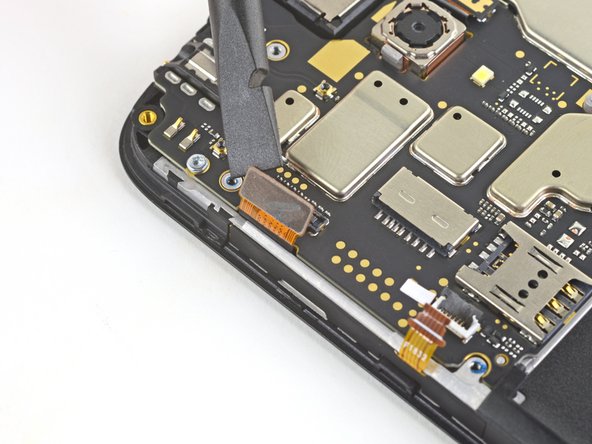
Use the point of a spudger to pry up and disconnect the antenna cable from the daughterboard.
-
-
-
Use a spudger to pry up and disconnect the motherboard flex cable connector from the daughterboard.
-
-
-
-
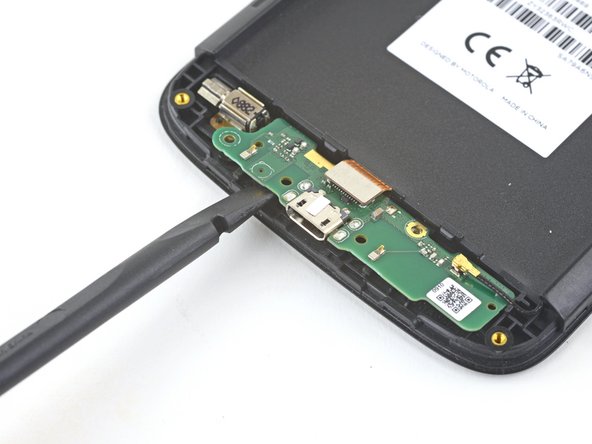
Insert the flat end of a spudger into the gap below the daughterboard and to the left of the charging port.
-
Pry the daughterboard up slightly with the spudger to loosen it from its recess.
-
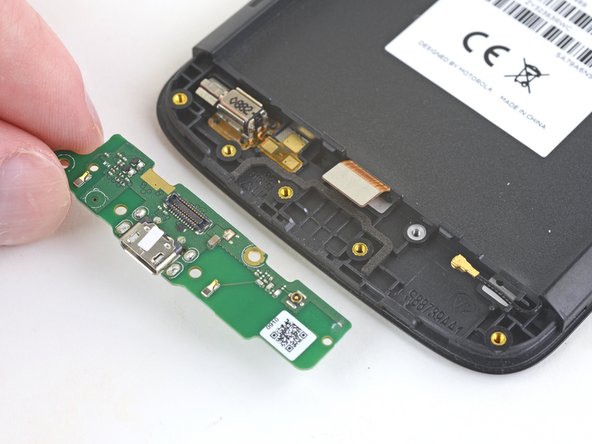
Lift and remove the daughterboard, taking care not to snag any cables.
-
-
-
Use an opening pick to carefully slice the adhesive underneath the vibration motor's contact pads.
-
Remove the vibration motor.
-
-
-
Insert an opening tool into the seam on the right side of the phone near the top.
-
Gently pry upwards until the hidden clip on the motherboard cover releases.
-
-
-
Insert an opening tool into the seam on the top of the phone, to the right of the indentation.
-
Gently pry upwards until the hidden clip on the motherboard cover releases.
-
-
-
Take note of which socket the antenna cable is attached to on the motherboard.
-
Use the point of a spudger to pry up and disconnect the antenna cable from the motherboard.
-
-
-
Use the point of a spudger to lift up the locking mechanism securing the ribbon cable to the ZIF connector.
-
-
-
Slide an opening pick between the ribbon cable and the motherboard to remove the cable from its connector.
-
-
-
Insert the flat end of a spudger underneath the motherboard, anywhere near the top edge of the phone.
-
Lift the spudger slightly to loosen the motherboard from the frame.
-
Remove the motherboard from the phone.
-
-
-
Use the flat end of a spudger to pry up and loosen the earpiece module from its recess.
-
Use your fingers or a pair of tweezers to remove the earpiece module.
-
-
-
Insert an opening pick in between the frame and button assembly.
-
Carefully slide the opening pick underneath the button assembly to slice the adhesive.
-
Remove the button assembly.
-
-
-
Use the point of a spudger to pry up a corner of the black battery mat.
-
Use your fingers to peel the battery mat from the frame.
-
-
-
Use your fingers or a pair of tweezers to lift and de-route the antenna cable from its groove on the right edge of the phone.
-
-
-
Insert an opening pick underneath the daughterboard flex cable.
-
Slide the pick along the underside of the cable, slicing the adhesive and removing the cable from the phone.
-
-
-
Only the frame and the LCD screen and digitizer assembly remain. Double-check that you removed all of the necessary components.
-