Motorola Moto E4 (XT1762) Motherboard Assembly Replacement

Prerequisite Only
This guide is only intended to be used as a prerequisite for other guides. It's incomplete by itself.

What you need

  1. Motorola Moto E4 (XT1762) Motherboard Assembly Replacement, Back Cover: step 1, image 1 of 3 Motorola Moto E4 (XT1762) Motherboard Assembly Replacement, Back Cover: step 1, image 2 of 3 Motorola Moto E4 (XT1762) Motherboard Assembly Replacement, Back Cover: step 1, image 3 of 3
    • Power off your phone before beginning disassembly.

    • Insert a fingernail, or spudger, into the notch on the bottom right corner to start separating the phone unit from the back cover.

    • Move to the bottom left corner to pry the phone out of the back cover.

  2. Motorola Moto E4 (XT1762) Motherboard Assembly Replacement: step 2, image 1 of 2 Motorola Moto E4 (XT1762) Motherboard Assembly Replacement: step 2, image 2 of 2
    • Lift the phone out of the back cover.

  3. Motorola Moto E4 (XT1762) Motherboard Assembly Replacement, Battery: step 3, image 1 of 3 Motorola Moto E4 (XT1762) Motherboard Assembly Replacement, Battery: step 3, image 2 of 3 Motorola Moto E4 (XT1762) Motherboard Assembly Replacement, Battery: step 3, image 3 of 3
    • Use a fingernail or spudger to pry at the notch at the bottom end of the battery.

    • Lever the battery out of its recess and remove it.

  4. Motorola Moto E4 (XT1762) Motherboard Assembly Replacement, Motherboard Cover: step 4, image 1 of 1
    • Remove the seven 3.3 mm Phillips #00 screws.

  5. Motorola Moto E4 (XT1762) Motherboard Assembly Replacement: step 5, image 1 of 2 Motorola Moto E4 (XT1762) Motherboard Assembly Replacement: step 5, image 2 of 2
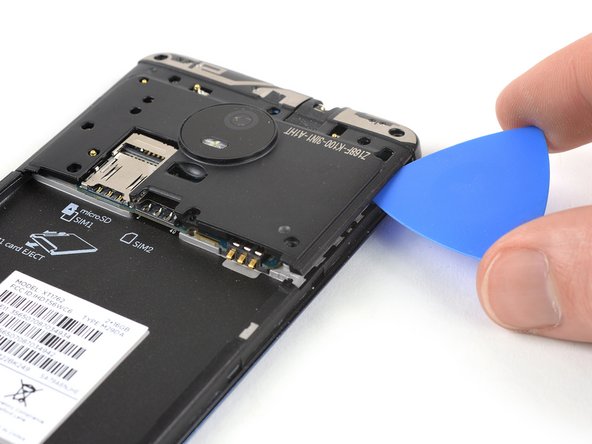
    • Insert an opening pick between the cover and the motherboard at the bottom right corner.

    • Slide the opening pick upwards to open the plastic clips.

  6. Motorola Moto E4 (XT1762) Motherboard Assembly Replacement: step 6, image 1 of 2 Motorola Moto E4 (XT1762) Motherboard Assembly Replacement: step 6, image 2 of 2
    • Insert an opening pick between the cover and the motherboard at the bottom left corner.

    • Slide the opening pick upwards to open the plastic clips.

    • Pry up the motherboard cover by twisting the opening pick.

  7. Motorola Moto E4 (XT1762) Motherboard Assembly Replacement: step 7, image 1 of 1
    • Remove the motherboard cover.

  8. Motorola Moto E4 (XT1762) Motherboard Assembly Replacement, Motherboard Assembly: step 8, image 1 of 2 Motorola Moto E4 (XT1762) Motherboard Assembly Replacement, Motherboard Assembly: step 8, image 2 of 2
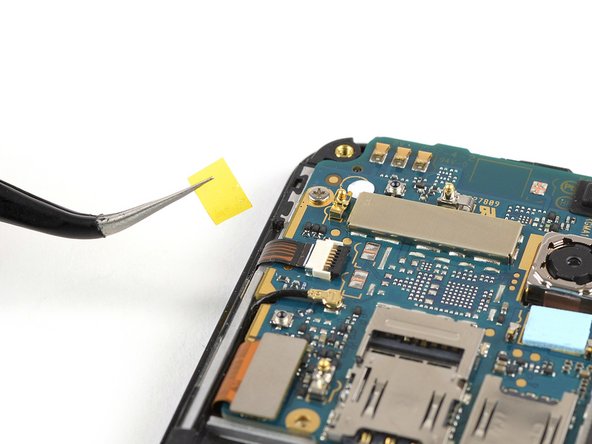
    • Use a pair of tweezers to peel off the yellow tape of the ZIF connector located on the left of the motherboard.

  9. Motorola Moto E4 (XT1762) Motherboard Assembly Replacement: step 9, image 1 of 2 Motorola Moto E4 (XT1762) Motherboard Assembly Replacement: step 9, image 2 of 2
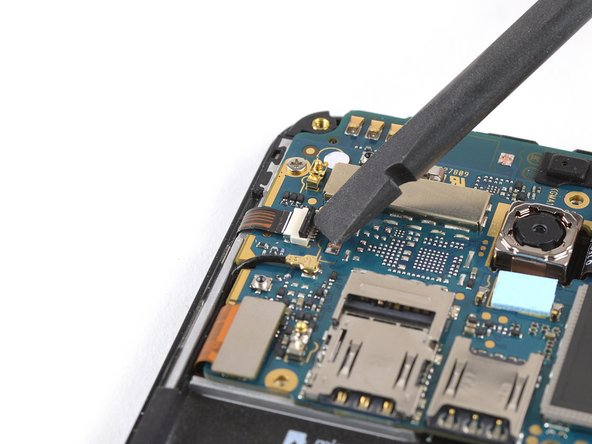
    • Use the edge of a spudger to open the black flap of the ZIF connector.

  10. Motorola Moto E4 (XT1762) Motherboard Assembly Replacement: step 10, image 1 of 2 Motorola Moto E4 (XT1762) Motherboard Assembly Replacement: step 10, image 2 of 2
    • Slide the volume button flex cable out of the ZIF connector to disconnect it.

  11. Motorola Moto E4 (XT1762) Motherboard Assembly Replacement: step 11, image 1 of 2 Motorola Moto E4 (XT1762) Motherboard Assembly Replacement: step 11, image 2 of 2
    • Use a pair of tweezers to pry up and disconnect the antenna cable located on the left of the motherboard.

    • Fold the antenna cable out of the way.

  12. Motorola Moto E4 (XT1762) Motherboard Assembly Replacement: step 12, image 1 of 2 Motorola Moto E4 (XT1762) Motherboard Assembly Replacement: step 12, image 2 of 2
    • Use the edge of a spudger to pry up and disconnect the display flex cable located on the bottom left of the motherboard.

  13. Motorola Moto E4 (XT1762) Motherboard Assembly Replacement: step 13, image 1 of 1
    • Remove the two 2.9 mm long Phillips #00 screws securing the motherboard.

  14. Motorola Moto E4 (XT1762) Motherboard Assembly Replacement: step 14, image 1 of 2 Motorola Moto E4 (XT1762) Motherboard Assembly Replacement: step 14, image 2 of 2
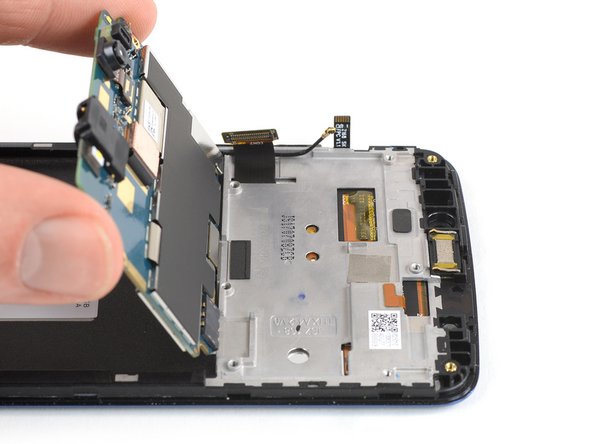
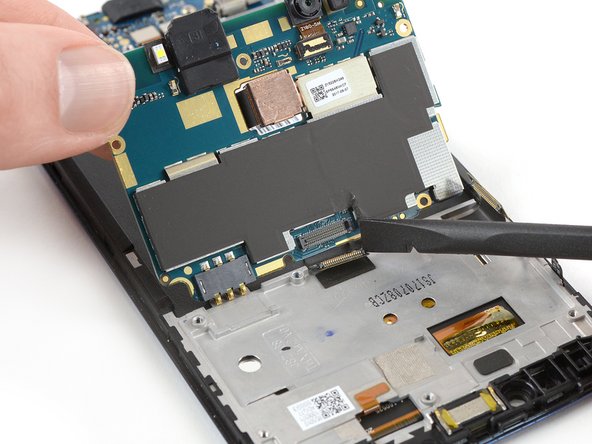
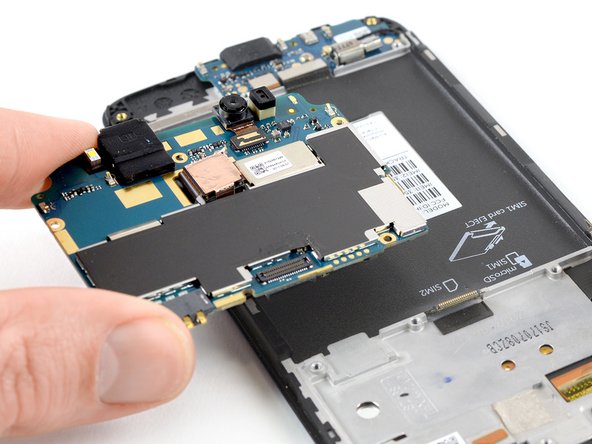
    • Don't try to remove the motherboard all the way yet. The interconnect flex cable is still connected to its rear side.

    • Use a spudger to carefully lift the motherboard from the top and fold it towards the battery compartment.

    • Be careful not to damage any components underneath the motherboard.

  15. Motorola Moto E4 (XT1762) Motherboard Assembly Replacement: step 15, image 1 of 3 Motorola Moto E4 (XT1762) Motherboard Assembly Replacement: step 15, image 2 of 3 Motorola Moto E4 (XT1762) Motherboard Assembly Replacement: step 15, image 3 of 3
    • Use the edge of a spudger to disconnect the interconnect cable from the motherboard.

    • Remove the motherboard.

Conclusion

To reassemble your device, follow these instructions in reverse order.

Dominik Schnabelrauch

Member since: 11/23/16

203,329 Reputation

682 Guides authored

Team

iFixit Member of iFixit

Staff

135 Members

16,817 Guides authored

0 Comments

Add Comment

View Statistics:

Past 24 Hours: 0

Past 7 Days: 0

Past 30 Days: 0

All Time: 44