Introduction
Use this guide to replace the speaker on your Motorola Moto E 2nd Generation.
Before you begin, download the Rescue and Smart Assistant app to backup your device and diagnose whether your problem is software or hardware related.
What you need
-
-
Using the small plastic opening tool, pry and slide all the way around the phone while carefully lifting up on the display.
-
-
-
-
Once display is fully unglued from the frame, carefully lift it up and locate the display connector.
-
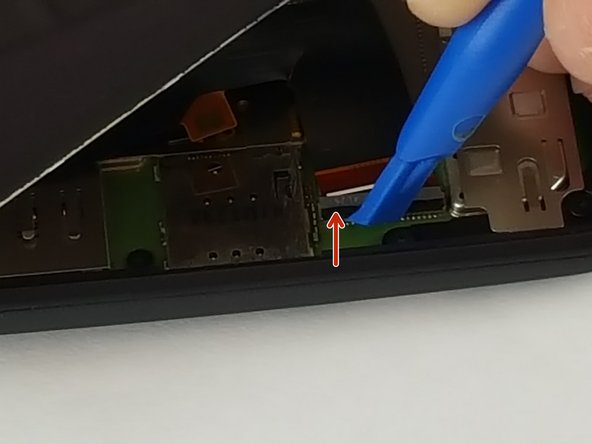
Using the same small plastic tool, carefully remove the yellow tape off the connector.
-
Now carefully undo the black connector lock by lifting it up in the direction of the red arrow.
-
Lastly slide the display cable off the connector. It should easily slide off, if not make sure the black lock is fully unlatched.
Very well put together. Worked fine for me.
A guitar pick will work as well as the plastic tool, but it might be a little harder to work with.
-
-
-
Now that the display is out, remove the aluminum shield off the motherboard.
-
Unscrew the single 4mm screw located on the top using a T4 Torx bit.
-
After screw is out, gently remove the aluminum shield off the motherboard.
-
-
-
Using the metal spudger tool, very carefully remove the speaker by first gently prying up on the right side and then the bottom.
You can see a plastic clip on the right, so I understand the justification for prying on the right first. However, when I tried prying on the right, it separated the two halves of the speaker, ruining it. There was also a pad of foam, double sided tape under mine.
If you see in the other side the plastic clip is smaller , I was able to release this clip (the left side one) and in the bottom part of the speaker you can see a little gap when i put my pointy metal spudger and help the speaker slowging going up, it fells a little hard to push because of the magnet in it.
I found I did not need to remove the speaker. I was able to (just barely) reach the screw behind it without removing it. After removing all of the other screws, I loosened that one a little bit at a time while gently prying the motherboard out of the case. Eventually it was all the way removed and I was able to take out the motherboard.
Great tip about not removing the speaker. I, too, managed to remove that screw behind the speaker. I didn’t even need to pry out the motherboard while doing it.
Keith R -
Sir need track diagram for this………… speakers track might be cut….
-


To reassemble your device, follow these instructions in reverse order.
To reassemble your device, follow these instructions in reverse order.
Cancel: I did not complete this guide.
10 other people completed this guide.
Team

USF Tampa, Team 12-3, Eyestone Spring 2016 Member of USF Tampa, Team 12-3, Eyestone Spring 2016
USFT-EYESTONE-S16S12G3
3 Members
14 Guides authored
3 Comments
Olá André. Gostaria de saber se aquela peça a direita do earpiece speaker é outro falante.
Questiono pq o meu Moto E2 apresenta um som meio chiado nas ligações, porém no viva voz ou reproduzindo mídia o som é limpo, normal.
Obrigado.