
Minolta Maxxum QTSI Tripod Mount Replacement

What you need

  1. Minolta Maxxum QTSI Tripod Mount Replacement, Tripod Mount: step 1, image 1 of 1
    • With a screwdriver, remove the (7) black Phillips #00 5.0mm screws on the bottom of the camera.
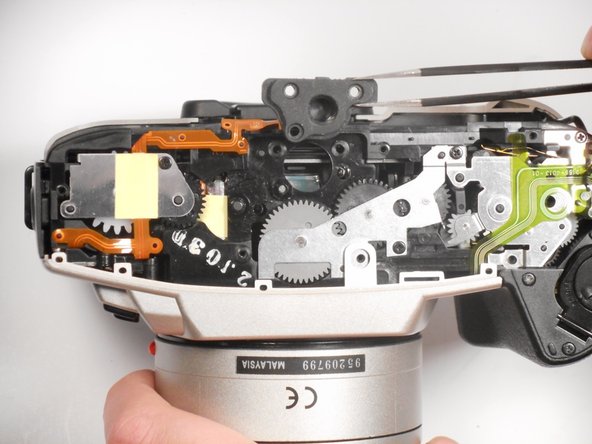
    • The screws are located on the outer edge of the bottom panel.

    • Be careful when removing the screws from the panel because they are easy to lose.

  2. Minolta Maxxum QTSI Tripod Mount Replacement: step 2, image 1 of 2 Minolta Maxxum QTSI Tripod Mount Replacement: step 2, image 2 of 2
    • Once all the screws are removed, the panel should easily come off.

    • Remove the bottom panel of the camera by placing your index finger and thumb on the outer edges of the panel.

    • Pull the bottom panel towards you, it should come off easily.

  3. Minolta Maxxum QTSI Tripod Mount Replacement: step 3, image 1 of 1
    • The tripod socket is visible when the bottom panel is removed.

    • Remove the (3) black Phillips #00 6.25mm screws from the tripod socket.

    • When the screws are removed, the tripod socket is free and can easily be lost.

  4. Minolta Maxxum QTSI Tripod Mount Replacement: step 4, image 1 of 2 Minolta Maxxum QTSI Tripod Mount Replacement: step 4, image 2 of 2
    • Use the tweezers to gently remove the tripod socket, and replace it.

Conclusion

To reassemble your device, follow these instructions in reverse order.

Jordan Ellery

Member since: 10/10/16

388 Reputation

3 Guides authored

0 Comments

Add Comment

View Statistics:

Past 24 Hours: 0

Past 7 Days: 0

Past 30 Days: 3

All Time: 352