Introduction
This guide will go over how to replace the cameras on the Microsoft Surface Pro 5, also known as the Microsoft Surface Pro (2017). The Microsoft Surface Pro 5 has two cameras: one front facing and one rear facing. Both are located underneath the black tie bar. The iOpener is used in this guide, but a hair dryer or heat gun could also be used. See instructions for the iOpener here.
What you need
-
-
Use a spudger to flip up the small locking flaps on the display cable ZIF connectors.
-
-
-
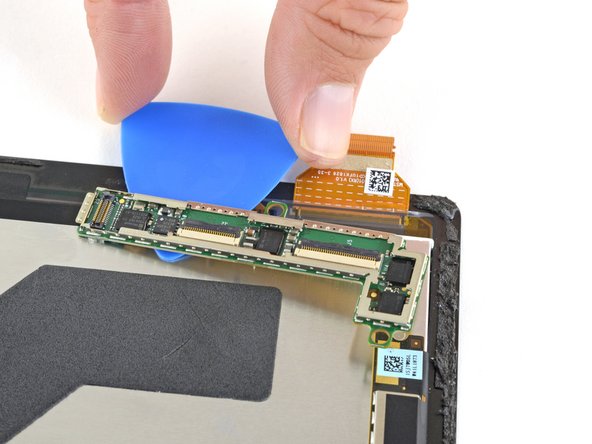
Slide an opening pick under the display board to separate the adhesive holding it onto the back of the screen.
-
-
-
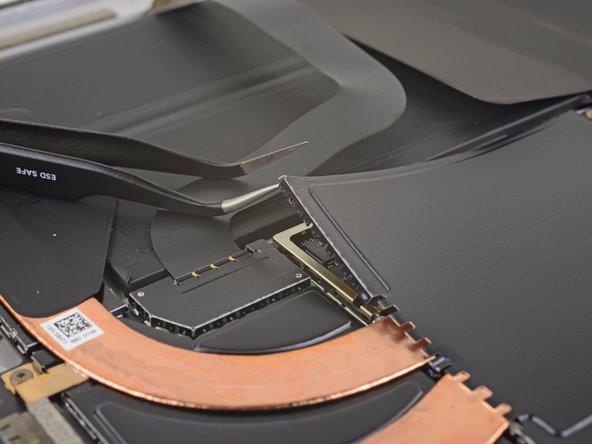
Insert one point of a pair of pointed tweezers into a gap in the corner of the EMI shield covering the heat sink.
-
Use the tweezers to pry the EMI shield away from the motherboard as much as you can without bending it. Do not remove it yet.
-
-
-
-
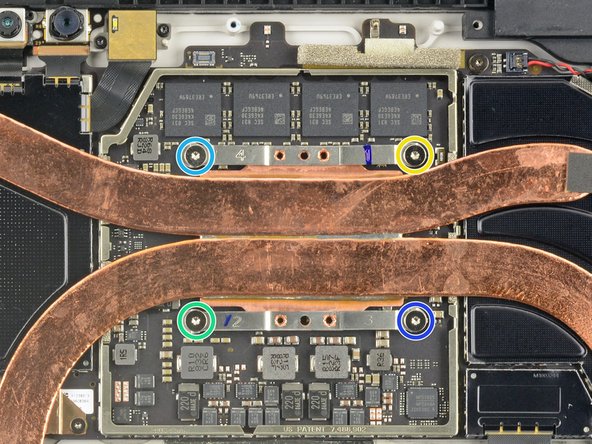
Remove the ten Torx screws securing the heat sink:
-
Five 2.6 mm-long T3 screws
-
Four 3.3 mm-long T5 screws
-
Screw 1
-
Screw 2
-
Screw 3
-
Screw 4
-
-
-
Remove the Torx T5 x 6mm screw connecting the black tie bar to the power button/volume control/speaker assembly.
-
-
-
Disconnect the small ribbon cable connecting the camera tie bar to the motherboard by pulling up with tweezers.
-
-
-
Pry off the metal cover covering the front and rear camera ribbon cable motherboard connections using a nylon spudger.
-


Team

Cal Poly, Team S15-G3, Livingston Fall 2017 Member of Cal Poly, Team S15-G3, Livingston Fall 2017
CPSU-LIVINGSTON-F17S15G3
3 Members
17 Guides authored