Introduction
Use this guide to replace a worn-out or dead battery in a Microsoft Surface Pro 5.
For your safety, discharge the battery below 25% before disassembling your Surface. This reduces the risk of a dangerous thermal event if the battery is accidentally damaged during the repair.
If your battery is swollen, take appropriate precautions.
You'll need replacement adhesive for the battery in order to complete this repair. Strong double-sided tape like Tesa 61395 is recommended.
Applying new thermal paste to the CPU during reassembly may improve the performance of your Surface. If you wish to do that, make sure you have new thermal paste and either high-concentration isopropyl alcohol or a specialized thermal paste cleaner.
There is a significant chance that you may break the unreinforced and fragile display panel during this procedure. Be sure to apply plenty of heat and be extremely careful during the prying stage.
What you need
-
Step 1 Heat the screen
Careful: steps 1-22 are sourced from a guide that's marked as in-progress.
-
If the screen's glass is cracked, keep further breakage contained and prevent bodily harm during your repair by taping over the glass. Lay overlapping strips of clear packing tape over the display until all the glass is covered. Wear safety glasses to protect your eyes.
-
Heat an iOpener and apply it to the right edge of the Surface's screen for two minutes.
-
-
-
Take note of the screen adhesive layout before continuing:
-
These areas only contain adhesive and are safe to cut.
-
The display board and flex cables sit here close to the edge. Cut very carefully and do not insert the pick as deep under the display.
-
Fragile antenna cables lie under this part of the screen. Carefully follow the procedure to avoid damaging them. The adhesive is also the thickest here.
Be careful at the bottom of the screen also. If you put the picks in too far, you can severe the screen ribbon cables which happened to me. I successfully removed the screen without breaking it but severed those cables.
-
-
-
Insert an opening pick into the speaker opening on the screen and slide the pick under the glass. Do not press the pick into the speaker grille, as the grille is easily torn.
-
-
-
Rotate the pick toward the bottom of the Surface to slide it underneath the lower edge of the speaker cutout.
-
-
-
Slide the pick down the right edge of the Surface to slice through the adhesive under the screen.
-
Leave this opening pick in the right edge to prevent the adhesive from resealing.
-
-
-
Insert a new opening pick into the bottom right corner and slide it around the corner toward the bottom edge.
-
Slide the pick along the bottom edge of the Surface to cut through the screen adhesive.
-
Leave this pick in the bottom edge to prevent the adhesive from resealing.
Avoid pressing the pick more than 5mm into the lower edge. Driving the pick in as far as the edge of the bezel on the lower edge will damage ribbon cables.
-
-
-
Insert the point of a pick under the display where you just stopped cutting. Do not insert the pick deeper than the edge of the bezel.
-
Carefully roll the pick to the right, pressing the long edge of the pick into the screen adhesive underneath the bezel, cutting the adhesive as you go. Do not slide the pick along the edge of the Surface.
-
Repeat this motion of inserting the point of the pick where you just cut, and rolling to the right all along the top edge of the Surface, until the pick is 2.5 inches (64 mm) from the right edge of the Surface.
-
-
-
Very slowly lift the screen assembly away from the Surface case. If you encounter any resistance, stop and check that all the adhesive is separated.
-
Use an opening pick to cut through any remaining adhesive.
-
-
-
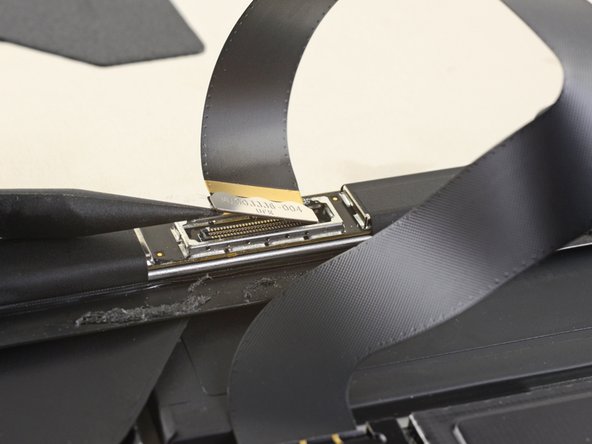
Lift the top of the screen assembly away from the case while sliding the bottom of the screen closer to the motherboard display connectors.
-
Gently lay the screen down on the case with the connectors facing up. Take care to avoid creasing the display cables.
No llega el cable derecho de la pantalla, al voltear la Tablet y este se romperá, lo ideal sera levantar la pantalla un poco y desconectar el cable de la tablet no de la pantalla.
-
-
-
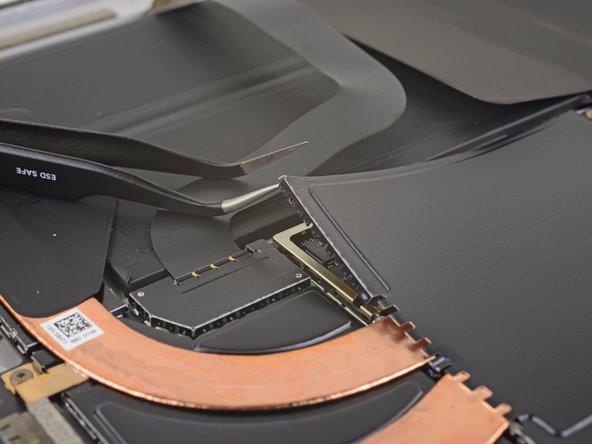
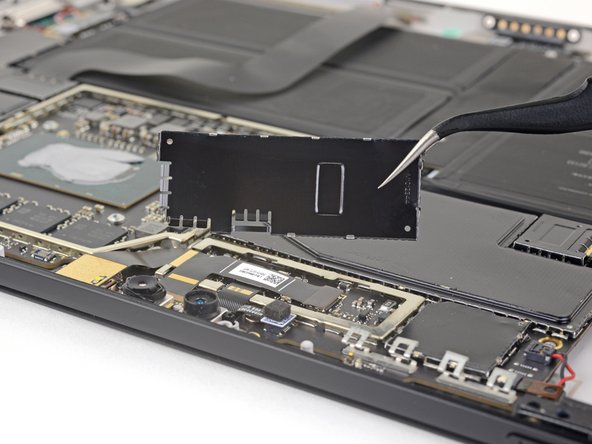
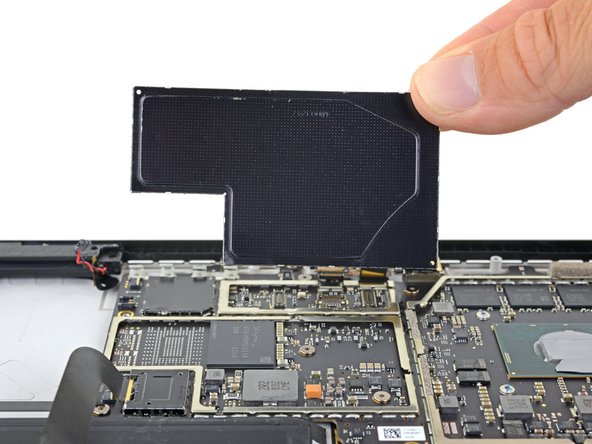
Use an opening pick to pry up one edge of the EMI shield covering the display board.
-
Repeat this procedure at different points around the shield until it is free.
I had better results using the black spudger to free the shields without damaging them.
-
-
-
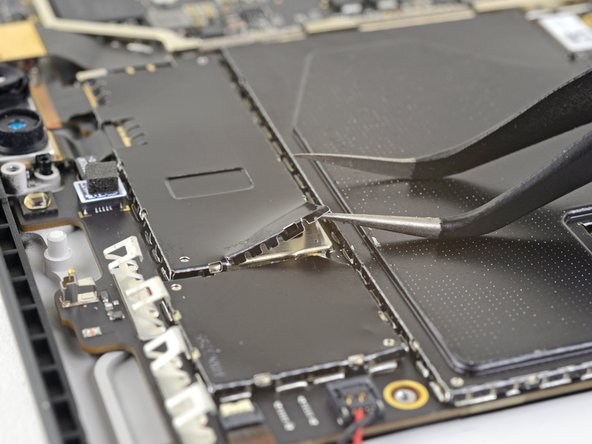
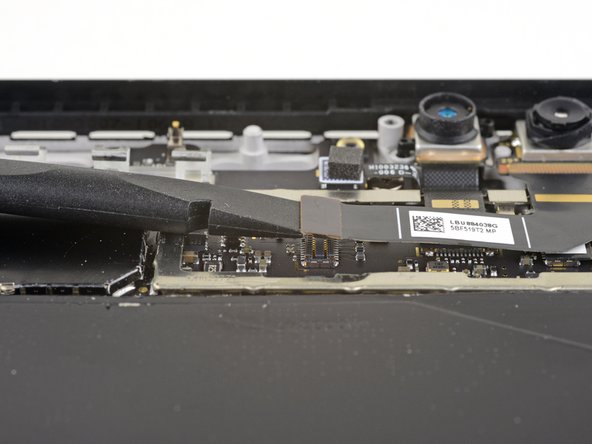
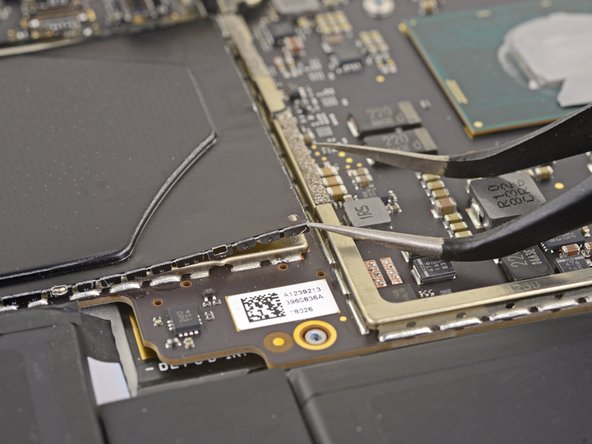
Insert one point of a pair of pointed tweezers into a gap in the edge of the EMI shield covering the digitizer connector.
-
Use the tweezers to pry the EMI shield away from the display as much as you can without bending it.
-
Repeat this procedure at different points around the shield until it is free. Remove the shield.
-
-
-
-
Remove the screen assembly from the Surface.
-
During reassembly, pause here and follow this guide to replace the screen adhesive.
-
-
-
Use the point of a spudger to pry the microphone connector straight up and out of its socket on the motherboard.
-
-
-
Use a T5 Torx driver to remove the four screws securing the antenna support:
-
Three 4.5 mm screws
-
One 6 mm screw
-
-
-
Use a spudger to lift the antenna support out of its recess in the Surface.
-
Remove the antenna support.
-
-
-
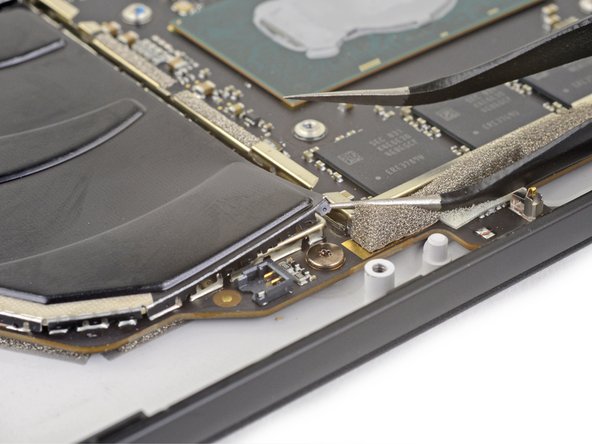
Insert one point of a pair of pointed tweezers into a gap in the corner of the EMI shield covering the heat sink.
-
Use the tweezers to pry the EMI shield away from the motherboard as much as you can without bending it. Do not remove it yet.
Black spudger worked best to get the emu shields out without damaging them.
-
-
-
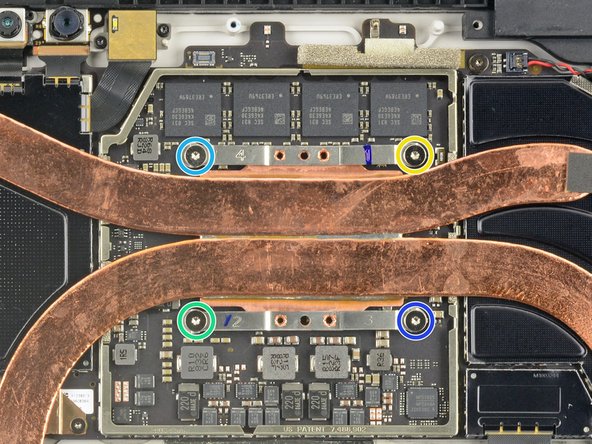
Remove the ten Torx screws securing the heat sink:
-
Five 2.6 mm-long T3 screws
-
Four 3.3 mm-long T5 screws
-
Screw 1
-
Screw 2
-
Screw 3
-
Screw 4
Just like to add, on my i7, there is a fan in the top left corner and the heat sink is glued to the cover. The cover must be removed using a ph0 x 3 and one T3 (I think that is the sizes)
As the other person commented, mine also had a fan connected to the heatsink. This is present in the version with an Intel Core i7-7660U. It requires removing a T3 and T5 screw and the fan connector. Below is a link to an image showing this step.
While I do not have the fan present in my i5 version, the copper heat pipe does extend further down on the far left side (as oriented in the picture). There is an additional T3 screw on this arm as well as a small dab of adhesive on the very end.
-
-
-
Use the point of a spudger to lift the left speaker connector out of its socket on the motherboard.
-
-
-
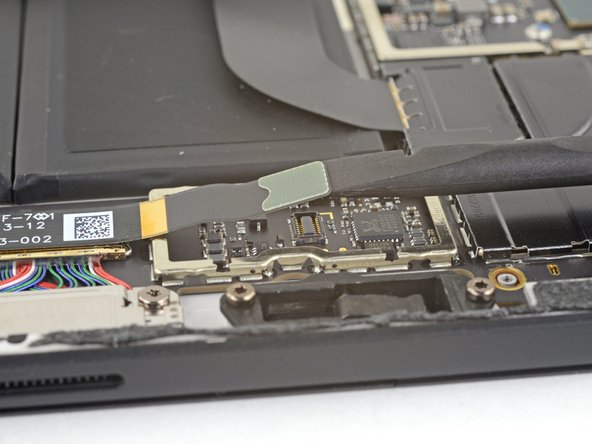
Use the point of a spudger to flip up the small locking flap securing the volume and power button cable ZIF connector.
-
Slide the volume and power button cable straight out of its socket on the motherboard.
-
-
-
Use the point of a spudger to lift the right speaker connector out of its socket on the motherboard.
-
-
-
Use a T5 Torx driver to remove the two screws securing the right speaker:
-
One 6 mm screw
-
One 3.7 mm screw
-
-
-
Use a spudger to lift the left edge of the right speaker so that it clears the components around the speaker.
-
With the left edge lifted, slide the speaker to the left, straight out of its recess in the case.
-
-
-
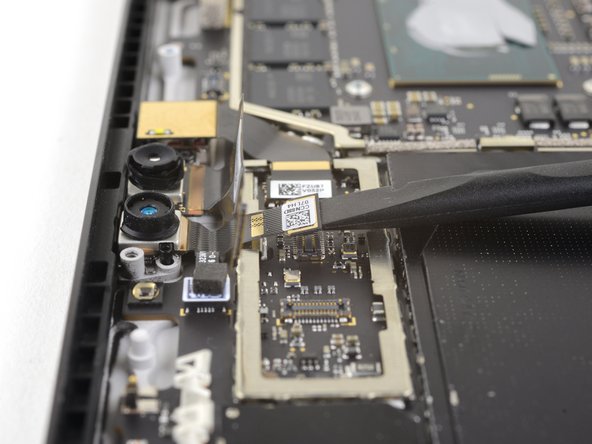
Insert one point of a pair of pointed tweezers into a gap in the corner of the EMI shield covering the camera connectors.
-
Use the tweezers to pry the EMI shield away from the motherboard as much as you can without bending it.
-
Repeat this procedure at different points around the shield until it is free. Remove the shield.
-
-
-
Use the flat end of a spudger to pry the front-facing camera connector up and out of its socket on the motherboard.
-
-
-
Use the flat end of a spudger to pry the rear-facing camera connector up and out of its socket on the motherboard.
-
-
-
Use the flat end of a spudger to pry the microphone connector up and out of its socket on the motherboard.
-
-
-
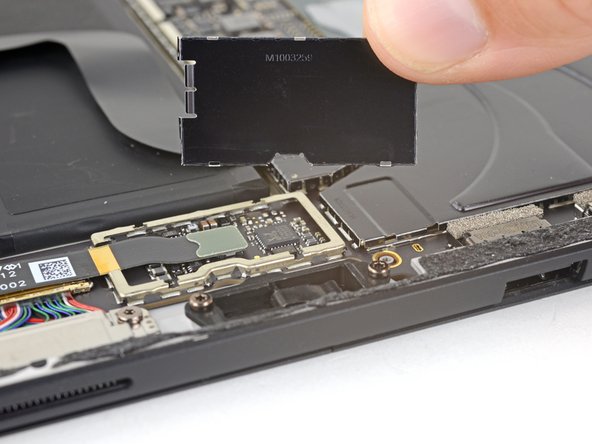
Insert one point of a pair of pointed tweezers into a gap in the corner of the EMI shield covering the microSD card reader connector.
-
Use the tweezers to pry the EMI shield away from the motherboard as much as you can without bending it.
-
Repeat this procedure at different points around the shield until it is free. Remove the shield.
-
-
-
Use the flat end of a spudger to pry the microSD card reader connector up and out of its socket on the motherboard.
-
-
-
Use the flat end of a spudger to lift the flap that sits over the SurfaceConnect port connector.
-
-
-
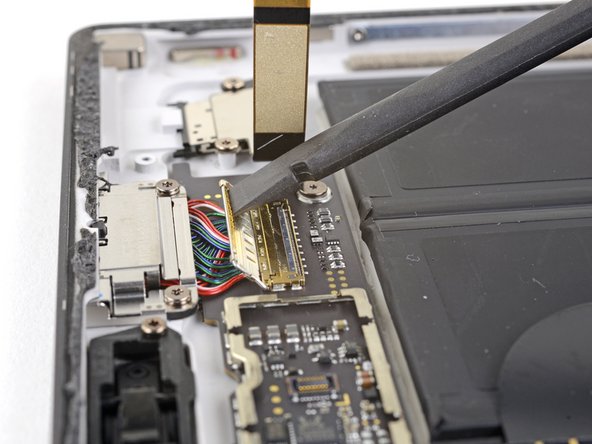
Use the point of a spudger to flip up the small locking flap securing the headphone jack cable ZIF connector.
-
Slide the headphone jack cable straight out of its socket on the motherboard.
-
-
-
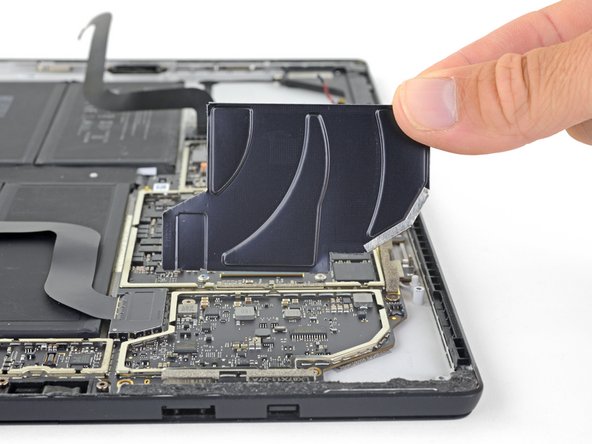
Insert one point of a pair of pointed tweezers into a gap in the corner of the left-most of the remaining large EMI shields.
-
Use the tweezers to pry the EMI shield away from the motherboard as much as you can without bending it.
-
Repeat this procedure at different points around the shield until it is free. Remove the shield.
-
-
-
Use a T3 Torx driver to remove the eight 2.5 mm screws securing the motherboard.
-
-
-
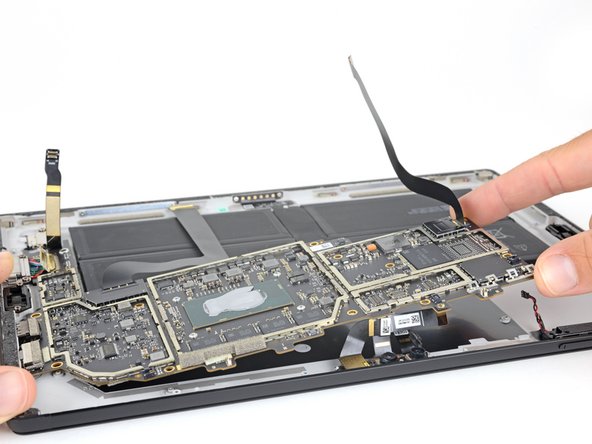
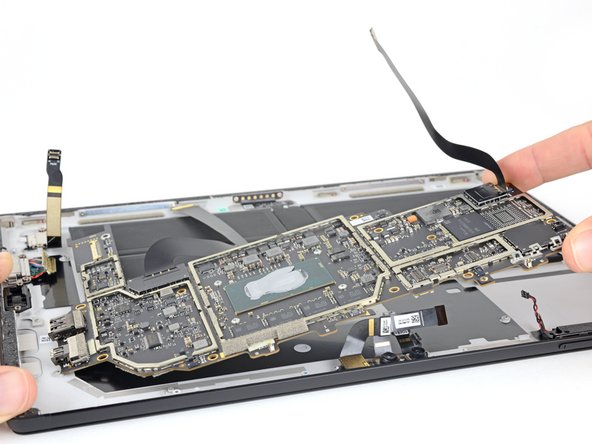
Lift the non-port-side of the motherboard up slightly, just enough so that it clears the components around it and the edge of the case.
-
Slide the motherboard away from the ports. Make sure the ports are completely out of their slots in the case before removing the motherboard.
-
Remove the motherboard.
-
-
-
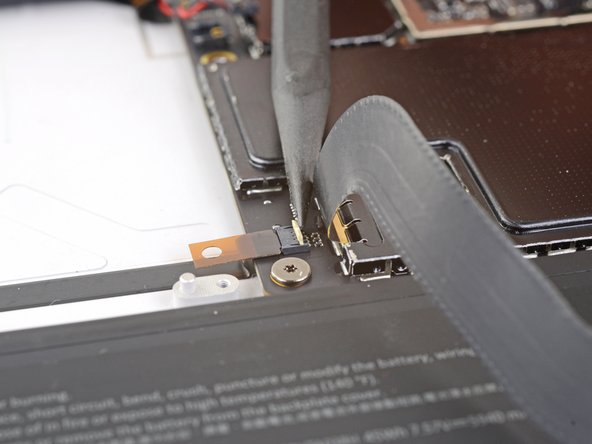
Heat an iOpener and apply it to the battery connector for two minutes to soften the adhesive securing the connector to the case.
-
-
-
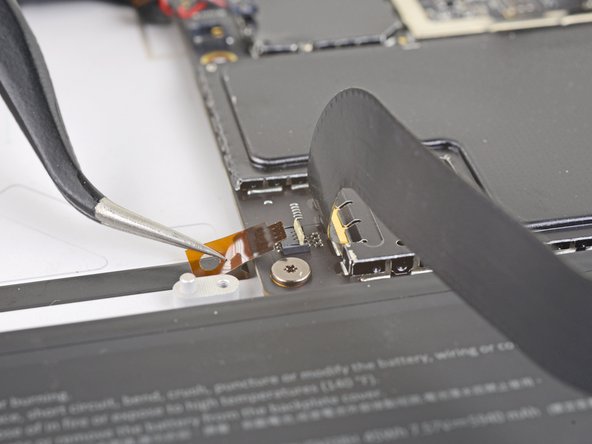
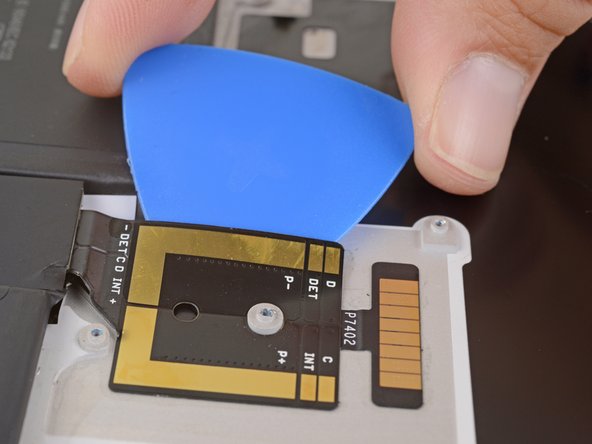
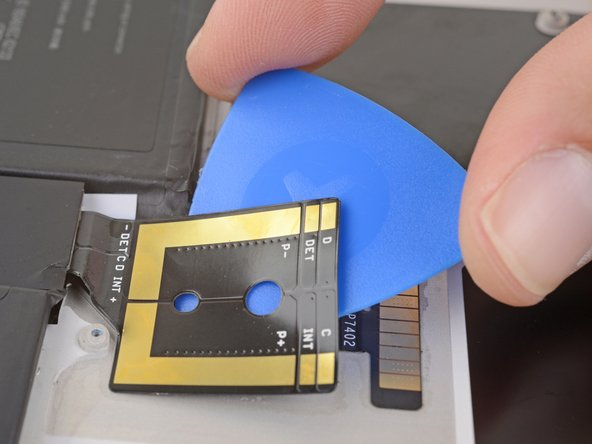
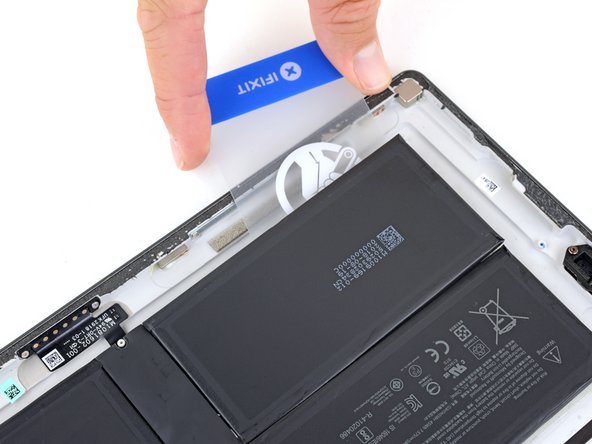
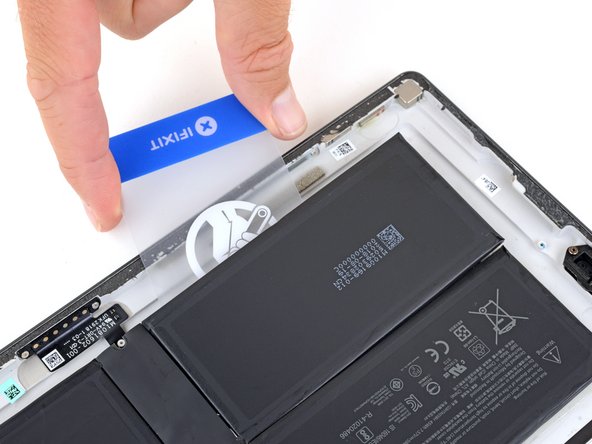
Starting at the edge closest to the battery, slide an opening pick under the battery connector to separate the adhesive underneath.
-
-
-
Prop the top edge of the Surface up a couple inches so the whole Surface slopes towards the bottom edge.
-
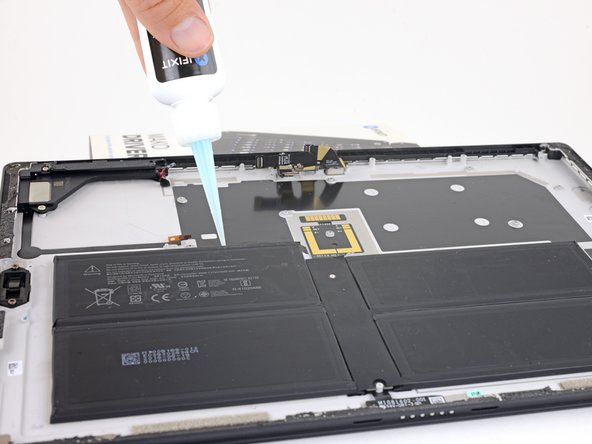
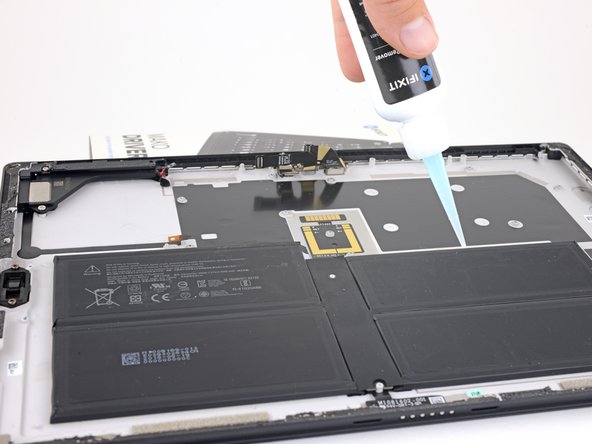
Apply adhesive remover or high-concentration (90% or higher) isopropyl alcohol to the top edge of the battery.
-
Let the adhesive remover sit and soak into the adhesive for 2–3 minutes before continuing.
-
-
-
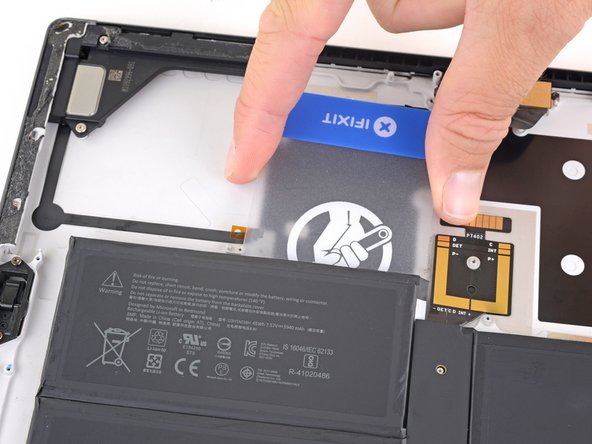
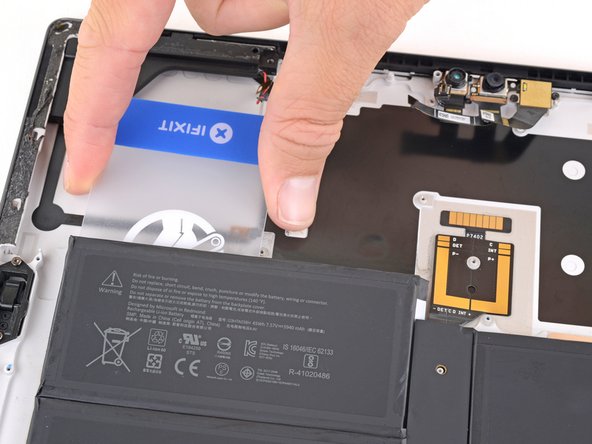
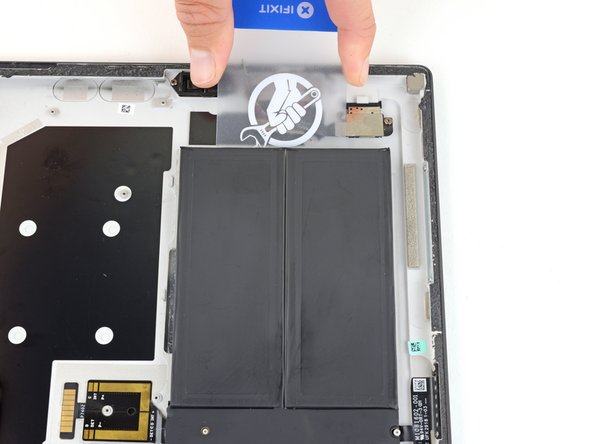
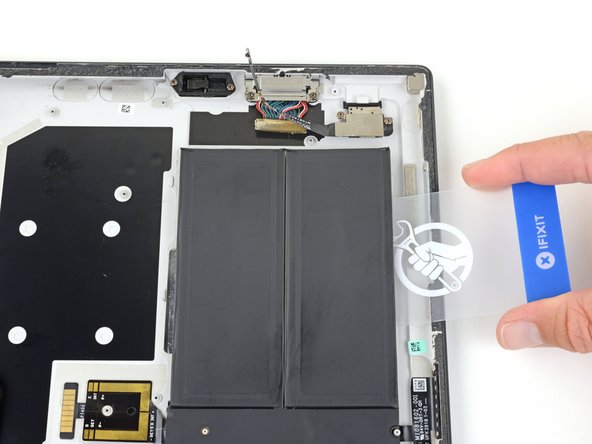
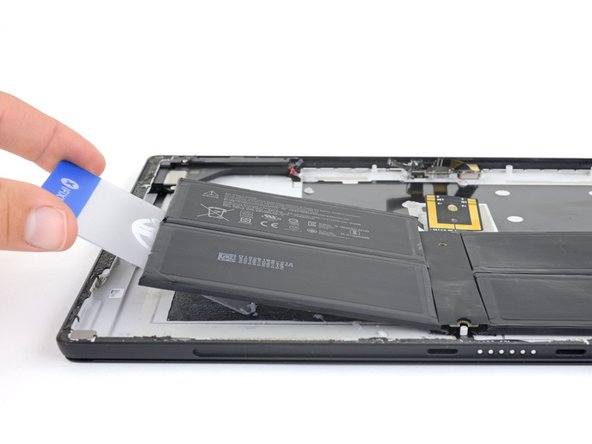
Slide a plastic card under the left side of the top edge of the battery.
-
Slide the card side to side under the upper left battery cell to slice through the adhesive underneath.
-


For optimal performance, calibrate your newly installed battery after completing this guide.
Compare your new replacement part to the original part—you may need to transfer remaining components or remove adhesive backings from the new part before installing.
To reassemble your device, follow the above steps in reverse order.
Take your e-waste to an R2 or e-Stewards certified recycler.
Repair didn’t go as planned? Try some basic troubleshooting, or ask our Answers community for troubleshooting help.
Cancel: I did not complete this guide.
30 other people completed this guide.

17 Comments
This looks like the most stressful repair possible. It’s criminal how sealed up these devices are. Microsoft seems to be going in the right direction with repair, but this was really atrocious.
Or one can use the Surface Pro without a battery by simply cutting the battery connector pictured in step 51. To do this follow the steps until step 22, then remove the single screw for the heat sink branch that lies over the battery connector, cut the battery connector with a pair of needle-nosed snips while gently lifting the heat sink branch out of the way, continue with steps 52 through 56, and finally seal the cut end of the battery connector with some non-conductive tape and reassemble.
And BTW, you can find replacement antennas on eBay or Amazon if you damaged either while removing the screen.
New battery is in and it seems to charge but windows wont recognize a battery as being installed(even after reinstalling acpi drivers for it). The install itself went pretty flawless so I have no idea how to get it to recognize it. It wont show any battery statistics/status/%. Research seems to show this is a common thing but I have found no solutions. If one is known, adding it to this tutorial would be awesome.
Hello Community,
I replaced my bloated battery in the Surface Pro 5 today using the ifixit guide. Everything went great so far. The device turns on, recognizes the battery. Only the battery does not charge. The charger does not light up when the Surface is turned off. When the Surface is turned on, the charger blinks dimly. The error is not due to the charger, because it behaves identically with the docking station. What have I overlooked? Here a Screenshot of the windows battery report : Battery Report
Thanks!
I have been using my surface daily for the last 4 years. Now with a fresh battery it is good for few more. Apart from an iPhone SE battery, I had no experience with fixing electronics. Took me 10 hours to complete the whole operation. I wouldn't have even attempted the repair if it wasn't for the detailed guide. Thank you.
i fixed it today and it worked very well.
Thanks for the detailed guidance! :)
what i was missing were some parts to order and maybe a full list of things i need to order. Getting the Stripes for rebuilding it was a little complicated in germany.
After finishing (without gluing it together) the manual keyboard can't get recognized from the surface.
Did i make a mistake? there was no step where the connection was explained.
Great guide. Full repair in 5 hours, my trickiest one yet. No issues with the battery.
New problem arose....
I have a thick black line in the centre third of my screen. I don't see any damage to the screen, and have tested the screen connectors. Is there another connector I may have missed?
I also have a thick black line directly lined up with the digitizer connection. If I press around on the connector the lines change in appearance. I can't find any physical damage to the screen, ports, or cable. I don't know what's wrong and I'm thinking of replacing the screen.
An update - I ordered a new display cable to see if I had damaged the original one. The problem has persisted with the new cable, so it looks like I'll be replacing the screen. Luckily I have not adhered the screen back to the body so I don't have to get it open again.
I just did this repair on my Surface Pro 5 with no issues. I had previously changed the battery on my wife's Surface Pro 4 last year so was familiar with the process, but for hers I used a heating pad to remove the screen and for mine I used the iOpener. The iOpener is definitely the way to go! With the heating pad heating up the whole device, I think I overheated her digitizer and separated it a bit from the screen so hers now has faint backlight fingers protruding from the edges of the screen. With the iOpener, heat is only applied to the very edges of the screen and is much safer. Well worth the money. Also purchase the precut screen adhesive strips while you're at it!!
And for anyone outside the US searching for batteries, iFixit doesn't ship batteries outside the US (I'm in Canada), so I took a chance with a Canadian aftermarket supplier and ordered Cameron Sino branded batteries for both mine and my wife's Surface's. Both are working fine and are registering slightly over 100% rated capacity.
It's very hard job to remove the display without damaging the display (is it even possible at the first time?) or the 2 cables that connect to the motherboard. I'm normally very skilled doing this repairs but the Surface it's an exeption.
do i need to add new connectivity paste between the battery and the motherboard connection
Hi, after I replaced the battery. The wifi adapter was missing. Should I replace the wifi antenna or should I check something else that I forgot to connect? Thanks
I have had my Surface Pro 5 for about 6 or 7 years, and it now only holds a charge for 15-20 minutes. I was going to attempt the repair, but after looking at how delicate it is and all of the problems encountered above with many that have attempted it, I think I’ll just use it plugged in and purchase another computer for portability. I’m a bit miffed that Microsoft considered such an expensive piece of hardware disposable. It could have been designed such that the battery was user replaceable without having to spend 5 hours doing it and likely cracking the screen in the process. Even a local repair shop that said they do this battery replacement noted that they charge up front for a new screen due to the likelihood that they will break it as well as I would. Poor design.
I attempted this as my second ever repair and ended up cracking the screen. Definitely me not being careful and this being a really difficult repair. Godspeed for everyone who did this and succeeded! I did really love my surface but, wow, Microsoft did not want me to open this thing hahaha
I am grateful I have all these iFixit tools for when I need to repair other things
Replaced the battery, no visible damage to the display (I was very, very careful!) but when I turned it back on the screen had various issues. Replaced the screen and now it's like new again! Would recommend being prepared to spend another £100 or so on buying a replacement screen if replacing the battery - worth it to be able to use the laptop for longer than half an hour off charge though!
The guide Surface is not equipped with a fan. I had to remove two additional screws in opposite corners of the fan assembly. No need to remove the tiny screws on top of the fan itself. The fan is integrated with the heatsink pipes, so this step is needed for lifting off the heatsink pipes. Thank you for a great guide and an awesome initiative!
You may want to discharge the battery completely as I found it quite easy to accidentally bump the power button and turn the surface on while cutting through the screen adhesive.
Emma Strainis - Reply