Introduction
The fan on the PSU that comes with the kit is extremely loud. This guide will go through the steps on replacing the Sunon fan that comes in the PSU with a 12v Noctua NF-A6x25.
This is not a necessary or critical mod. It simply makes the PSU quieter.
What you need
-
-
There's 8 screws, 3 on each side and 2 on top. You need to remove to open the PSU. 1 of them is under the yellow sticker.
-
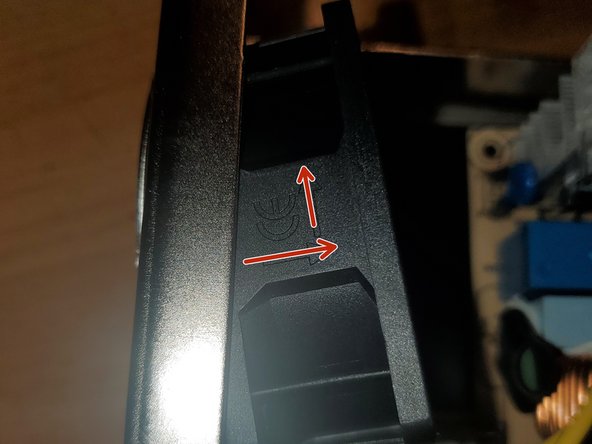
Slide the cover off.
-
-
-
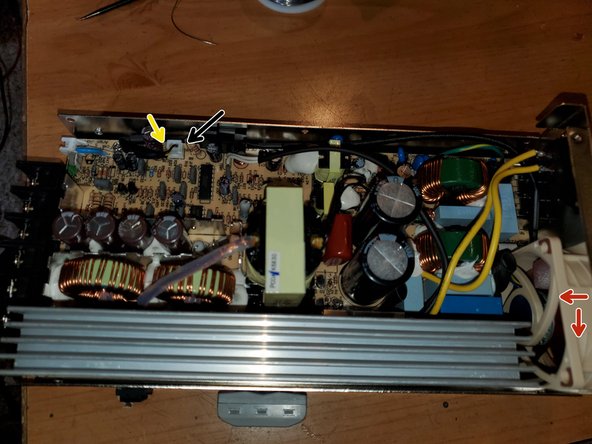
Remove the 5 screws that hold the board in to the case, than remove the board.
-
-
-
-
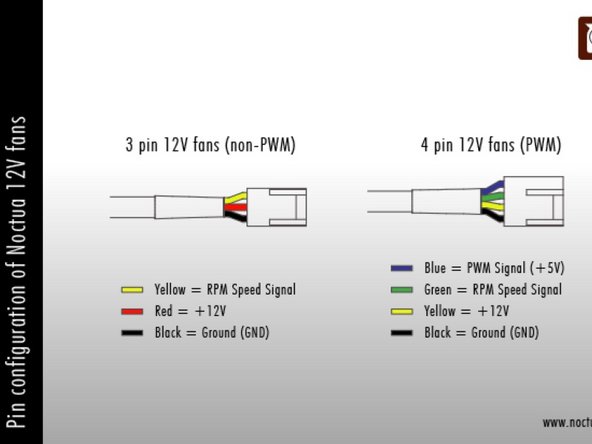
The NF-A6x25 is a 4 wire PWM fan. Since we don't need all 4 wires cut the harness to length(12" should be enough).
-
Crimp on some JST 2.54 connectors.
-
Mount the NF-A6x25 were the original fan was with the 2 screws that held in the Sunon fan. Make sure the airflow arrows point towards the board.
-
Insert the board into the case and secure it with the 5 screws.
-
Connect the NF-A6x25 fan to the board. Positive on the left and Negative on the right
-
Slide the casing cover on and the remaining 6 screws
-


I wasn’t paid to write these guides. Ben asked me to do it as a favor to him. Considering all that he’s done for our community I felt it was the least I could do. To be honest even though it took about 2 months to build and document, I had a lot of fun doing it. It forced me to write guides in a manner that was easy for everyone to understand and cleanup my Github so I could share any files that were used that aren’t part of the original download. You’re not obligated but if you would like, feel free to donate.
I wasn’t paid to write these guides. Ben asked me to do it as a favor to him. Considering all that he’s done for our community I felt it was the least I could do. To be honest even though it took about 2 months to build and document, I had a lot of fun doing it. It forced me to write guides in a manner that was easy for everyone to understand and cleanup my Github so I could share any files that were used that aren’t part of the original download. You’re not obligated but if you would like, feel free to donate.
Cancel: I did not complete this guide.
4 other people completed this guide.