Introduction
Use this guide to replace a broken trackpad.
What you need
-
-
Remove the following 10 screws securing the lower case to the MacBook Pro 13" Unibody:
-
Seven 3 mm Phillips screws.
-
Three 13.5 mm Phillips screws.
-
-
-
Slightly lift the lower case and push it toward the rear of the computer to free the mounting tabs.
-
-
-
Remove the following tri-point screws securing the battery to the upper case:
-
One 5.5 mm tri-point screw.
-
One 13.5 mm tri-point screw.
-
-
-
-
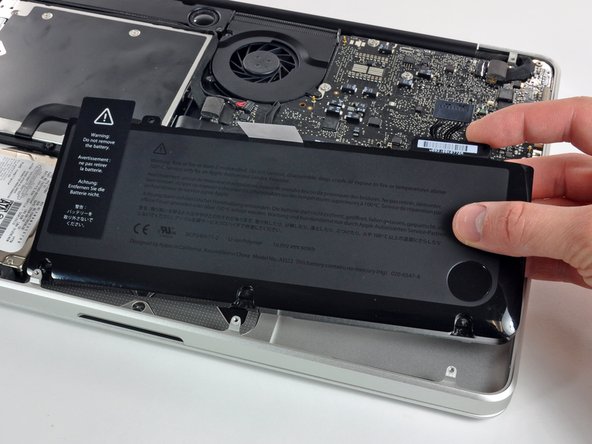
Lift the battery out of the upper case.
-
Charge it to 100%, and then keep charging it for at least 2 more hours. Next, unplug and use it normally to drain the battery. When you see the low battery warning, save your work, and keep your laptop on until it goes to sleep due to low battery. Wait at least 5 hours, then charge your laptop uninterrupted to 100%.
-
If you notice any unusual behavior or problems after installing your new battery, you may need to reset your MacBook's SMC.
-
-
-
Use the flat end of a spudger to carefully pry the trackpad connector up from its socket on the logic board.
-
-
-
If necessary, carefully dislodge the edge of the trackpad closest to the keyboard from its recess in the upper case by pushing it away from the brackets attached to the upper case.
-
Carefully push the trackpad connector and cable down through the slot cut into the upper case.
-
It may be necessary to use a spudger to help get the trackpad connector past the edge of the logic board.
-
Once the cable has been completely pulled through its slot in the upper case, pull the trackpad away from the outer edge of the upper case and remove it from the machine.
-
-
-
To remove the flex cable from the old trackpad, first flip open the latch on the ZIF connector, opposite the cable. Then, apply a little heat from a hair dryer or iOpener to soften the adhesive securing the cable to the trackpad, and carefully peel off and remove the cable.
-


To reassemble your device, follow these instructions in reverse order.
To reassemble your device, follow these instructions in reverse order.
Cancel: I did not complete this guide.
149 other people completed this guide.

10 Comments
Bought a new trackpad, installed it, fiddled with centering it, loosened the click adjuster screw and it would hardly click if I pressed real hard, just like the old trackpad. Problem solved by putting two 1/32" thick sticky pads under battery where the battery sits on the macbook frame near the lower bottom edge. The battery was new and not swollen but is was still too thick. Didn't need the new trackpad but now I have a spare.
The removal and installation went exactly as described, and the new trackpad worked correctly the first time. The toughest part - truly, not all that difficult - was manipulating the four screws that hold the trackpad in place. I don't think I've seen such small threaded fasteners since I went to a watch museum!
Would a swollen battery cause the track pad to seemingly pop out of the top of my 2010 MBP? Right side of trackpad is lifted the worst, top is slightly raised. The four corners and left side are seemingly flush with the rest of the computer. Trackpad works fine, other than no click...still has perfect movement.
That is indeed a common symptom of a swollen battery, you can pop the rear case off of your laptop and peek at the battery, and even take it out for a moment, if it looks swollen, you should probably replace it.