Introduction
MacBook Pro 13" Unibody Mid 2010 のバッテリーを交換するためのガイドです。バッテリーが膨張した場合、適切な予防処置をとってください。
What you need
-
-
MacBook Pro 13インチ Unibodyに留められた底ケースから次のネジを10本外します。
-
3 mmプラスネジー7本
-
13.5 mmプラスネジー3本
-
-
-
-
上部ケースにバッテリーを取り付けている次のトライポイントネジを外します。
-
5.5 mm トライポイントネジ 1本
-
13.5 mm トライポイントネジ 1本
-
-
-
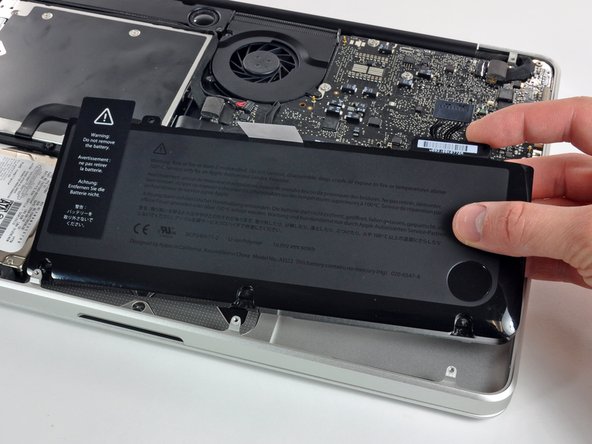
上部ケースからバッテリーを持ち上げます。
-
100%になるまで充電します。充電後も最低2時間はプラグを繋げたままにします。それからプラグを外して、通常通り使用しながら、自然に放電させます。バッテリー残量小のサインが表示されたら、これまでの作業を保存して、スリープ状態になるまで放置してください。スリープ状態に入ったら、少なくとも5時間置きます。それから一気に100%まで充電します。
-
新しいバッテリーを装着後、通常通り作動しない場合は、MacBook ProのSMCをリセットしなければならない可能性があります。
-


再度組み立てる時は、分解した順番と逆の順番で組み立ててください。
再度組み立てる時は、分解した順番と逆の順番で組み立ててください。
Cancel: I did not complete this guide.
683 other people completed this guide.
Special thanks to these translators:
100%

These translators are helping us fix the world! Want to contribute?
Start translating ›

26 Comments
You guys are awesome! My granddaughter spilled a whole coke on the Mac and it went fizz! After some weeks I took it to the Apple store where it was declared it dead. They offered me a refurbished machine for $800, but insteaed I came home, took the disk out and hooked it via a USB carrier to another Mac which proved that the disk had not been harmed. I put it back in the machine and booted up at which point it became obvious that the battery was dead. One pass at Google turned up IFixIt where I found the battery and the correct, goofy tri-point screwdriver. The battery arrived a bit ago and the Mac is up and running as if nothing happened . . . a tidy savings of $650!
Thanks so much1
This was a total life saver! A few weeks ago my house was hit by lightning and even though my computer wasn't plugged in (thank God!) my charger was completely fried. I ordered a new charger but my computer still wasn't working- Apple said my computer was done for. A friend said it was probably my battery and told me about ifixit.com. I was able to buy a new battery and change it myself (it was so easy!!!). Saved me from spending a bunch of $$ at the Apple store. I move out of the Country in a few weeks and didn't know what I was going to do without a computer. Thanks ifixit!!!
When I followed this exactly, I booted up my MacBook to see that my battery had an x through it with the no battery availible popping up when I scrolled over it. I (stupidly) left the computer on while I browsed for a solution. The whole time my charger showed a green light. Suddenly the computer turned off and hasn't been able to be turned back on since despite switching to another battery and another charger. The charger still shows a green light, which means the battery is either fully charged or installed incorrectly. I don't understand how it can be installed incorrectly when the only part to put it into the computer is the plug in. Please someone help me, I have no idea how to fix it and have made multiple forums on here asking for help, to no avail.
I think you are SOL. I had same problem a few days ago. I have attempted everything I could find from online resources. Bottom Line: ship it to an Apple authorized repair shop or an Apple Store. Battery replacement Cost is now only $130, which isn't much more than iFixIt cost.
gkofga -
Your connector or socket may have broken. Open the Mac and check if you missed something.