Introduction
Use this guide to replace the display assembly of your MacBook Pro 13" Late 2020.
For your safety, drain your MacBook Pro's battery below 25% charge before starting repairs.
Some photos in this guide are from a different model and may contain slight visual discrepancies, but they won't affect the guide procedure.
What you need
-
-
If your MacBook is running Big Sur v11.1 or later, disabling Auto Boot may not work. You can proceed normally, but make sure to disconnect the battery as soon as you're inside.
-
Use a P5 Pentalobe driver to remove the six screws securing the lower case:
-
Two 6.8 mm screws
-
Two 5.3 mm screws
-
Two 3.4 mm screws
-
-
-
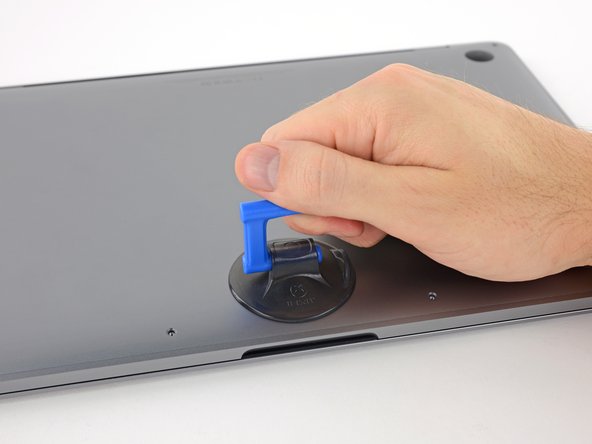
Insert your opening pick once again under the front edge of the lower case, near one of the two centermost screw holes.
-
Give the pick a firm twist to pop free the third clip securing the lower case to the chassis.
-
Repeat this procedure near the other of the two centermost screw holes, popping the fourth clip free.
-
-
-
Pull the lower case firmly towards the front of the MacBook (away from the hinge area) to separate the last of the clips securing the lower case.
Be mindful of finger placement as the inside edges of the case are very sharp and may cut you.
literally just cut myself
I used the suction cup to pull/slide the lower case from the back clips
This is probably the most difficult step. It doesn't come easily, you have to be careful but very firm and apply plenty of force. The edges are somewhat sharp, but I didn't cut myself. Just don't slide your fingers along the edges. I had the best luck orienting the computer in portrait (like the pictures) and pushing on the front right edge of the main chasis with my right hand fingers while pushing the opposite direction on the bottom lid with my left hand fingers (place your fingers right in the crack of the hinge).
-
-
-
Remove the lower case.
-
Set it in place and align the sliding clips near the display hinge. Press down and slide the cover toward the hinge. It should stop sliding as the clips engage.
-
When the sliding clips are fully engaged and the lower case looks correctly aligned, press down firmly on the lower case to engage the four hidden clips underneath. You should feel and hear them snap into place.
-
-
-
Carefully peel up the large piece of tape covering the battery connector, on the edge of the logic board nearest the battery.
-
Remove the tape.
-
-
-
-
Use a T5 Torx driver to remove the 3.7 mm pancake screw securing the battery power connector.
io ho trovato un Torx T4 invece del T5.
Ciao Stefano! Grazie per il commento. Infatti c’è sempre una certa tolleranza fra il cacciavite e la testa delle viti. Quindi è possibile che un cacciavite più grande o più piccolo sia più “comodo” in certi casi. Buona riparazione!
konnte diese Verbindung nicht lösen. Zu sehr angezogen
-
-
-
Use a spudger to gently lift the battery power connector, disconnecting the battery.
-
Lift the connector high enough so that it stays separated from its socket.
Please save yourself a pile of money and read this before doing this step: I bricked my MacBook by not being extremely careful and making sure to NOT touch the connector together as I took it apart. Ouch ouch ouch. 😫
-
-
-
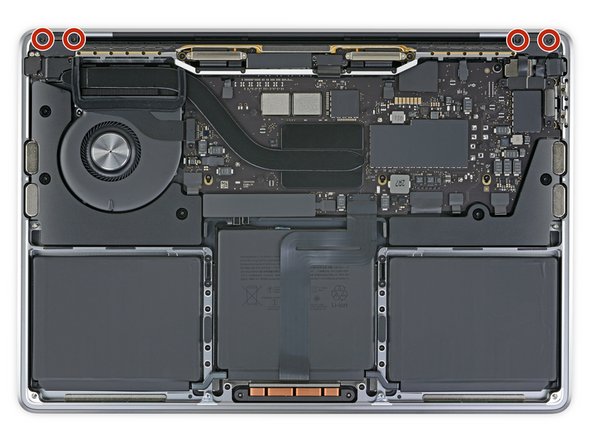
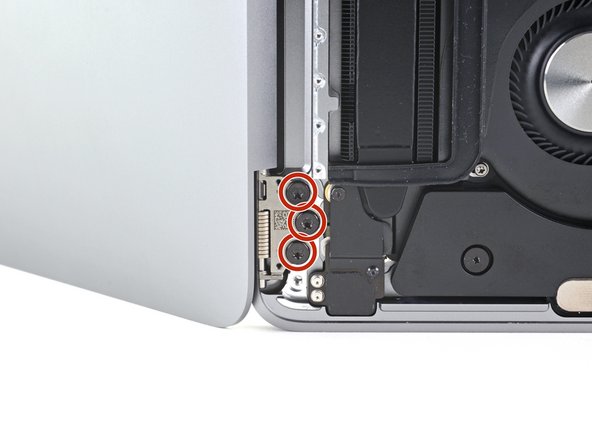
Remove the four 3.3 mm T3 Torx screws securing the plastic covers on top of the display hinges.
-
-
-
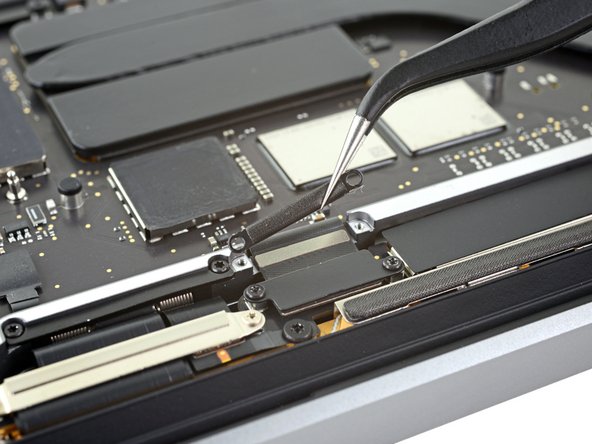
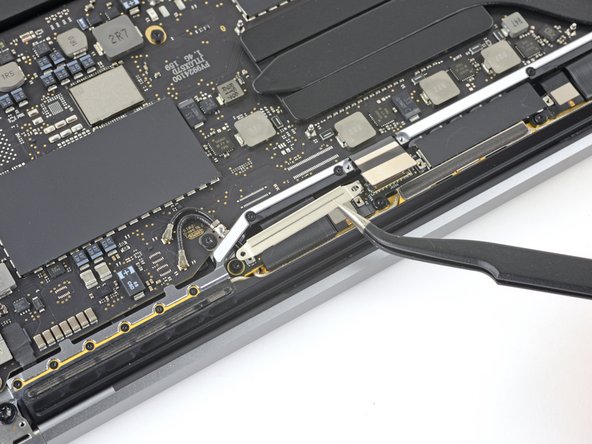
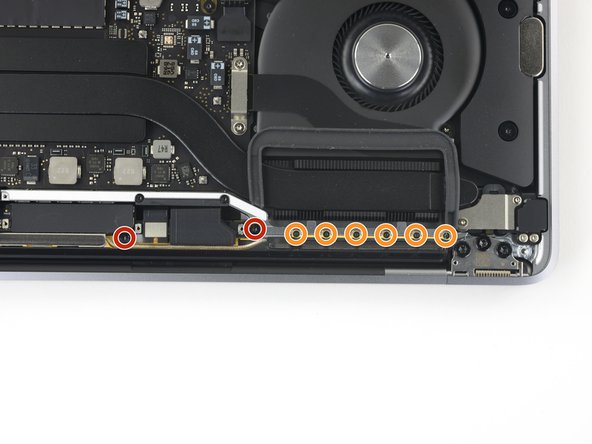
Remove the two 1.7 mm T3 Torx screws securing the aluminum cover on top of the display cable flex connector.
-
Remove the cover.
-
-
-
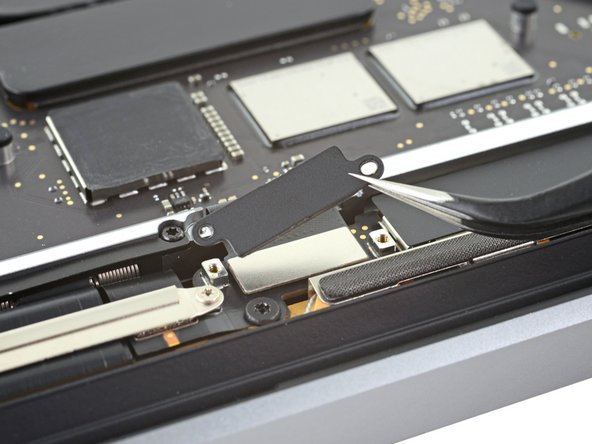
Remove the four 1.5 mm T3 Torx screws securing the two aluminum covers on top of the two display cable connectors.
-
Use a pair of tweezers to remove the two aluminum covers.
-
-
-
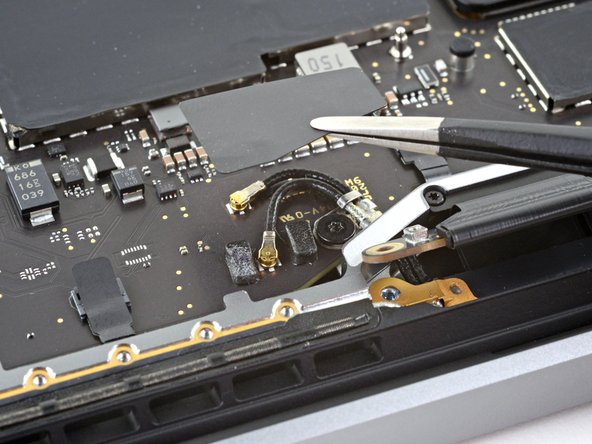
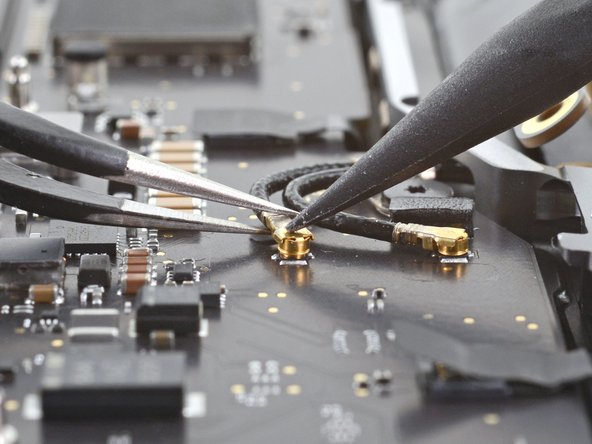
Use a pair of tweezers to remove the plastic antenna cable cover.
-
-
-
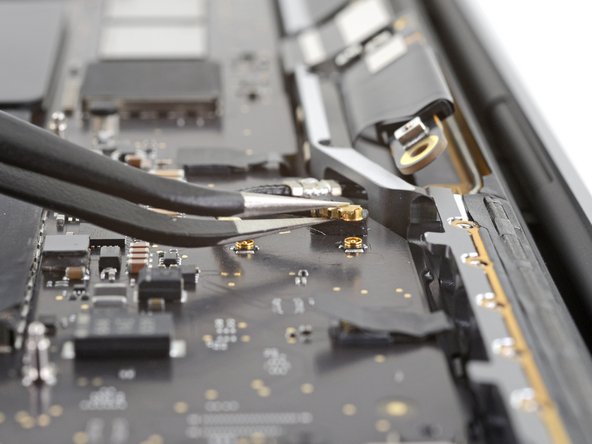
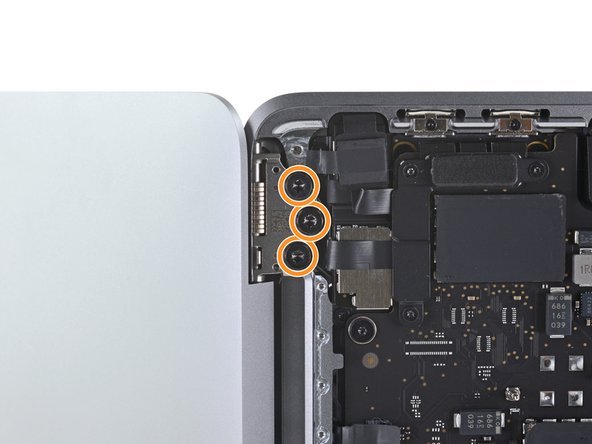
Remove the four 4.1 mm T3 Torx screws securing the spring hinges of the two display cables.
-
-
-
Grab the left side of the display cable assembly and pull it towards the bottom end of the MacBook and away from the spring hinge.
-
Use a pair of tweezers to pull the spring hinge of the display cable out of its bracket.
-
Repeat this step with the right spring hinge of the display cable assembly.
-
-
-
Push both halves of the MacBook Pro together so that the hinge brackets can be lifted clear of their recesses in the chassis.
-
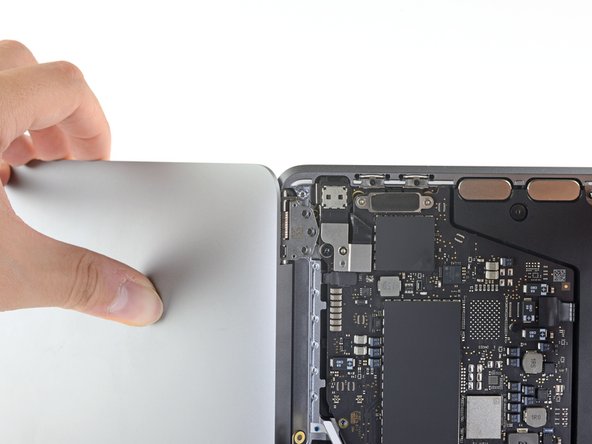
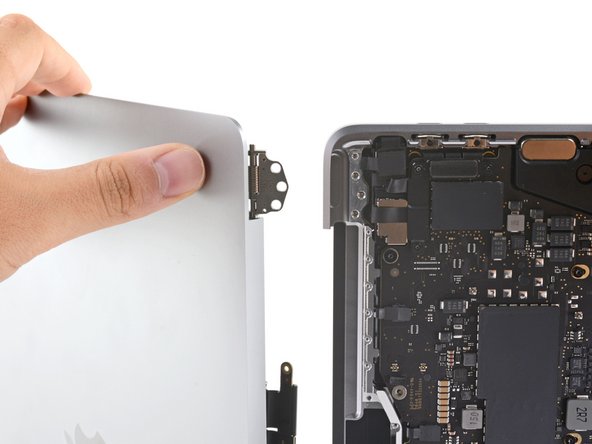
Push the main body of the MacBook Pro away from you while pulling the screen toward you to separate it.
-
Remove the display/screen assembly, being careful not to snag it on any cables.
-


Compare your new replacement part to the original part—you may need to transfer remaining components or remove adhesive backings from the new part before installing.
To reassemble your device, follow the above steps in reverse order.
Take your e-waste to an R2 or e-Stewards certified recycler.
Repair didn’t go as planned? Try some basic troubleshooting or search our Answers community for help.
Cancel: I did not complete this guide.
36 other people completed this guide.


7 Comments
Congrats on a job excellently done. These procedures are comprehensive and makes the process seem effortless. Thumbs Up.
Excellent guide and may the Force be with Carsten Frauenheim!
From one complete noob to any others out there - magnetized screwdrivers were life-savers, especially in getting everything back together. I used a magnet on a little flashlight I had handy. Just move the screwdriver shaft back and forth across the magnet for a few seconds. The affect will diminish after a little while so when those freaking tiny screws start falling off, just stroke that mag again and you're cooking with crisco.
An excellent guide and the time estimate is spot-on. Taking it all apart is fairly easy/straightforward. Getting back to gutter properly is a little harder. Pay special attention to how those spring hinges for the display cables come out/go in. It's not exactly intuitive. Also, the plethora of very tiny screws is considerable. Keep them organized and don't stop them. Lastly, pay close attention to getting the cover back on correctly. The clips near the hinges can be a little tricky and be sure the side clips really click in. Otherwise, this a a reasonable fix and is entirely possible even for someone of limited experience. Thank you!
Do you have a guide to replace a brokken LCD screen from the display assembly?
(A2338)
It appears to me that there is not a way to even order just the LCD Screen, so I'm guess they do not. I had to order an entire (aftermarket) assembly of the back cover and the LCD.
I came to this guide for the M1 2020 Macbook Pro. The guide is good but do note that the pictures jump back and forth between Intel and M1 logic boards.
I use a empty egg carton to place screws in in the order of removal from computer
robert - Reply
That's a good idea Robert!
Tom Kingsley -