
MacBook Air 13" Mid 2011 Right Speaker Replacement

What you need

  1. MacBook Air 13" Mid 2011 Right Speaker Replacement, Lower Case: step 1, image 1 of 1
    Tool used on this step:
    P5 Pentalobe Screwdriver Retina MacBook Pro and Air
    $5.99
    Buy
    • Before proceeding, power down your MacBook. Close the display and lay it on a soft surface, top-side down.

    • Use a P5 Pentalobe driver to remove ten screws securing the lower case, of the following lengths:

    • Two 9 mm screws

    • Eight 2.6 mm screws

  2. MacBook Air 13" Mid 2011 Right Speaker Replacement: step 2, image 1 of 1
    • Wedge your fingers between the display and the lower case and pull upward to pop the lower case off the Air.

    • Remove the lower case and set it aside.

  3. MacBook Air 13" Mid 2011 Right Speaker Replacement, Battery: step 3, image 1 of 2 MacBook Air 13" Mid 2011 Right Speaker Replacement, Battery: step 3, image 2 of 2
    • Grab the clear plastic pull tab attached to the battery connector and pull it toward the front edge of the Air to disconnect the battery from the logic board.

    • Do not lift upward on the connector as you disconnect it.

    • When reinstalling a new battery, it may be helpful to temporarily reconnect the battery before placing it in the frame. Make sure that the connector lays flat to the board.

  4. MacBook Air 13" Mid 2011 Right Speaker Replacement: step 4, image 1 of 1
    • Remove the following five screws securing the battery to the upper case:

    • Three 6.3 mm T5 Torx screws

    • Two 2.4 mm T5 Torx screws

  5. MacBook Air 13" Mid 2011 Right Speaker Replacement: step 5, image 1 of 1
    • When handling the battery, avoid squeezing or touching the four exposed lithium polymer cells.

    • Lift the battery from its edge nearest the logic board and remove it from the upper case.

    • When installing the new battery, if there is a thin plastic film on your replacement battery, do not attempt to remove it. It is glued on and protects the battery pack while it is inside the MacBook.

    • If you're installing a new battery, you should calibrate it after installation:

    • Charge it to 100%, and then keep charging it for at least 2 more hours. Then, unplug and use it normally to drain the battery. When you see the low battery warning, save your work, and keep your laptop on until it goes to sleep due to low battery. Wait at least 5 hours, then charge your laptop uninterrupted to 100%.

    • If you notice any unusual behavior or problems after installing your new battery, you may need to reset your MacBook's SMC.

  6. MacBook Air 13" Mid 2011 Right Speaker Replacement, Right Speaker: step 6, image 1 of 1
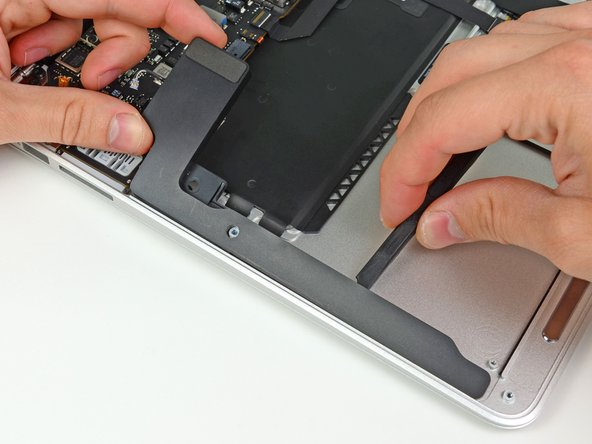
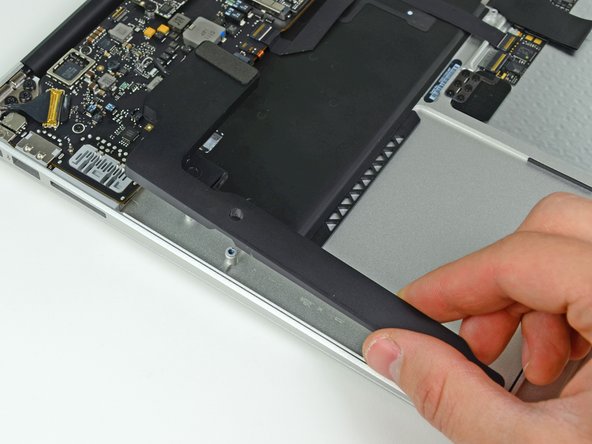
    • Use the flat end of a spudger to pry the right speaker connector up and out of its socket on the logic board.

    • Pry up from beneath the wires.

  7. MacBook Air 13" Mid 2011 Right Speaker Replacement: step 7, image 1 of 3 MacBook Air 13" Mid 2011 Right Speaker Replacement: step 7, image 2 of 3 MacBook Air 13" Mid 2011 Right Speaker Replacement: step 7, image 3 of 3
    • Use the flat end of a spudger to pry the right speaker off the adhesive securing it to the upper case.

    • Remove the right speaker from the upper case.

Finish Line

10 other people completed this guide.

0 Comments

Add Comment

View Statistics:

Past 24 Hours: 0

Past 7 Days: 1

Past 30 Days: 11

All Time: 8,375