Introduction
Use this guide to replace the upper case, including the keyboard, of your MacBook Air 13" Early 2015.
What you need
-
-
Use a P5 Pentalobe driver to remove ten screws securing the lower case, of the following lengths:
-
Two 9 mm screws
-
Eight 2.6 mm screws
-
-
-
Grab the clear plastic pull tab attached to the battery connector and pull it parallel to the board toward the front edge of the Air.
-
-
-
Use the flat end of a spudger to pry the I/O board cable connector up out of its socket on the I/O board.
-
-
-
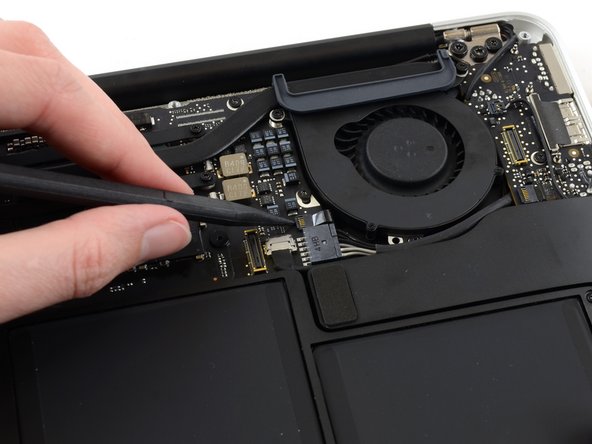
Use the tip of a spudger to carefully flip up the retaining flap on the fan cable ZIF socket.
-
-
-
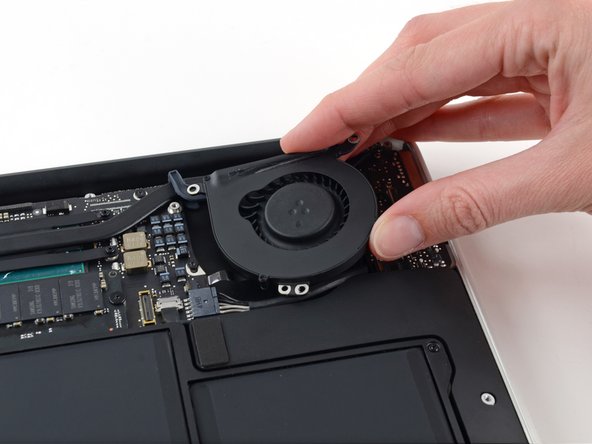
Disconnect the I/O board by pulling its power cable away from its socket on the logic board.
-
-
-
-
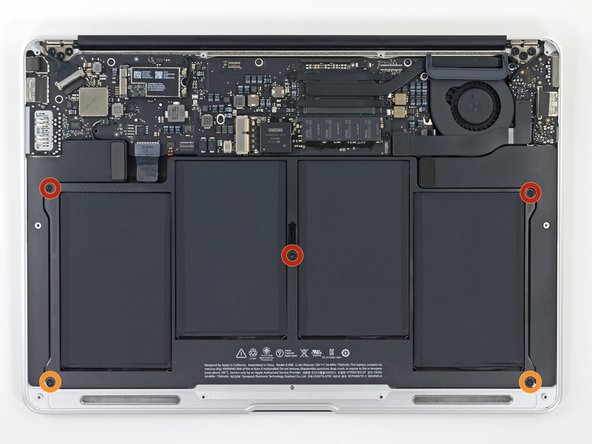
Remove the following five screws securing the battery to the upper case:
-
Three 6.9 mm T5 Torx screws
-
Two 3.0 mm T5 Torx screws
-
-
-
Lift the battery from its edge nearest the logic board and remove it from the upper case.
-
Charge it to 100%, and then keep charging it for at least 2 more hours. Then, unplug and use it normally to drain the battery. When you see the low battery warning, save your work, and keep your laptop on until it goes to sleep due to low battery. Wait at least 5 hours, then charge your laptop uninterrupted to 100%.
-
If you notice any unusual behavior or problems after installing your new battery, you may need to reset your MacBook's SMC.
-
-
-
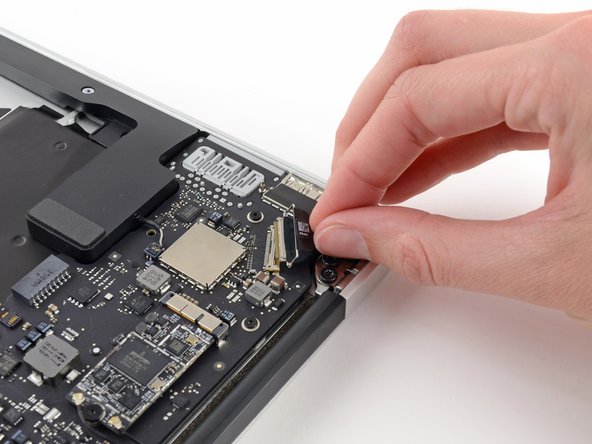
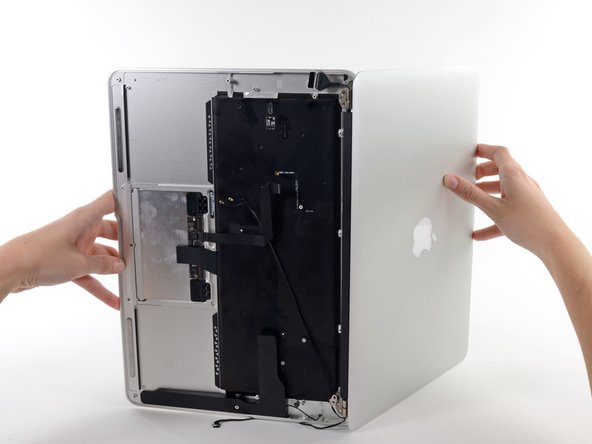
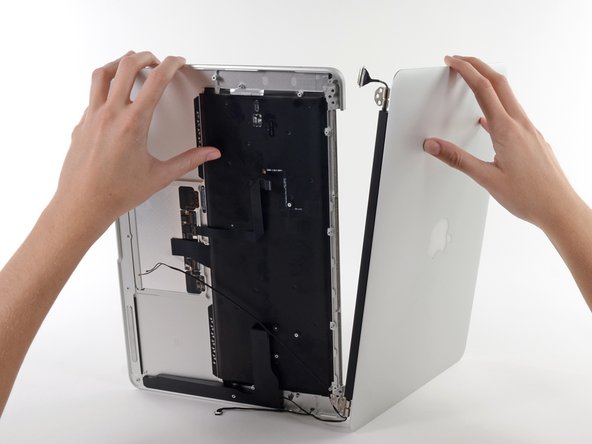
Grab the plastic pull tab secured to the display data cable lock and rotate it towards the top side of the computer.
-
-
-
Remove the inner two 5.6 mm T8 Torx screws securing the right display hinge to the upper case.
-
-
-
Use the flat end of a spudger to pry the left speaker off the adhesive securing it to the upper case.
-
Remove the left speaker from the upper case.
-
-
-
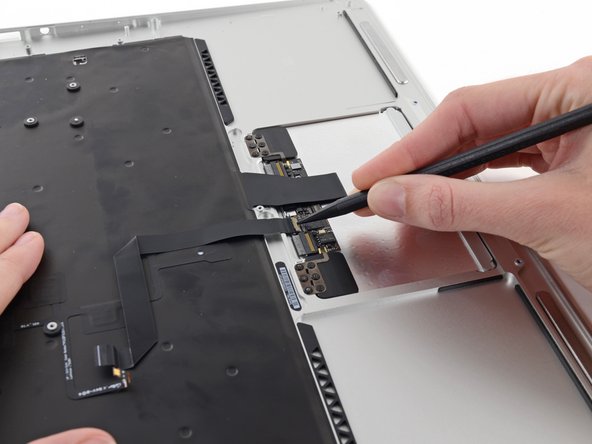
Use the tip of a spudger or your fingernail to flip up the retaining flap on the trackpad ribbon cable ZIF socket.
-
Pull the trackpad ribbon cable straight out of its socket toward the rear edge of the Air.
-


To reassemble your device, follow these instructions in reverse order.
Take your e-waste to an R2 or e-Stewards certified recycler.
Repair didn’t go as planned? Try some basic troubleshooting, or ask our Answers community for help.
To reassemble your device, follow these instructions in reverse order.
Take your e-waste to an R2 or e-Stewards certified recycler.
Repair didn’t go as planned? Try some basic troubleshooting, or ask our Answers community for help.
Cancel: I did not complete this guide.
61 other people completed this guide.


8 Comments
helped me change out a keyboard easy to follow
maybe not hard closer to a medium challange
Difficulty max medium…did this in 20-30min
Wonderful guide! Can’t do anything without you guys!
As usual, a perfect guide. I was able to complete the top case replacement in roughly 30 minutes. I purchased your P5 Pentalobe Screwdriver along with the magnetized organizer mat which certainly helped me with getting the replacement done that quickly.
Truly excellent guide. Carried out with Essentials Electronic Toolkit. Was actually enjoyable!