Introduction
Benutze diese Anleitung, um die Festplatte deines Mac Mini zu ersetzen.
What you need
-
-
Mit den Daumen in die Vertiefungen der Bodenplatte drücken.
-
Die Bodenplatte jetzt gegen den Uhrzeigersinn drehen, bis der weiße Punkt mit der Markierung auf dem Außengehäuse übereinstimmt.
-
-
-
Entferne die beiden 11,3 mm T6 Torx Schrauben, die den Lüfter auf der Platine nahe der Funkantenne festhalten.
-
-
-
Entferne die einzige 3,5 mm T6 Torx Schraube, mit der die Haube am Kühlkörper befestigt ist.
-
-
-
-
Entferne folgende Schrauben, die das Antennenblech am Mini festhalten:
-
Zwei 6,6 mm T8 Torx Schrauben
-
Zwei 5,0 mm T8 Torx Schrauben oder 2,0 mm Sechskantschrauben (beide Schraubendreher funktionieren)
-
Beachte beim Zusammenbau:
-
-
-
Mit dem flachen Ende eines Spudgers kannst du den den Stecker der Festplatte aus seinem Anschluss auf der Hauptplatine lösen.
-
-
-
Setze das Mac Mini Logic Board Removal Tool in die beiden rot markierten Öffnungen ein. Beachte, dass dass es das Gehäuses unterhalb der Platine berührt bevor du weitermachst.
-
Ziehe das Tool vorsichtig in Richtung der I/O Platine. Die Hauptplatine und die I/O Einheit sollten etwas aus dem äusseren Gehäuse herausrutschen.
-
Ziehe das Mac Mini Logic Board Removal Tool wieder heraus.
-
-
-
Drücke gleichzeitig die beiden Klammern ganz links und rechts an der I/O Einheit zur Mitte des I/O Boards hin und ziehe das I/O Board aus dem Gehäuse.
-
Ziehe das Logic Board nur so weit aus dem Gehäuse, bis die Kante des I/O Boards etwa 1,3 cm von der Kante des Aluminiumgehäuses entfernt ist.
-
-
-
Entferne den Streifen, der das Festplattenkabel mit der Festplatte verbindet.
-
Ziehe das Festplattenkabel ab, indem du den Stecker senkrecht von der Festplatte weg ziehst.
-
-
-
Entferne das Festplattenkabel.
-
Drehe die beiden 6,2 mm T8 Schrauben auf der Seite der Festplatte heraus.
-
-
-
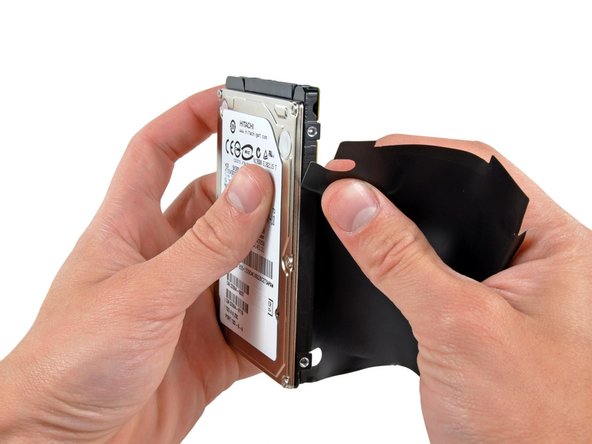
Löse vorsichtig die Abdeckung von der Festplatte ab.
-
Die Festplatte ist frei.
-
Wenn du eine neue Festplatte einbaust, hilft dir unsere OS X Installationsanleitung sie zum Laufen zu kriegen.
-


Um dein Gerät wieder zusammenzubauen, befolge diese Anleitung in umgekehrter Reihenfolge.
Um dein Gerät wieder zusammenzubauen, befolge diese Anleitung in umgekehrter Reihenfolge.
Cancel: I did not complete this guide.
537 other people completed this guide.
Special thanks to these translators:
100%

These translators are helping us fix the world! Want to contribute?
Start translating ›

78 Comments
no need to remove the logic board! the disk comes out after step 12.
Also you do not really need to disconnect the antenna. Just be carefull no to break the wire.
i replaced 5400 rpm hdd with Samsung SSD 840 Pro
I did it Rober's way - thanks - no disconnecting antenna in step 10
Stopping after step 12 and replacing hard drive there without removing logic board
I put the sheet that was around the old hard drive over the new one - not sure if its needed?
After it is all done i did Command + R to do internet recovery and get OS X mountain lion on the blank drive
Last thing to do is go here to enable trim: http://www.groths.org/?page_id=322
royl123 -
Very helpful guide, thanks! As many have said before, I would not detach the fan or antenna, just move it out of the way.
One very trivial tip: slide a piece of paper over the logic board as soon as you've removed the fan, as a protection against accidentally touching the components with your fingers or tools.
I did not reinstall the plastic cover on the HDD. This is only to protect the logic board of the HDD, which ofcourse is very well protected in SSD's.
That depends which position the hard drive is in. If it's in the upper slot (ie at the 'top' of the enclosure when it's in use) then you will need to remove the logic board.
Dismantling the Mini was simple, but the two hardest steps when installing a new hard drive were sliding the drive back in aligned correctly, and replacing the antenna grill.
Even with the logic board pushed out, I found it difficult to line up the screws on the hard drive and get it seated properly. As for the grill, it would not line up with the screw holes. I had to use the Mac Mini tool hooked into a hole in the grill as a lever to lift it up and in towards the lip of the rim it was sitting on. There was an audible snap as it settled into place.