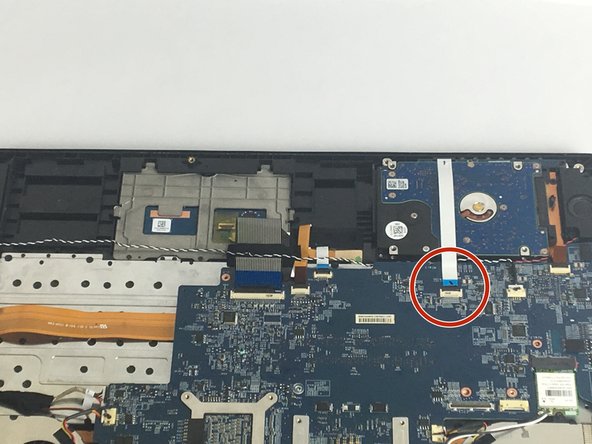
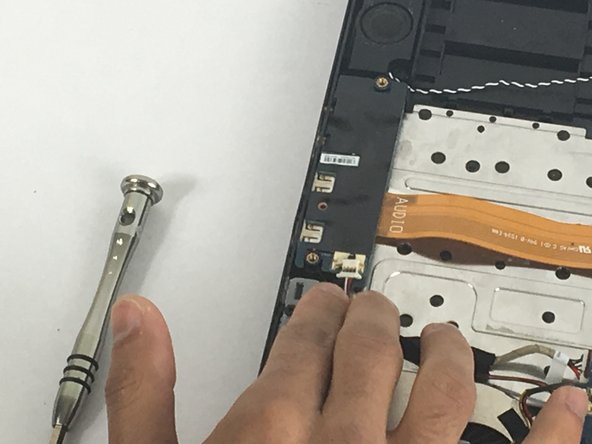
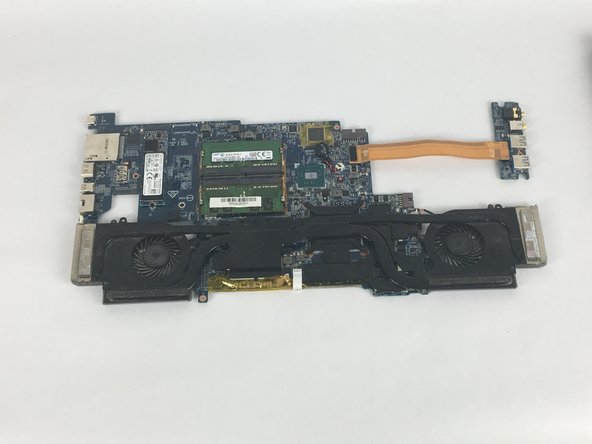
MSI GS60 6QE GHOST PRO 4K Motherboard fans Replacement

What you need

  1. MSI GS60 6QE GHOST PRO 4K Motherboard fans Replacement, Motherboard fans: step 1, image 1 of 3 MSI GS60 6QE GHOST PRO 4K Motherboard fans Replacement, Motherboard fans: step 1, image 2 of 3 MSI GS60 6QE GHOST PRO 4K Motherboard fans Replacement, Motherboard fans: step 1, image 3 of 3
    • Use a Phillips #0 driver to remove the 15 screws that hold the bottom cover:

    • Eleven 2.5 mm length screws

    • Four 5 mm length screws

    • Remove the bottom cover.

  2. MSI GS60 6QE GHOST PRO 4K Motherboard fans Replacement: step 2, image 1 of 3 MSI GS60 6QE GHOST PRO 4K Motherboard fans Replacement: step 2, image 2 of 3 MSI GS60 6QE GHOST PRO 4K Motherboard fans Replacement: step 2, image 3 of 3
    • Locate the battery.

    • Locate the battery plug and unplug it carefully

  3. MSI GS60 6QE GHOST PRO 4K Motherboard fans Replacement: step 3, image 1 of 3 MSI GS60 6QE GHOST PRO 4K Motherboard fans Replacement: step 3, image 2 of 3 MSI GS60 6QE GHOST PRO 4K Motherboard fans Replacement: step 3, image 3 of 3
    • Locate the Hard drive

    • Unplug it gently by lifting it up to unlock the black cover that connects it to the motherboard

    • Be careful not to break the black cover because it can be broken easily

    • Unplug the hard drive

  4. MSI GS60 6QE GHOST PRO 4K Motherboard fans Replacement: step 4, image 1 of 3 MSI GS60 6QE GHOST PRO 4K Motherboard fans Replacement: step 4, image 2 of 3 MSI GS60 6QE GHOST PRO 4K Motherboard fans Replacement: step 4, image 3 of 3
    • unplug this wire carefully

    • Unplug the brown wire located next to the previous wire. Unplug it gently by lifting it up to unlock the black cover that connects it to the motherboard

    • Be careful not to break the black cover because it can be broken easily

  5. MSI GS60 6QE GHOST PRO 4K Motherboard fans Replacement: step 5, image 1 of 2 MSI GS60 6QE GHOST PRO 4K Motherboard fans Replacement: step 5, image 2 of 2
    • unplug the selected wire. Unplug it gently by lifting it up to unlock the black cover that connects it to the motherboard

  6. MSI GS60 6QE GHOST PRO 4K Motherboard fans Replacement: step 6, image 1 of 2 MSI GS60 6QE GHOST PRO 4K Motherboard fans Replacement: step 6, image 2 of 2
    • unplug the brown selected wire. Unplug it gently by lifting it up to unlock the black cover that connects it to the motherboard

  7. MSI GS60 6QE GHOST PRO 4K Motherboard fans Replacement: step 7, image 1 of 1
    • unplug the selected wire. Unplug it gently by lifting it up to unlock the black cover that connects it to the motherboard

  8. MSI GS60 6QE GHOST PRO 4K Motherboard fans Replacement: step 8, image 1 of 2 MSI GS60 6QE GHOST PRO 4K Motherboard fans Replacement: step 8, image 2 of 2
    • Locate the selected wire and unplug it carefully

  9. MSI GS60 6QE GHOST PRO 4K Motherboard fans Replacement: step 9, image 1 of 3 MSI GS60 6QE GHOST PRO 4K Motherboard fans Replacement: step 9, image 2 of 3 MSI GS60 6QE GHOST PRO 4K Motherboard fans Replacement: step 9, image 3 of 3
    • unplug the selected wires

    • Unplug it gently without causing damage to the wire

  10. MSI GS60 6QE GHOST PRO 4K Motherboard fans Replacement: step 10, image 1 of 2 MSI GS60 6QE GHOST PRO 4K Motherboard fans Replacement: step 10, image 2 of 2
    • unplug the selected white wire. Unplug it gently by lifting it up to unlock the black cover that connects it to the motherboard

    • Be careful not to break the black cover because it can be broken easily

  11. MSI GS60 6QE GHOST PRO 4K Motherboard fans Replacement: step 11, image 1 of 2 MSI GS60 6QE GHOST PRO 4K Motherboard fans Replacement: step 11, image 2 of 2
    • unplug the selected wire.

  12. MSI GS60 6QE GHOST PRO 4K Motherboard fans Replacement: step 12, image 1 of 2 MSI GS60 6QE GHOST PRO 4K Motherboard fans Replacement: step 12, image 2 of 2
    • remove the selected 2.5 mm screws by PH0 Bit screwdriver

    • Gently unplug the electronic chip

  13. MSI GS60 6QE GHOST PRO 4K Motherboard fans Replacement: step 13, image 1 of 1
    • Remove the four 2.5mm screws with a PH0 bit.

  14. MSI GS60 6QE GHOST PRO 4K Motherboard fans Replacement: step 14, image 1 of 2 MSI GS60 6QE GHOST PRO 4K Motherboard fans Replacement: step 14, image 2 of 2
    • After you remove all the connected wires and unscrew all the screws that holds the motherboard to the laptop, take the motherboard out as shown in the picture.

    • Make sure it is completely diconnected from all wires and screws

  15. MSI GS60 6QE GHOST PRO 4K Motherboard fans Replacement: step 15, image 1 of 3 MSI GS60 6QE GHOST PRO 4K Motherboard fans Replacement: step 15, image 2 of 3 MSI GS60 6QE GHOST PRO 4K Motherboard fans Replacement: step 15, image 3 of 3
    • Remove the eight 2.5mm screws with a PH0 bit.

  16. MSI GS60 6QE GHOST PRO 4K Motherboard fans Replacement: step 16, image 1 of 1
    • After you unscrew all the screws, take the fan off to replace it.

Conclusion

To reassemble your device, follow these instructions in reverse order.

3 other people completed this guide.

Mafdy Wahib

Member since: 09/28/17

369 Reputation

2 Guides authored

Team

USF Tampa, Team S1-G4, Nance Fall 2017 Member of USF Tampa, Team S1-G4, Nance Fall 2017

USFT-NANCE-F17S1G4

3 Members

5 Guides authored

7 Comments

Hi, I just went through this disassembly (which is mostly great, thank you Mafdy) to replace the fans, and I wanted to point out a couple of clarifications:

Most importantly! It is NOT necessary to remove the fan/heatsink assembly from the motherboard to remove and replace the fans! Instead of proceeding with steps 15 and 16, look for tiny philips screws on the black side of the heatsink assembly which fasten each fan - 3 for one fan, 4 for the other. These are accessible once the motherboard is free from the case.

Steps 15 and 16 cause you to break the thermal compound seal on the CPU and GPU, and then proper re-assembly would mean cleaning off the old compound and correctly applying new compound before re-attaching the heatsink assembly - an unnecessary hassle just to replace the fans.

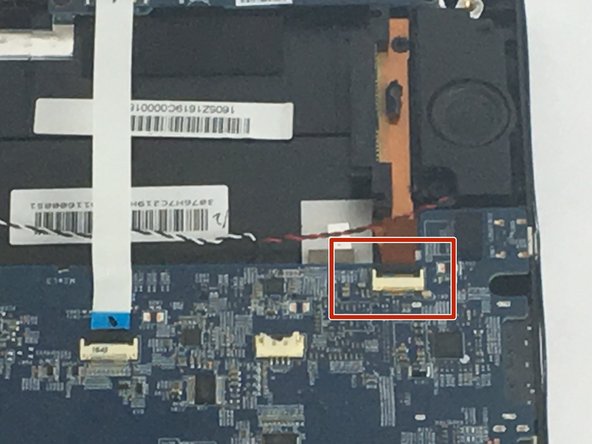
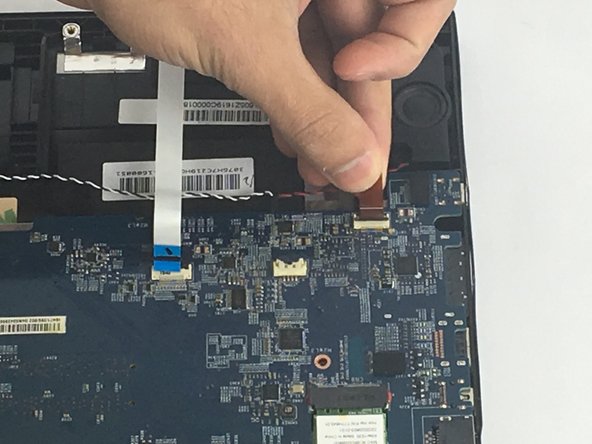
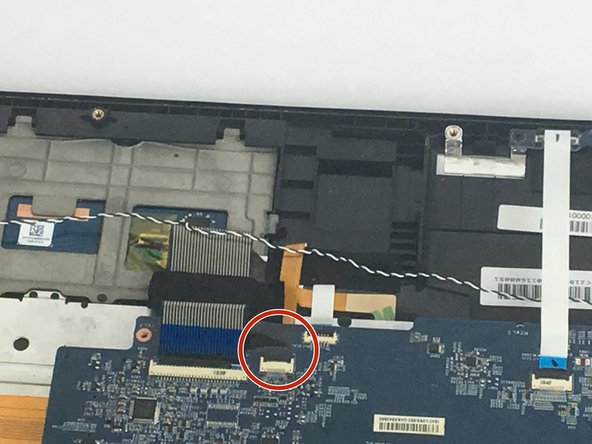
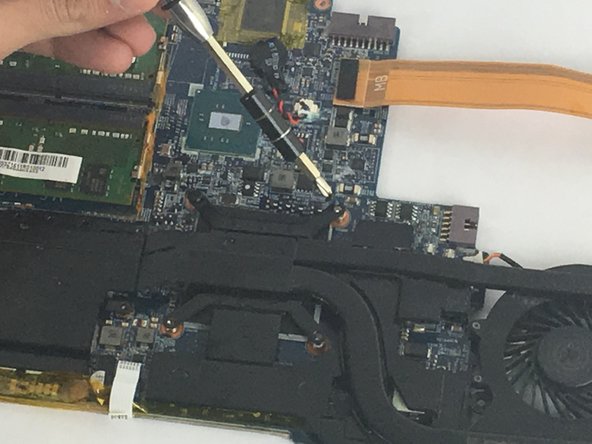
Secondly, be aware that, during steps 13-14, there are a number of additional screws and connectors that are not mentioned, that need to be removed in order to release the motherboard from the laptop housing.

Happy Fixing!

Knight9990 - Reply

fans in the final section combined with copper pipe. Can they be separated? I'm having trouble finding a fan. Where can I buy new fans.

Çağlar Gökçe - Reply

I have replaced both fans on gs60 today, and the instructions worked like charm! Steps 14-16 were unnecessary! Thx!

Konstantin Izmailov - Reply

Add Comment

View Statistics:

Past 24 Hours: 1

Past 7 Days: 6

Past 30 Days: 41

All Time: 6,382