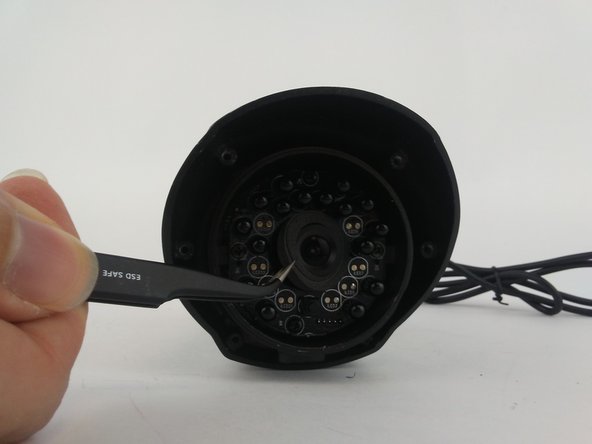
Lorex LW2742 Lens Replacement

What you need

  1. Lorex LW2742 Lens Replacement, Lens: step 1, image 1 of 2 Lorex LW2742 Lens Replacement, Lens: step 1, image 2 of 2
    • Remove the six 10mm Torx T10 screws on the camera face.

  2. Lorex LW2742 Lens Replacement: step 2, image 1 of 1
    • Remove the exterior lens cover.

  3. Lorex LW2742 Lens Replacement: step 3, image 1 of 3 Lorex LW2742 Lens Replacement: step 3, image 2 of 3 Lorex LW2742 Lens Replacement: step 3, image 3 of 3
    • Remove the foam ring around the lens with tweezers.

    • Be aware, the electronic components of the LED board may be compromised if you use your fingers instead of tweezers for this step.

  4. Lorex LW2742 Lens Replacement: step 4, image 1 of 1
    • Remove the two 5mm Phillips #1 screws.

    • Remove the two 8mm Phillips #0 screws.

    • When reassembling, tighten the top and bottom 5mm screws first, followed by the left and right 8mm screws.

  5. Lorex LW2742 Lens Replacement: step 5, image 1 of 1
    • Remove the LED board with tweezers.

    • It is unnecessary to unplug the LED board from internal components for lens replacement.

  6. Lorex LW2742 Lens Replacement: step 6, image 1 of 2 Lorex LW2742 Lens Replacement: step 6, image 2 of 2
    • Use the Phillips #000 to remove the three 3mm screws on the face of the camera lens

  7. Lorex LW2742 Lens Replacement: step 7, image 1 of 1
    • Remove the camera lens.

    • After replacing camera lens and before reassembly it is encouraged to clean new lens surface with a microfiber lens cleaning cloth

Conclusion

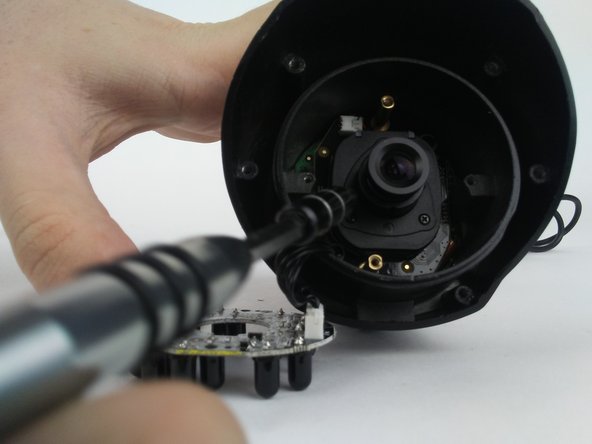
To reassemble your device, follow these instructions in reverse order.

Alex Kusmierz

Member since: 09/26/16

601 Reputation

5 Guides authored

Team

USF Tampa, Team 16-1, Eyestone Fall 2016 Member of USF Tampa, Team 16-1, Eyestone Fall 2016

USFT-EYESTONE-F16S16G1

4 Members

12 Guides authored

0 Comments

Add Comment

View Statistics:

Past 24 Hours: 0

Past 7 Days: 1

Past 30 Days: 6

All Time: 893