Introduction
Follow this guide to remove and replace the USB cable of your webcam. Knowledge of soldering is necessary in order to install a new cable.
What you need
-
-
-
Use tweezers to grasp the white wire connector on the back of the motherboard.
-
Wiggle the connector back and forth to remove it from the socket.
-
-
-
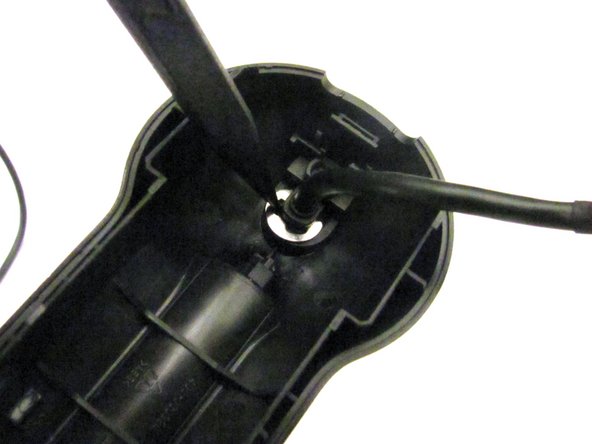
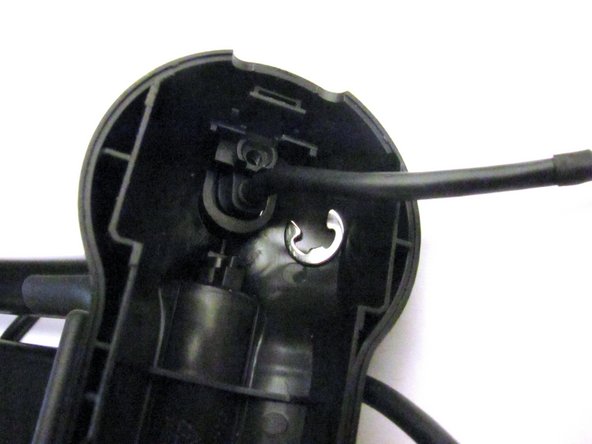
Wedge the pointy end of the spudger between the sliver E-ring and USB attachment base to extract the E-ring and release the USB cable.
-
-
-
Feed the end of the disconnected USB cable through the back cover.
-


To reassemble your device, follow these instructions in reverse order.
To reassemble your device, follow these instructions in reverse order.
Cancel: I did not complete this guide.
3 other people completed this guide.
Team

Cal Poly, Team 12-34, Amido Spring 2013 Member of Cal Poly, Team 12-34, Amido Spring 2013
CPSU-AMIDO-S13S12G34
4 Members
16 Guides authored
4 Comments
Ich habe auch. ich braucht neu Kabel für C910 aber wo finden?
where i baught pro 9000 Cable
In hindsight, I wish I had just ordered a new camera. It is more difficult than these instructions make it look. I found a replacement cable on Amazon. Disassembly and removal of the old cable was easy. Soldering of the single wire on the new cable was difficult. I'm not as steady as I used to be, and the tiny cable and small board made it a difficult task. Once I finished the soldering, reassembly was easy except for the cable clip. Once done and I plugged it in, the camera would not work--USB device not recognized. I don't know whether the cable was incorrect or if I messed something up during the soldering. I finally trashed the old camera and ordered a new Logitech c920s. Wasted $10 on the failed cable and spent $70 on the new camera.
If you are unsure, it might be worth spending the money to upgrade instead of wasting time and money on a failed replacement cable like I did.
As an update to the above-- My repair failed because I had ordered the wrong cable.