
Logitech G700s Scroll Wheel Replacement

What you need

  1. Logitech G700s Scroll Wheel Replacement, Top Case Replacement: step 1, image 1 of 1
    • Remove the batteries from the mouse.

    • Use a plastic opening tool to peel up the four mouse feet.

  2. Logitech G700s Scroll Wheel Replacement: step 2, image 1 of 2 Logitech G700s Scroll Wheel Replacement: step 2, image 2 of 2
    • Remove the five 5.5mm Phillips #00 screws found underneath the mouse feet.

  3. Logitech G700s Scroll Wheel Replacement: step 3, image 1 of 3 Logitech G700s Scroll Wheel Replacement: step 3, image 2 of 3 Logitech G700s Scroll Wheel Replacement: step 3, image 3 of 3
    • Pull the top of the mouse off of the bottom half.

    • There's a wire connecting the two halves.

    • Unplug the programmable buttons from the motherboard.

    • The white pin housing on the motherboard may come off while unplugging. In that case, use tool to pry between at location indicated to separate them and insert the housing back onto the motherboard.

  4. Logitech G700s Scroll Wheel Replacement, Scroll Wheel: step 4, image 1 of 3 Logitech G700s Scroll Wheel Replacement, Scroll Wheel: step 4, image 2 of 3 Logitech G700s Scroll Wheel Replacement, Scroll Wheel: step 4, image 3 of 3
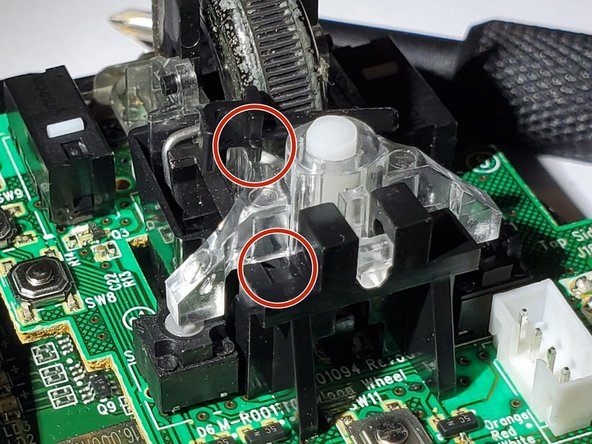
    • Remove the black pin that holds the scroll wheel to the motherboard.

    • The protrusion on the bottom side of the pin clicks into the dimple on the base.

    • I find the easiest way to remove the pin is to use the pointy end of the spudger to push on this end of the pin.

  5. Logitech G700s Scroll Wheel Replacement: step 5, image 1 of 3 Logitech G700s Scroll Wheel Replacement: step 5, image 2 of 3 Logitech G700s Scroll Wheel Replacement: step 5, image 3 of 3
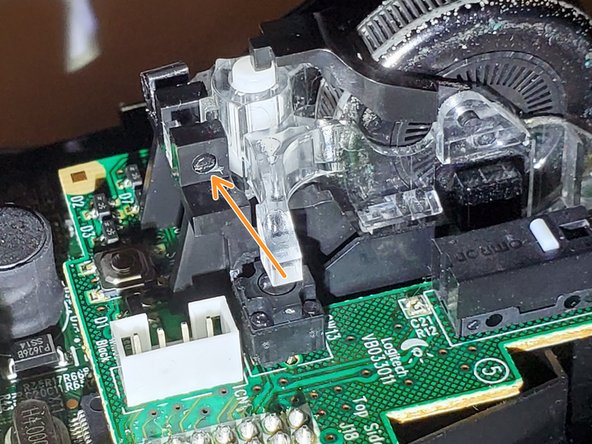
    • First, lift the assembly from the back (green arrow), while keeping the front clear plastic part resting on the springs (red circle).

    • Then, while pulling it toward the back very slightly, carefully lift the front part off the springs.

    • It might jump a little bit from the springs.

    • The clear front part has a hole that attaches onto a clear nibble just below the bracket (blue arrow in second picture) for the scrollwheel to pivot left and right for the left and right scroll function.

    • Though the pivot point isn't attached too deeply. When reassembling, align the circular marks in the front to the springs, then press the back side down into the holder and it will self align.

    • Be careful not to lose the two small springs! They are magnetic and could attach to any magnetic tip screw driver!

    • Leaving a magnet on the metal clip might help to retain the springs, though I haven't tried it.

    • Remove the springs and keep them safe.

Chase Tisinger

Member since: 02/14/18

687 Reputation

5 Guides authored

Team

USF Tampa, Team S2-G3, Nance Spring 2018 Member of USF Tampa, Team S2-G3, Nance Spring 2018

USFT-NANCE-S18S2G3

4 Members

15 Guides authored

View Statistics:

Past 24 Hours: 0

Past 7 Days: 8

Past 30 Days: 51

All Time: 5,972