
Les Paul Wireless Guitar Battery Pack Replacement

What you need

  1. Les Paul Wireless Guitar Battery Pack Replacement, Les Paul Wireless Guitar Body Teardown: step 1, image 1 of 1
    • Remove batteries

  2. Les Paul Wireless Guitar Battery Pack Replacement: step 2, image 1 of 2 Les Paul Wireless Guitar Battery Pack Replacement: step 2, image 2 of 2
    • Remove void warranty sticker

    • The sticker is covering a torx screw

  3. Les Paul Wireless Guitar Battery Pack Replacement: step 3, image 1 of 3 Les Paul Wireless Guitar Battery Pack Replacement: step 3, image 2 of 3 Les Paul Wireless Guitar Battery Pack Replacement: step 3, image 3 of 3
    • Unscrew the 11 screws securing the back of the body using a T10 Torx screwdriver. Each screw is 1 cm long.

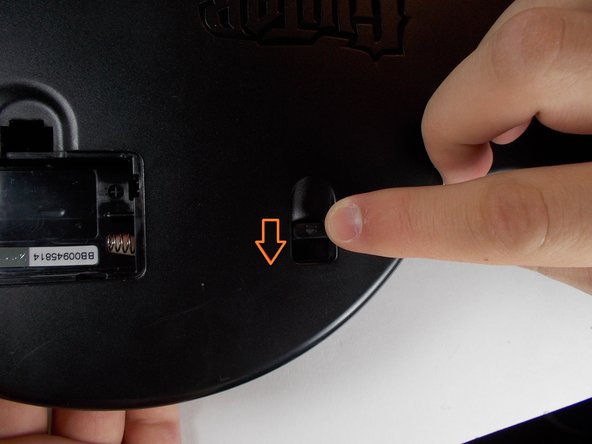
    • Push level, this will detach the back of the guitar from the front.

    • Carefully remove the back of the body

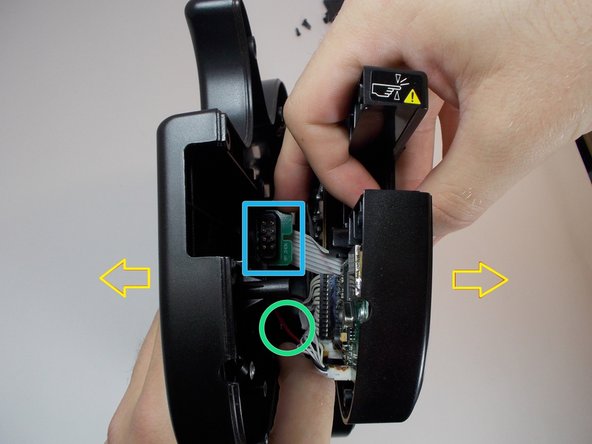
    • The battery pack cord is attached to both sides of the guitar, be careful not to tear it apart.

    • The neck connector may be stuck to the back so be sure to detach it before fully pulling

  4. Les Paul Wireless Guitar Battery Pack Replacement, Battery Pack: step 4, image 1 of 2 Les Paul Wireless Guitar Battery Pack Replacement, Battery Pack: step 4, image 2 of 2
    • Gently move the capacitor around until it breaks off

  5. Les Paul Wireless Guitar Battery Pack Replacement: step 5, image 1 of 1
    • Solder on the new capacitor.

Conclusion

To reassemble your device, follow these instructions in reverse order.

3 other people completed this guide.

Chris

Member since: 10/18/13

881 Reputation

6 Guides authored

2 Comments

What cap is needed?

Martin Samuelsson - Reply

Mine is: 2200uF 10V

Thijs van Ulden -

Add Comment

View Statistics:

Past 24 Hours: 6

Past 7 Days: 27

Past 30 Days: 91

All Time: 12,244