Introduction
This guide describes the process for replacing the heat sink assembly on a Lenovo Yoga 730-13IKB laptop (model number starting with “81CT”).
The heat sink keeps your computer’s Central Processing Unit (CPU) and other components from overheating.
A laptop may overheat (and potentially freeze or shutdown) and make extremely loud or abnormal noises due to a broken heat sink assembly. Cooling fans that are broken or have debris in them can cause strange noises. Debris in the heat sink and/or nonfunctioning cooling fans usually result in overheating. Unplugged connectors, debris, or broken electronics can prevent cooling fans from functioning.
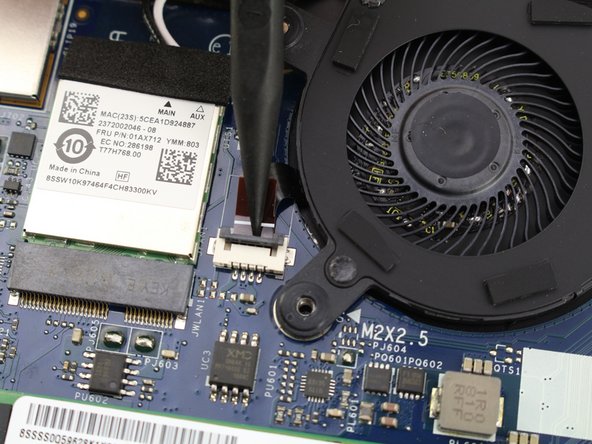
Make sure to clean the heat sink assembly thoroughly before installation. Using compressed air is a great, ESD-safe, way to dislodge debris. No special skills are required, but be careful when operating the ZIF fan connectors.
What you need
-
-
-
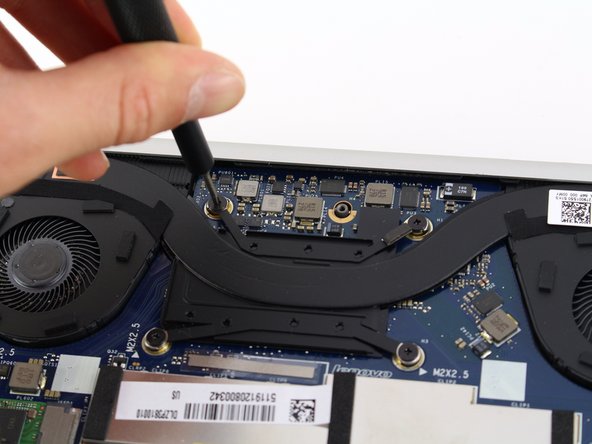
Use a Phillips #00 screwdriver to remove the eight 2.5mm screws securing the heat sink assembly.
-


To reassemble your device, follow these instructions in reverse order.
To reassemble your device, follow these instructions in reverse order.
Cancel: I did not complete this guide.
One other person completed this guide.
Team

Cal Poly, Team S1-G1, White Winter 2020 Member of Cal Poly, Team S1-G1, White Winter 2020
CPSU-WHITE-W20S1G1
3 Members
14 Guides authored