Introduction
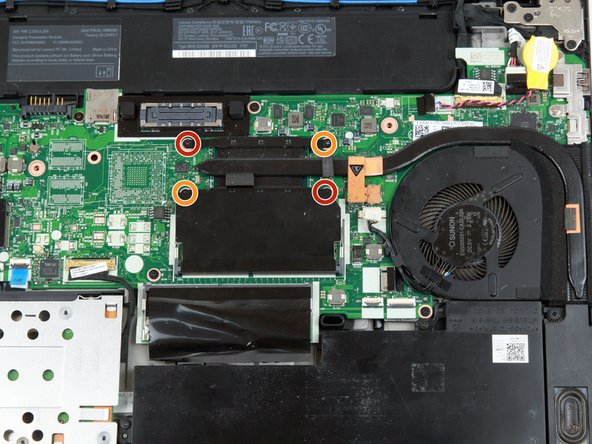
Use this guide to replace the fan and heat sink in a Lenovo ThinkPad T470 laptop.
The heat sink transfers heat from the laptop’s CPU to the fan, which redirects the heat away from the laptop’s internal components. The fan and heat sink work together to prevent the laptop from overheating, which can cause damage to the device.
Some signs that your fan and heat sink may be faulty include audible humming, rattling, or overheating. Before attempting to replace the fan and heat sink, see if you can troubleshoot any fan and heat sink issues. Always clean the thermal paste when separating the heatsink and CPU and reapply fresh paste before reassembling.
Before beginning this guide, make sure to disable the internal battery, power down your device, and disconnect from any external power sources.
What you need
-
-
Place the laptop so that the bottom is facing upwards.
-
Slide the latch on the left side of the battery to the left until it clicks in place.
-
-
-
Use a Phillips #1 screwdriver to loosen the six captive screws on the bottom cover of the laptop.
-
-
-
-
Use your hands to pull up on the back cover and release the plastic clips starting on the bottom side of the battery compartment.
-
Use your hands to pull up on the right side of the bottom cover to release the plastic clips.
-
Use your hands to pull up on the left side of the bottom cover to release the plastic clips.
-
-
-
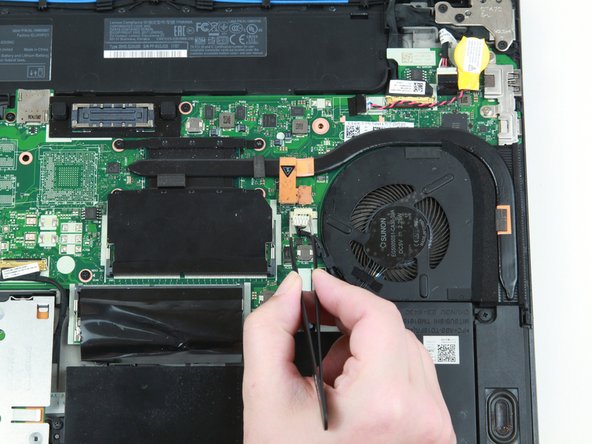
Use a pair of blunt nose tweezers to pull the white fan connector out of its socket on the motherboard.
-
To reassemble your device, follow these instructions in reverse order.
Take your e-waste to an R2 or e-Stewards certified recycler.
Repair didn’t go as planned? Try some basic troubleshooting, or ask our Answers community for help.
To reassemble your device, follow these instructions in reverse order.
Take your e-waste to an R2 or e-Stewards certified recycler.
Repair didn’t go as planned? Try some basic troubleshooting, or ask our Answers community for help.
Cancel: I did not complete this guide.
One other person completed this guide.


