Lenovo Tab S8 Motherboard Replacement

What you need

  1. Lenovo Tab S8 Motherboard Replacement, Battery: step 1, image 1 of 2 Lenovo Tab S8 Motherboard Replacement, Battery: step 1, image 2 of 2
    • Make sure the device is powered off.

    • Gently insert a spudger into one of the bottom corners between the screen and body case.

    • Slide the spudger along the inside of the crack in order to pry the case open.

    • Be careful of the small volume and power buttons when prying the case with the spudger. They are connected with small pieces of plastic that break easily.

    Bought a battery connector gets hot and doesn't turn on

    James Rego - Reply

  2. Lenovo Tab S8 Motherboard Replacement: step 2, image 1 of 3 Lenovo Tab S8 Motherboard Replacement: step 2, image 2 of 3 Lenovo Tab S8 Motherboard Replacement: step 2, image 3 of 3
    • After removing the cover, remove the M1.6 x 2 mm screw from the battery cable with the JIS J000 screwdriver.

    • Using screwdriver bits that do not fit in the screw head might strip the screw and render it unusable.

    • Remove the tape by gently scraping the edges up with the spudger.

  3. Lenovo Tab S8 Motherboard Replacement: step 3, image 1 of 3 Lenovo Tab S8 Motherboard Replacement: step 3, image 2 of 3 Lenovo Tab S8 Motherboard Replacement: step 3, image 3 of 3
    Tool used on this step:
    Plastic Cards
    $2.99
    Buy
    • Before removing the battery, be sure to disconnect the ribbon cables underneath it. The cables might stick to the battery during removal and cause damage.

    • Gently lift the flaps on the four ZIF connectors to disconnect the cables.

    • Use the plastic card to gently pry the battery from the device.

    • There may be glue holding the battery to the device. Use the spudger to detach any glue while the battery is partially raised by the card.

  4. Lenovo Tab S8 Motherboard Replacement, Motherboard: step 4, image 1 of 2 Lenovo Tab S8 Motherboard Replacement, Motherboard: step 4, image 2 of 2
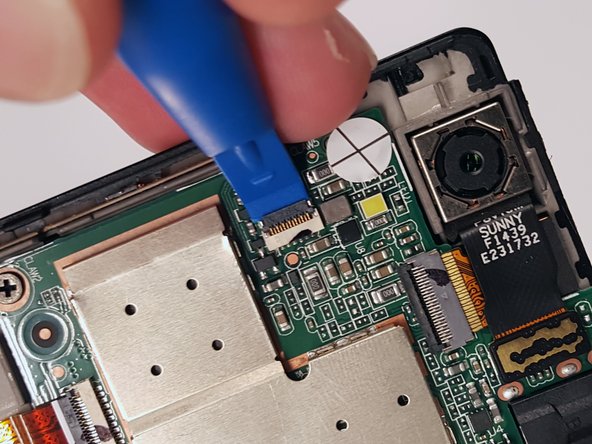
    • Use the tip of a spudger or your fingernail to flip up the small locking flap. Then, you can safely pull the cable out from under the camera.

  5. Lenovo Tab S8 Motherboard Replacement: step 5, image 1 of 2 Lenovo Tab S8 Motherboard Replacement: step 5, image 2 of 2
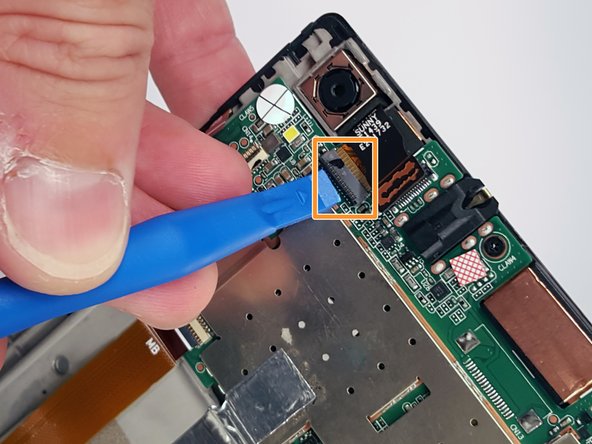
    • Remove the press-fit cable located next to the camera by using opening tool to gently pry it up.

    • Unlock the ZIF connector by lifting the black bar and sliding the ribbon cable out.

  6. Lenovo Tab S8 Motherboard Replacement: step 6, image 1 of 3 Lenovo Tab S8 Motherboard Replacement: step 6, image 2 of 3 Lenovo Tab S8 Motherboard Replacement: step 6, image 3 of 3
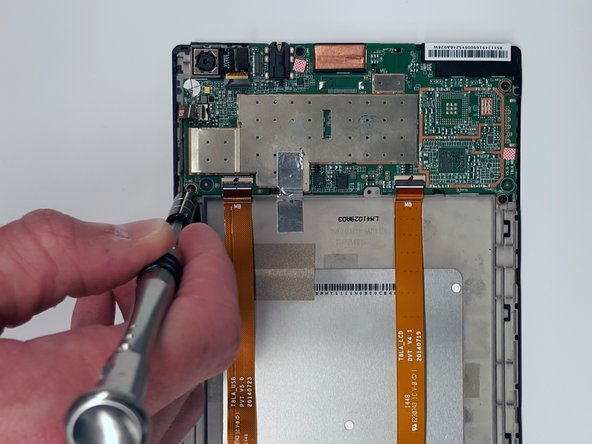
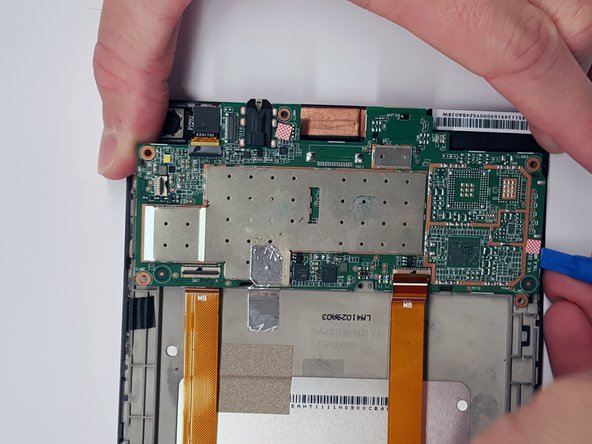
    • Remove the five M1.6 x 2 mm screws from the motherboard with the JIS J000 screwdriver.

    • There is one screw hidden under a circular white sticker directly below the camera. Remove the sticker to take out the screw that is underneath it.

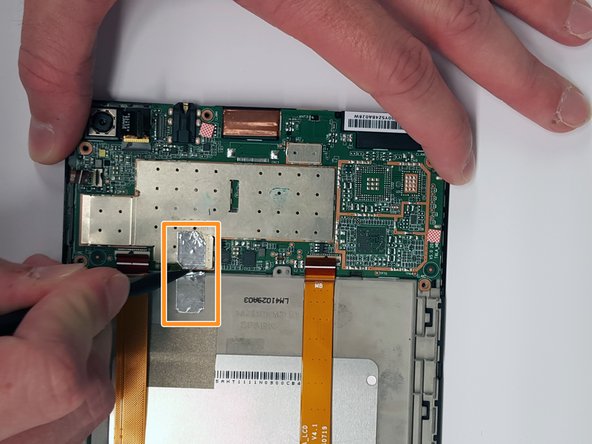
    • Cut or remove the piece of silver tape from the motherboard.

  7. Lenovo Tab S8 Motherboard Replacement: step 7, image 1 of 3 Lenovo Tab S8 Motherboard Replacement: step 7, image 2 of 3 Lenovo Tab S8 Motherboard Replacement: step 7, image 3 of 3
    • Use the spudger to gently pry the motherboard out of the frame from each side.

Conclusion

To reassemble your device, follow these instructions in reverse order.

6 other people completed this guide.

James Albu

Member since: 08/26/15

608 Reputation

2 Guides authored

Team

USF Tampa, Team 3-6, Eyestone Fall 2015 Member of USF Tampa, Team 3-6, Eyestone Fall 2015

USFT-EYESTONE-F15S3G6

3 Members

11 Guides authored

One Comment

hi James,great guide there, I've removed a motherboard from a similar levono tablet and made.good a broken usb port, but now the thing is charging and booting fine, but the screen is unresponsive. No display or touch operation, any ideas? Tia

ga808ry - Reply

Add Comment

View Statistics:

Past 24 Hours: 0

Past 7 Days: 5

Past 30 Days: 16

All Time: 4,710