
Lenovo Tab 2 A8 Rear-Facing Camera Replacement

What you need

  1. Lenovo Tab 2 A8 Rear-Facing Camera Replacement, Removing the Back Panel: step 1, image 1 of 3 Lenovo Tab 2 A8 Rear-Facing Camera Replacement, Removing the Back Panel: step 1, image 2 of 3 Lenovo Tab 2 A8 Rear-Facing Camera Replacement, Removing the Back Panel: step 1, image 3 of 3
    • Place the tablet face down on a soft, stable surface that will protect the screen.

    • Next, Scrape off the seal over the screw in the back of the tablet with a Metal Spudger.

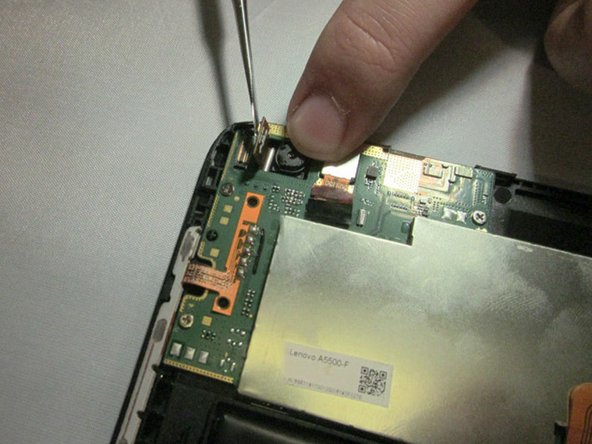
    • Use the Phillips #000 Screwdriver to remove the M1.4 × 2.5 screw.

    • If the seal covering the screw has already been removed, please proceed to the next step in the process.

    • As the screw is small, you may wish to extract it using a pair of tweezers.

  2. Lenovo Tab 2 A8 Rear-Facing Camera Replacement: step 2, image 1 of 3 Lenovo Tab 2 A8 Rear-Facing Camera Replacement: step 2, image 2 of 3 Lenovo Tab 2 A8 Rear-Facing Camera Replacement: step 2, image 3 of 3
    • Starting on the side, work your way around the the tablet to pop off the back cover. You will want to utilize a metal Spudger for this.

    • Some force may be required initially to pry the back cover off.

    • Note that the button tabs for this device are loose inside the case and will fall out when opening.

  3. Lenovo Tab 2 A8 Rear-Facing Camera Replacement, Rear-Facing Camera: step 3, image 1 of 2 Lenovo Tab 2 A8 Rear-Facing Camera Replacement, Rear-Facing Camera: step 3, image 2 of 2
    • Using a spudger, pry upward on the camera connector to free it from the motherboard.

  4. Lenovo Tab 2 A8 Rear-Facing Camera Replacement: step 4, image 1 of 1
    • Use tweezers to grasp the camera connector and lift the camera out of its socket.

Conclusion

To reassemble your device, follow these instructions in reverse order.

4 other people completed this guide.

0 Comments

Add Comment

View Statistics:

Past 24 Hours: 0

Past 7 Days: 0

Past 30 Days: 0

All Time: 585