
Lenovo IdeaPad A1-07 Motherboard Replacement

What you need

  1. Lenovo IdeaPad A1-07 Motherboard Replacement, Back Cover/Midframe: step 1, image 1 of 3 Lenovo IdeaPad A1-07 Motherboard Replacement, Back Cover/Midframe: step 1, image 2 of 3 Lenovo IdeaPad A1-07 Motherboard Replacement, Back Cover/Midframe: step 1, image 3 of 3
    • With the blue plastic opening tool, use the lock screen switch by the volume button as an access point to gently lift the back cover off.

    • Wedge the opening tool until you start hearing the back cover popping off the body of the device.

    • Slide the opening tool down the length of the device.

    • Once it is about half way off, you can use your thumb to pull the rest of the back cover off.

  2. Lenovo IdeaPad A1-07 Motherboard Replacement: step 2, image 1 of 3 Lenovo IdeaPad A1-07 Motherboard Replacement: step 2, image 2 of 3 Lenovo IdeaPad A1-07 Motherboard Replacement: step 2, image 3 of 3
    • Using a Phillips #000 screwdriver, remove all 18 of the 4mm screws.

    • With the blue plastic opening tool, gently wedge the tool between the screen and the gray frame until you feel resistance.

    • Do not force the frame off because you can break off the teeth securing the frame to the screen.

    • Push in the teeth with the blue plastic opening tool, towards the center of the device, and gently pull off the frame.

    • The gray frame will still be connected to the device by a pair of wires from the motherboard to the speaker.

  3. Lenovo IdeaPad A1-07 Motherboard Replacement: step 3, image 1 of 2 Lenovo IdeaPad A1-07 Motherboard Replacement: step 3, image 2 of 2
    • The speaker in the grey frame is connected to the motherboard by the white plastic connector.

    • Disconnect the speaker by separating the two sides of the speaker connector.

  4. Lenovo IdeaPad A1-07 Motherboard Replacement, Battery: step 4, image 1 of 3 Lenovo IdeaPad A1-07 Motherboard Replacement, Battery: step 4, image 2 of 3 Lenovo IdeaPad A1-07 Motherboard Replacement, Battery: step 4, image 3 of 3
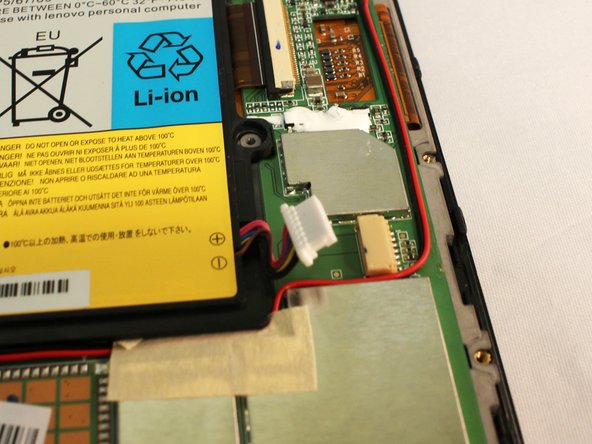
    • Use a plastic opening tool to push the white battery connector out of its socket on the motherboard.

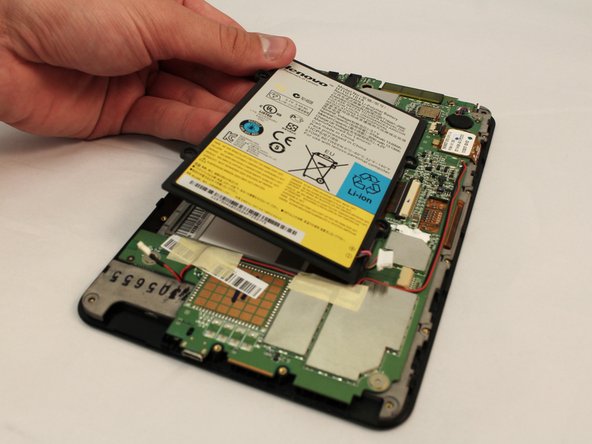
    • Lift the battery away from the device.

  5. Lenovo IdeaPad A1-07 Motherboard Replacement, Motherboard: step 5, image 1 of 3 Lenovo IdeaPad A1-07 Motherboard Replacement, Motherboard: step 5, image 2 of 3 Lenovo IdeaPad A1-07 Motherboard Replacement, Motherboard: step 5, image 3 of 3
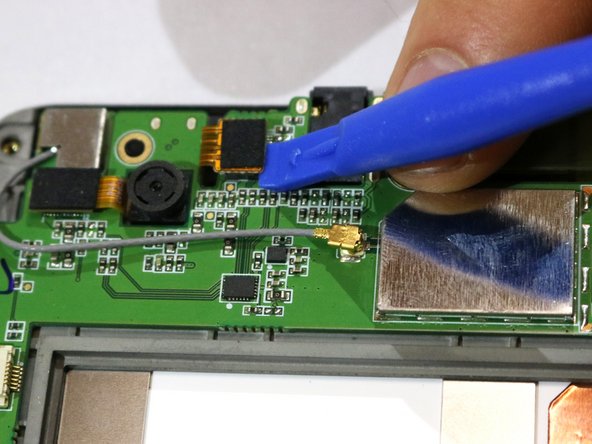
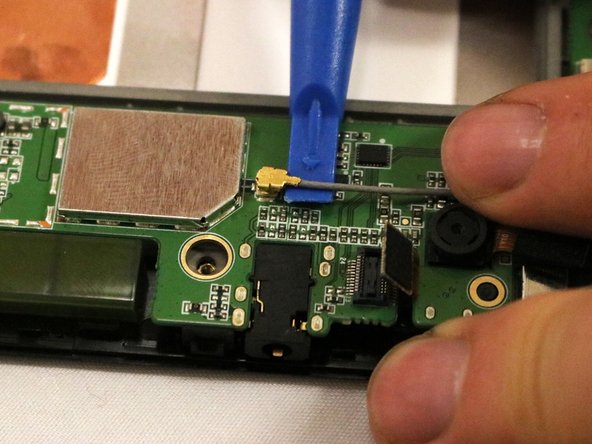
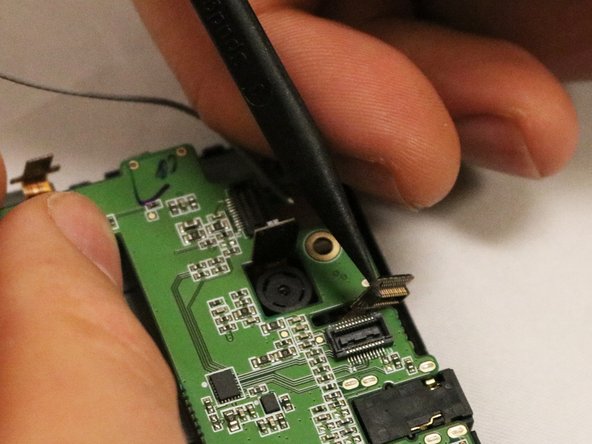
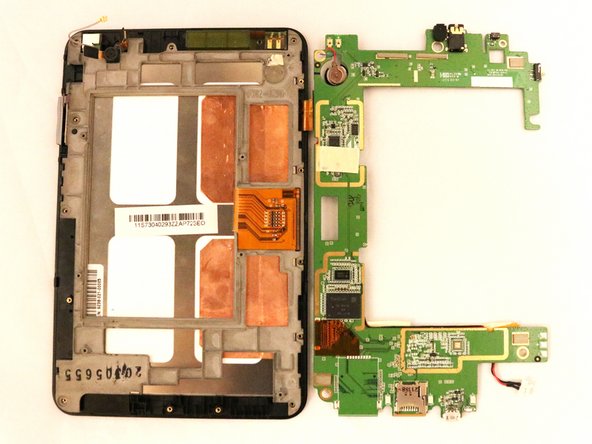
    • Remove the three, 3mm screws holding the motherboard to the screen using the PH #000 screwdriver.

    • You will have to disconnect all the connectors on the motherboard.

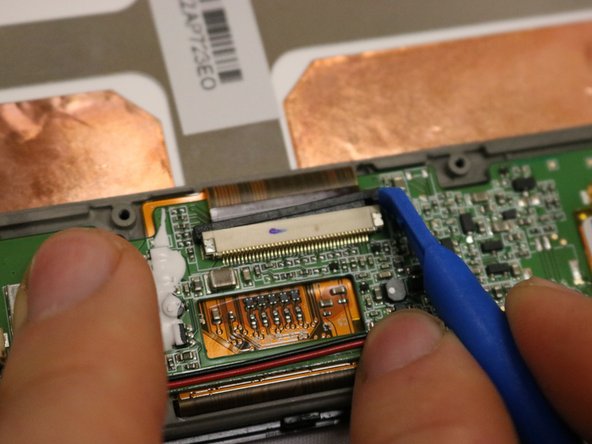
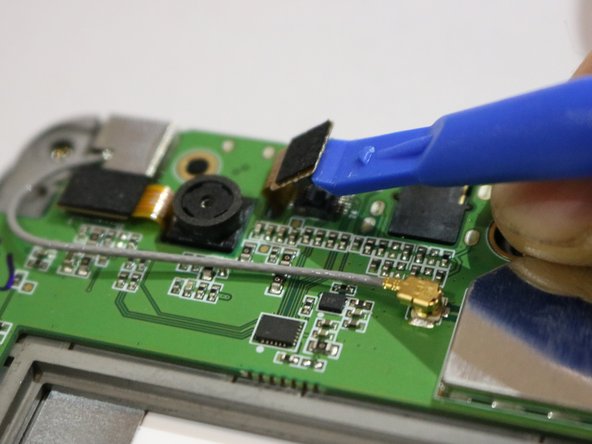
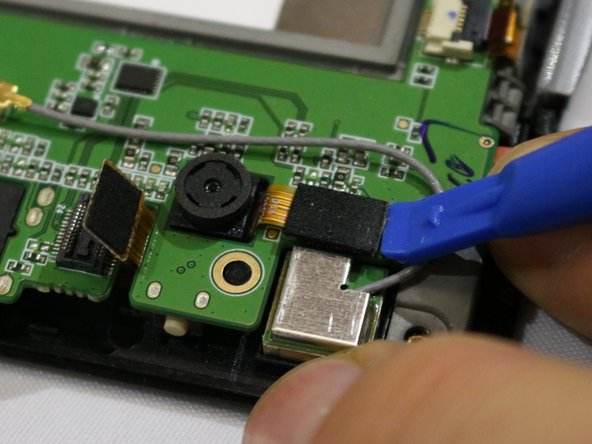
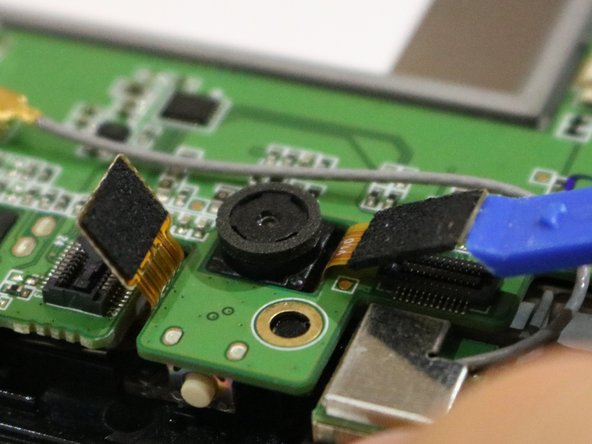
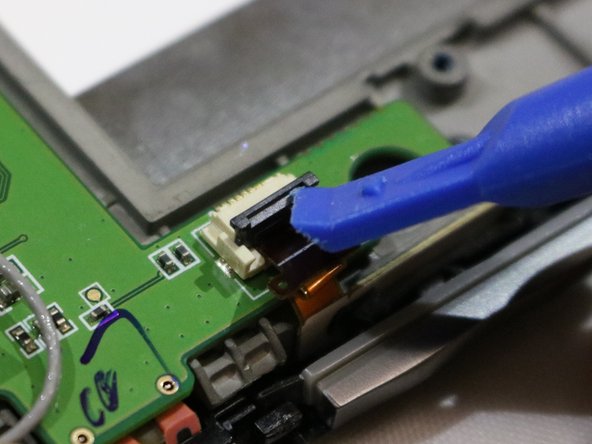
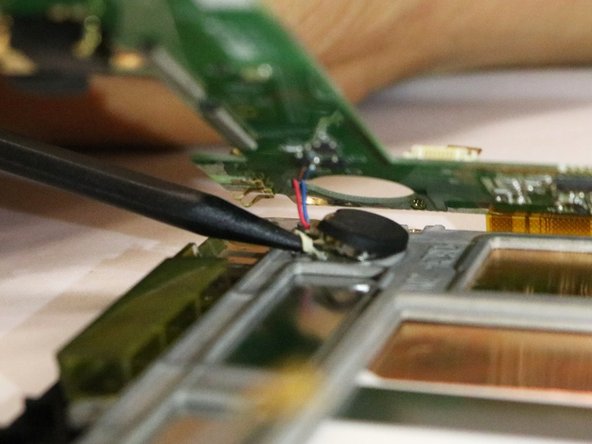
    • The first connector to remove is in the center of the motherboard.

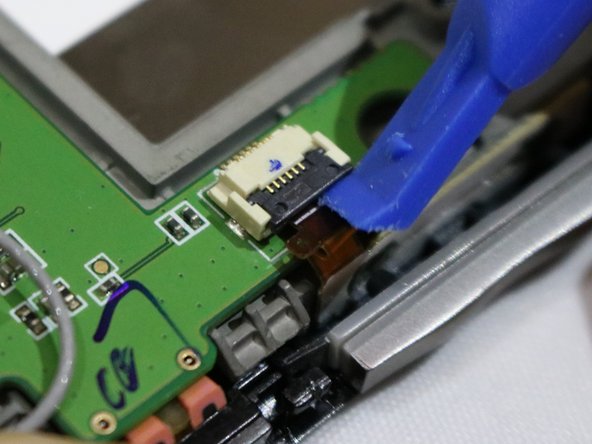
    • Use the blue plastic opening tool to slide the little black retainer, relieving pressure on the brown ribbon cable.

    • Use the blue opening tool to pull the brown ribbon cable out of the connector.

  6. Lenovo IdeaPad A1-07 Motherboard Replacement: step 6, image 1 of 3 Lenovo IdeaPad A1-07 Motherboard Replacement: step 6, image 2 of 3 Lenovo IdeaPad A1-07 Motherboard Replacement: step 6, image 3 of 3
    • On the top left of the motherboard, to the right of the back camera is another connector.

    • To disconnect, use a blue plastic opening tool to lift and pry it up.

    • Once it snaps up out of place, it has been disconnected.

  7. Lenovo IdeaPad A1-07 Motherboard Replacement: step 7, image 1 of 3 Lenovo IdeaPad A1-07 Motherboard Replacement: step 7, image 2 of 3 Lenovo IdeaPad A1-07 Motherboard Replacement: step 7, image 3 of 3
    • Using the same process as the previous connector, disconnect a similar connector just to the left of the back camera.

    • Once it snaps up out of place, it has been disconnected.

  8. Lenovo IdeaPad A1-07 Motherboard Replacement: step 8, image 1 of 3 Lenovo IdeaPad A1-07 Motherboard Replacement: step 8, image 2 of 3 Lenovo IdeaPad A1-07 Motherboard Replacement: step 8, image 3 of 3
    • On the top left of the motherboard, just next to the volume button, is another connector.

    • Use a blue plastic opening tool to lift up on the black lever.

    • Once it is pushed up, the brown ribbon can be pulled out using the spudger.

  9. Lenovo IdeaPad A1-07 Motherboard Replacement: step 9, image 1 of 3 Lenovo IdeaPad A1-07 Motherboard Replacement: step 9, image 2 of 3 Lenovo IdeaPad A1-07 Motherboard Replacement: step 9, image 3 of 3
    • The final connector is a grey cable with a gold tip called the coaxial cable.

    • To disconnect, slide the blue plastic opening tool up to the base of the tip.

    • Twist the opening tool to gently lift up the coaxial cable.

    • The coaxial cable is snapped in tightly and may take a little bit of force.

  10. Lenovo IdeaPad A1-07 Motherboard Replacement: step 10, image 1 of 3 Lenovo IdeaPad A1-07 Motherboard Replacement: step 10, image 2 of 3 Lenovo IdeaPad A1-07 Motherboard Replacement: step 10, image 3 of 3
    • While lifting the motherboard, you need to push the connector heads down through the holes that they come through.

    • With the cameras oriented on top, there will still be one ribbon on the right of the motherboard connected to the screen.

    • Simply lift the motherboard on the left side and flip it over to the right like turning a page.

  11. Lenovo IdeaPad A1-07 Motherboard Replacement: step 11, image 1 of 3 Lenovo IdeaPad A1-07 Motherboard Replacement: step 11, image 2 of 3 Lenovo IdeaPad A1-07 Motherboard Replacement: step 11, image 3 of 3
    • Once all the connectors are pushed through, the last thing still connecting the motherboard to the screen is the motherboard battery.

    • The connector is fixed to the metal frame by adhesive.

    • Using the black spudger, gently pry up the connector by pulling at the base of the battery.

  12. Lenovo IdeaPad A1-07 Motherboard Replacement: step 12, image 1 of 3 Lenovo IdeaPad A1-07 Motherboard Replacement: step 12, image 2 of 3 Lenovo IdeaPad A1-07 Motherboard Replacement: step 12, image 3 of 3
    • Now you will be free to detach the screen from the front cover.

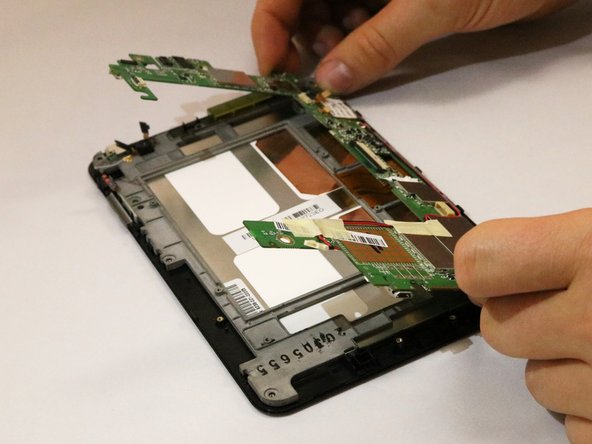
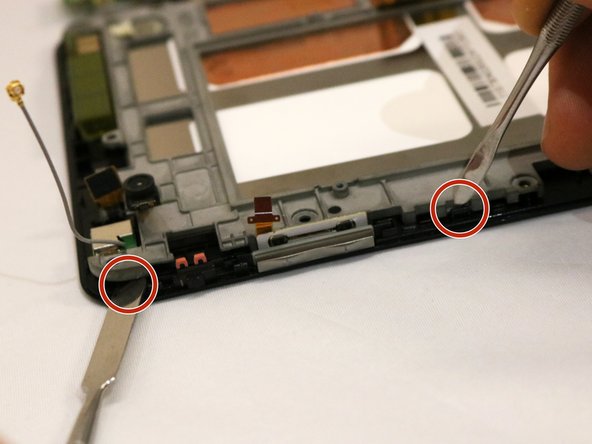
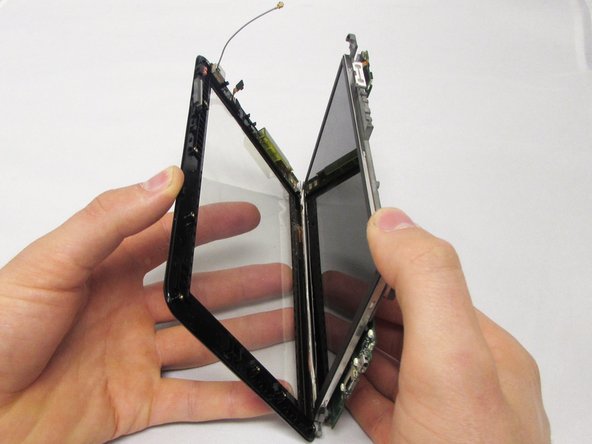
    • With the device face down, you can pull up on the top left side of the metal frame while pushing out a plastic tooth using two metal spudgers.

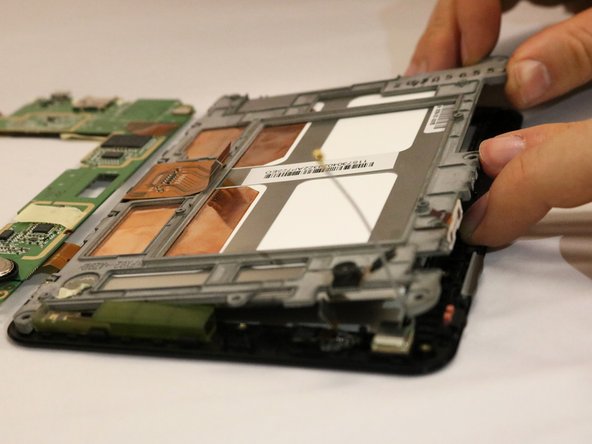
    • Gently lift until you feel the tension of the adhesive on the right side.

    • Once you feel tension, slide a metal spudger tool down the length of the right side to remove the adhesive.

    • Be sure to move the tool straight down the side. There is a thin copper film that can be crumpled if the spudger enters from the side.

  13. Lenovo IdeaPad A1-07 Motherboard Replacement: step 13, image 1 of 1
    • The motherboard is soldered to the black screen frame by an orange film tab.

    • With the screen now removed, it too can be replaced.

Conclusion

To reassemble your device, follow these instructions in reverse order.

One other person completed this guide.

0 Comments

Add Comment

View Statistics:

Past 24 Hours: 0

Past 7 Days: 0

Past 30 Days: 1

All Time: 344