Free Shipping on Domestic Orders $75+

Lenovo IdeaPad 130-15AST Cooling Fan Replacement

What you need

    1. Lenovo IdeaPad 130-15AST Cooling Fan Replacement, DVD/CD Optical Drive: step 1, image 1 of 1
      • Verify that the DVD/CD Tray is free of DVD's and CD's.

      • Using a Phillips #00 screwdriver, remove one of the 6.0mm screws.

      Ask FixBot

      Add Comment

    2. Lenovo IdeaPad 130-15AST Cooling Fan Replacement: step 2, image 1 of 2 Lenovo IdeaPad 130-15AST Cooling Fan Replacement: step 2, image 2 of 2
      • Using the Jimmy Tool, gently pry the DVD/CD Drive away from the case of the laptop.

      Ask FixBot

      Add Comment

    3. Lenovo IdeaPad 130-15AST Cooling Fan Replacement: step 3, image 1 of 1
      • Gently slide the DVD/CD Drive out of the laptop.

      Ask FixBot

      Add Comment

    1. Lenovo IdeaPad 130-15AST Cooling Fan Replacement, Cooling Fan: step 4, image 1 of 1
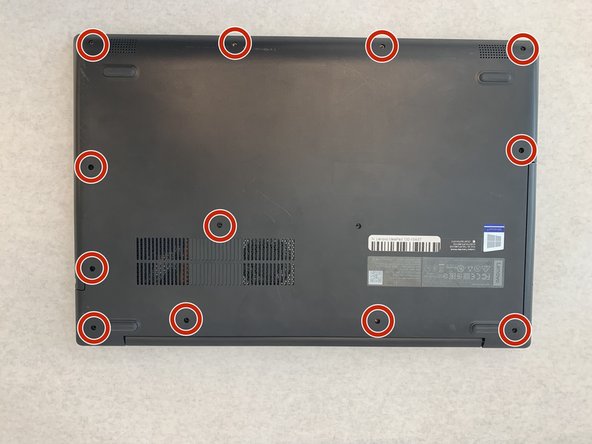
      • Before you proceed, make sure your computer is turned off and it is not connected to any power source.

      • Using a Phillips #1 screwdriver, remove 12 6mm screws.

      Ask FixBot

      Add Comment

    2. Lenovo IdeaPad 130-15AST Cooling Fan Replacement: step 5, image 1 of 3 Lenovo IdeaPad 130-15AST Cooling Fan Replacement: step 5, image 2 of 3 Lenovo IdeaPad 130-15AST Cooling Fan Replacement: step 5, image 3 of 3
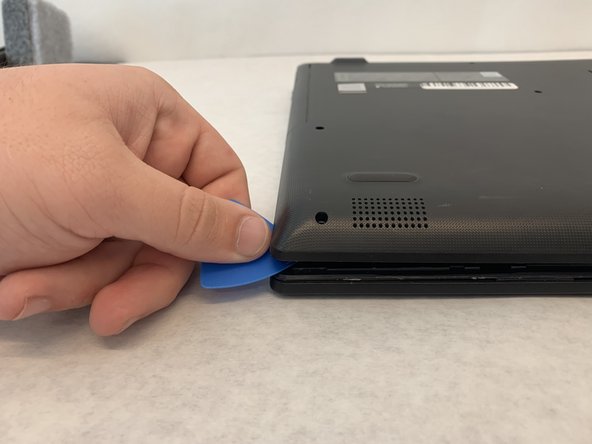
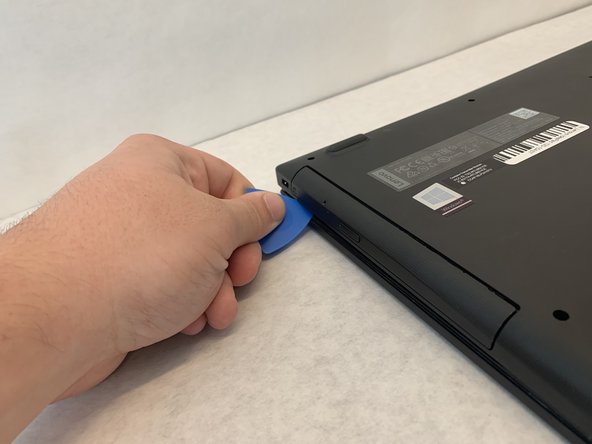
      • Do not try to completely remove this case without ensuring the entire case is free of connection points as this could crack or damage the case.

      • Use a thin, flat edge to gently break the seal of the case.

      Ask FixBot

      Add Comment

    3. Lenovo IdeaPad 130-15AST Cooling Fan Replacement: step 6, image 1 of 2 Lenovo IdeaPad 130-15AST Cooling Fan Replacement: step 6, image 2 of 2
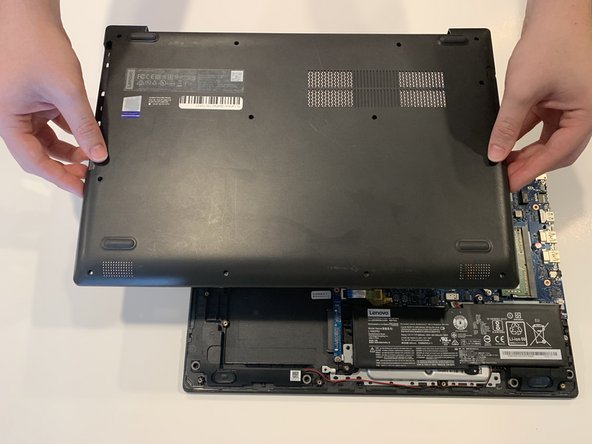
      • Make sure that the back panel is completely free from the laptop.

      • Grab the sides of the back panel of the laptop with two hands. Then separate the panel from the laptop by lifting up. Place the panel aside from the laptop.

      Ask FixBot

      Add Comment

    4. Lenovo IdeaPad 130-15AST Cooling Fan Replacement: step 7, image 1 of 2 Lenovo IdeaPad 130-15AST Cooling Fan Replacement: step 7, image 2 of 2
      • Gently move the wires wrapped around the fan that run along the left side of the cooling fan.

      • These wires are not connected directly to the fan and should not be removed but simply displaced from their original location.

      Ask FixBot

      Add Comment

    5. Lenovo IdeaPad 130-15AST Cooling Fan Replacement: step 8, image 1 of 1
      • Using the Phillips #0 screwdriver, to remove two 4.00mm screws.

      • You will need to save these screws, as a replacement cooling fan does not come with extra screws.

      Ask FixBot

      Add Comment

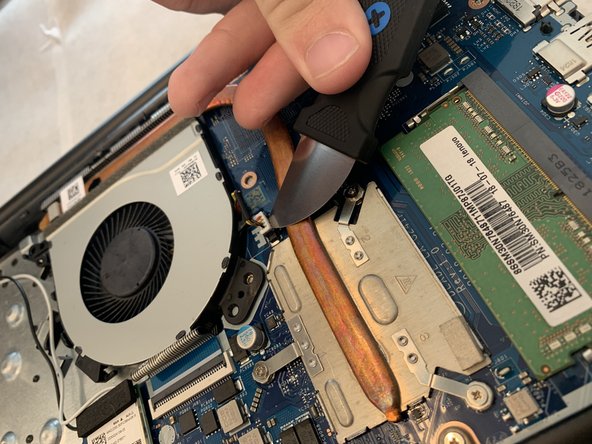
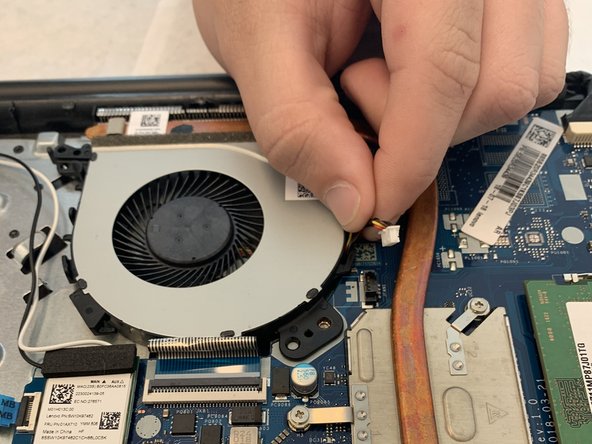
    6. Lenovo IdeaPad 130-15AST Cooling Fan Replacement: step 9, image 1 of 3 Lenovo IdeaPad 130-15AST Cooling Fan Replacement: step 9, image 2 of 3 Lenovo IdeaPad 130-15AST Cooling Fan Replacement: step 9, image 3 of 3
      • Gently use a prying tool to disconnect the cooling fan from the motherboard.

      • After disconnecting the cooling fan, remove the fan from the laptop.

      Ask FixBot

      Add Comment

Conclusion

To reassemble your device, follow these instructions in reverse order.

Cancel: I did not complete this guide.

5 other people completed this guide.

0 Guide Comments

Add Comment

View Statistics:

Past 24 Hours: 1

Past 7 Days: 16

Past 30 Days: 38

All Time: 1,142