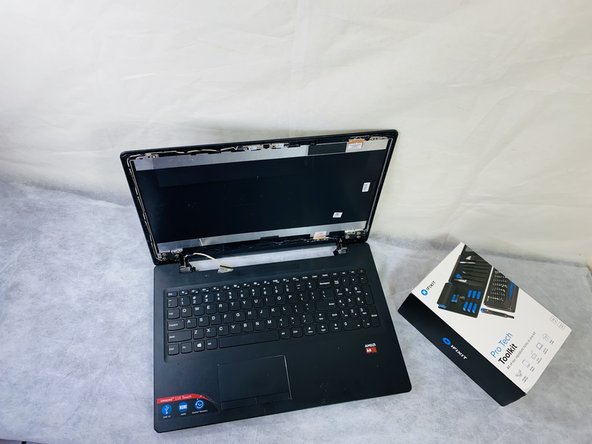
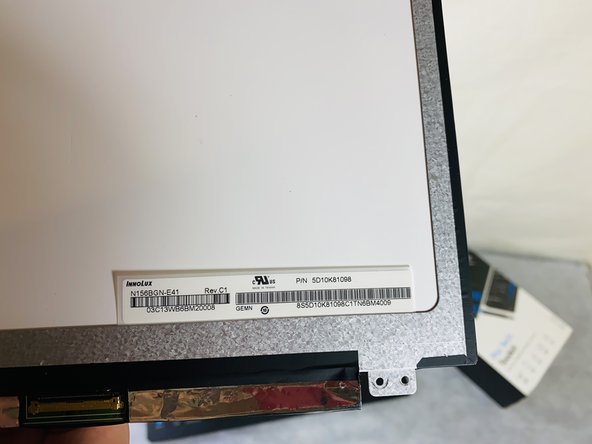
Lenovo IdeaPad 110 Touch-15ACL Screen Replacement

What you need

  1. Lenovo IdeaPad 110 Touch-15ACL Screen Replacement, Back Case: step 1, image 1 of 1
    • Remove the thirteen 6 mm Phillips #0 screws.

  2. Lenovo IdeaPad 110 Touch-15ACL Screen Replacement: step 2, image 1 of 2 Lenovo IdeaPad 110 Touch-15ACL Screen Replacement: step 2, image 2 of 2
    • Use an opening tool to gently disconnect most of the clips on the back panel.

    • DO NOT force the panel out towards the optical disk drive.

  3. Lenovo IdeaPad 110 Touch-15ACL Screen Replacement: step 3, image 1 of 3 Lenovo IdeaPad 110 Touch-15ACL Screen Replacement: step 3, image 2 of 3 Lenovo IdeaPad 110 Touch-15ACL Screen Replacement: step 3, image 3 of 3
    • Pry the disk drive away from the center of the laptop.

    • Don't worry about any screws since we already removed the screws that are associated with the drive.

    • Once the drive is removed, remove the one 2 mm Phillips #0 screw that is now exposed.

  4. Lenovo IdeaPad 110 Touch-15ACL Screen Replacement: step 4, image 1 of 3 Lenovo IdeaPad 110 Touch-15ACL Screen Replacement: step 4, image 2 of 3 Lenovo IdeaPad 110 Touch-15ACL Screen Replacement: step 4, image 3 of 3
    • Unclip any of the remaining clips and remove the back panel.

  5. Lenovo IdeaPad 110 Touch-15ACL Screen Replacement, Battery Replacement: step 5, image 1 of 1
    • Remove the four 6 mm Phillips #0 mounting screws.

  6. Lenovo IdeaPad 110 Touch-15ACL Screen Replacement: step 6, image 1 of 3 Lenovo IdeaPad 110 Touch-15ACL Screen Replacement: step 6, image 2 of 3 Lenovo IdeaPad 110 Touch-15ACL Screen Replacement: step 6, image 3 of 3
    • Detach the wire connected to the motherboard and remove the battery assembly.

  7. Lenovo IdeaPad 110 Touch-15ACL Screen Replacement, Screen Replacement: step 7, image 1 of 3 Lenovo IdeaPad 110 Touch-15ACL Screen Replacement, Screen Replacement: step 7, image 2 of 3 Lenovo IdeaPad 110 Touch-15ACL Screen Replacement, Screen Replacement: step 7, image 3 of 3
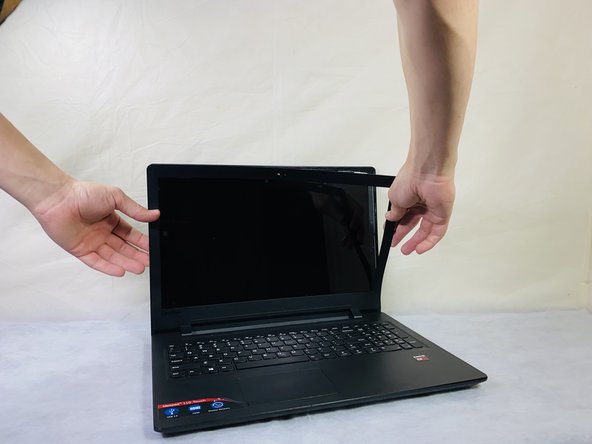
    • Open the laptop so the screen is facing you.

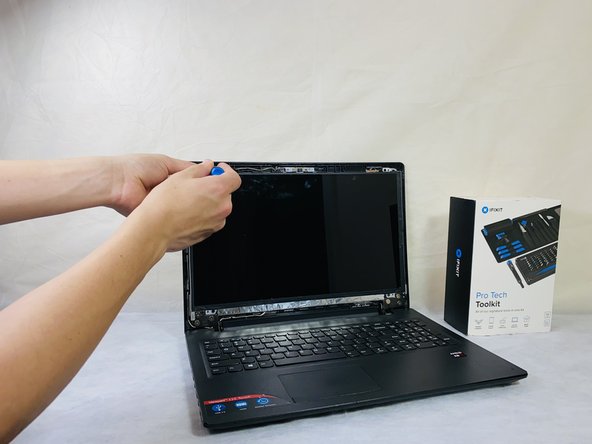
    • Use a pick or spudger to detach the clips around the screen holding the bezel in place.
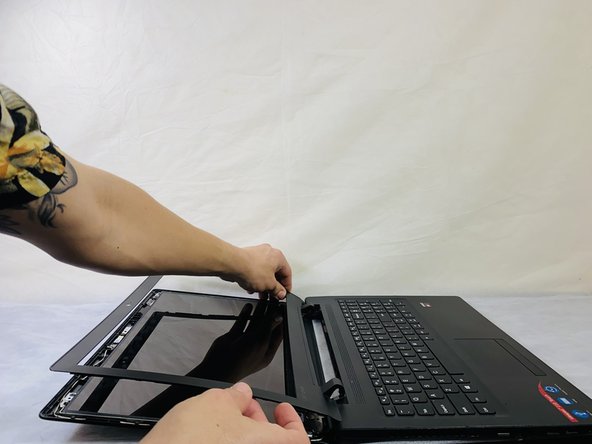
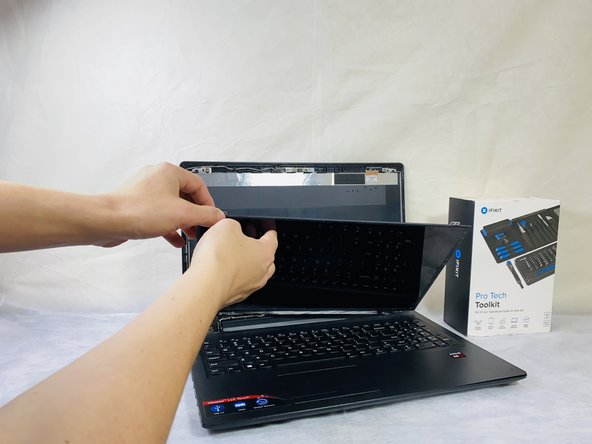
    • Remove the bezel.

  8. Lenovo IdeaPad 110 Touch-15ACL Screen Replacement: step 8, image 1 of 3 Lenovo IdeaPad 110 Touch-15ACL Screen Replacement: step 8, image 2 of 3 Lenovo IdeaPad 110 Touch-15ACL Screen Replacement: step 8, image 3 of 3
    • Remove the four 3 mm size Phillips #0 mounting screws.

  9. Lenovo IdeaPad 110 Touch-15ACL Screen Replacement: step 9, image 1 of 3 Lenovo IdeaPad 110 Touch-15ACL Screen Replacement: step 9, image 2 of 3 Lenovo IdeaPad 110 Touch-15ACL Screen Replacement: step 9, image 3 of 3
    • Carefully detach the display cable that attaches to the display.

    • There may be a piece of tape covering the connection. Be sure to preserve this if possible—it ensures a proper connection to your display.

Conclusion

To reassemble your device, follow these instructions in reverse order.

Clark Beuckman

Member since: 02/22/22

529 Reputation

5 Guides authored

Team

Clemson, Team 2-3, Hunter Spring 2022 Member of Clemson, Team 2-3, Hunter Spring 2022

CLEM-HUNTER-S22S2G3

5 Members

6 Guides authored

0 Comments

Add Comment

View Statistics:

Past 24 Hours: 0

Past 7 Days: 0

Past 30 Days: 7

All Time: 140