
Lenovo Essential G560 RAM Replacement and install 4gb RAM

Dennis Wong and
Last updated on Sep 21, 2024
Views: 12K
View statistics:
- Past 24 Hours:
- 3
- Past 7 Days:
- 25
- Past 30 Days:
- 120
- All Time:
- 12,313
Comments: 5
4 comments on steps, 1 guide comment.
Go to guide commentsCompleted: 5 6
5 people have marked this guide "completed." Will you be next?
6 people have marked this guide "completed." Including you — great job!
Favorites: 3 4
3 people have favorited (and subscribed to) this guide. Will you be next?
4 people have favorited (and subscribed to) this guide — including you!
Featured Student Guide
This guide has been the hard work of our awesome students and is found to be exceptionally cool by the iFixit staff.
Better Introduction
Improve this guide by completing or revising its introduction.
Introduction
Go to step 1 ↓RAM should be replaced if the computer has memory issues. This is sometimes the case when the computer won't boot, or simply runs too slow for comfort.
What you need


-
-
-
Turn off the computer.
-
Disconnect the charging cable from the computer.
-
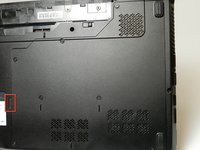
Flip the computer upside down.
 Ask FixBot
-
-
-
Locate the two switches that lock the battery. Push the right-hand switch outward into the "unlocked" position.
-
-
-
Push and hold the left hand switch outward in the "unlocked" position, then gently slide the battery away from the computer.
-
-
-
-
-
-
Remove the seven 5.3 mm Phillips #1 screws holding the back panel in place.
-
-
-
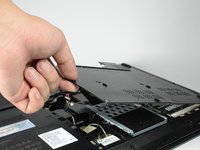
Pull the back panel off using the highlighted tab. The tab should give you enough leverage to pull the panel off smoothly.
-
-
-
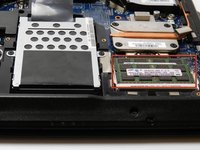
The computer should be open with many of the internal components shown. You can now access the hard drive, the RAM, and the keyboard.
-
-
-
-
-
Locate the RAM Sticks in the computer. They should be in the corner of the laptop.
-
-
-
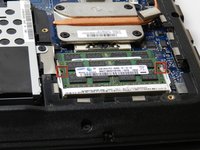
Using a spudger, push one of the metal rods on either side of the RAM stick away from it until you hear a light clicking noise. Repeat this procedure on the other metal rod on the opposite side of the RAM stick.
-
-






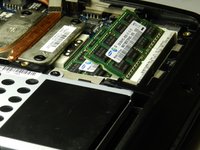

To reassemble your device, follow these instructions in reverse order.
Cancel: I did not complete this guide.
5 other people completed this guide.

Team

Cal Poly, Team 18-40, Regan Winter 2013 Member of Cal Poly, Team 18-40, Regan Winter 2013
CPSU-REGAN-W13S18G40
5 Members
84 Guides authored
1 Guide Comment
maine apne lenovo g560 laptop me crucial 4gb ram add kiya lekin mera system format nahi ho raha h. mujhe kya karna chahiye mujhe email kare. vikasmaddeshiya056@gmail.com
