Introduction
This guide will instruct you on how to replace a cracked or damaged LCD screen and digitizer assembly in your LG G4 smartphone.
It may be necessary to use a pre-cut LG G4 adhesive strip or Tesa 61395 tape to secure your new screen to your device.
What you need
-
-
Remove the rear cover by placing the plastic opening tool in the groove on the bottom left side of the LG G4 and gently prying up.
-
-
-
Place the plastic opening tool at the bottom edge of the battery and lift up. Carefully remove battery with your hands.
-
-
-
Once all the screws have been removed, place the plastic opening tool in the lower left corner and firmly lift the cover up.
-
Detach the cover with your fingers
-
-
-
Remove the following four press-fit connectors with the flat edge of a plastic spudger or opening tool:
-
Front-facing camera connector.
-
Rear-facing camera connector.
-
Digitizer connector.
-
-
-
-
Use a heat gun or iOpener over the auxiliary port to soften the adhesive that secures it to the plastic housing.
-
-
-
Insert a nylon spudger into the auxiliary port and gently pry upward to free the port.
-
-
-
Use a spudger to carefully remove these components and then place them in the new display assembly..
-
-
-
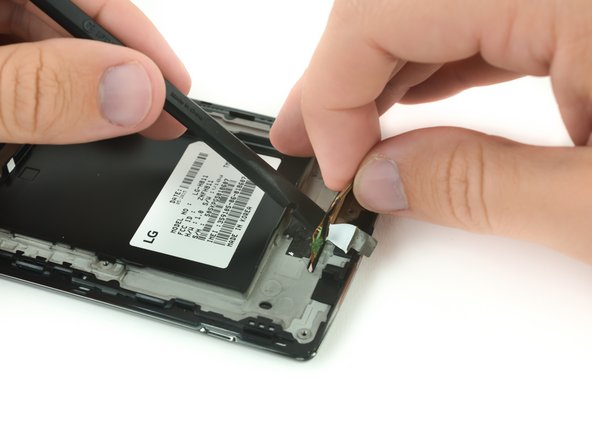
Use a pair of tweezers to remove the adhesive strip that secures the digitizer ribbon cable.
-
-
-
Insert the flat side of a nylon spudger below the digitizer ribbon cable to free it from the adhesive.
-
-
-
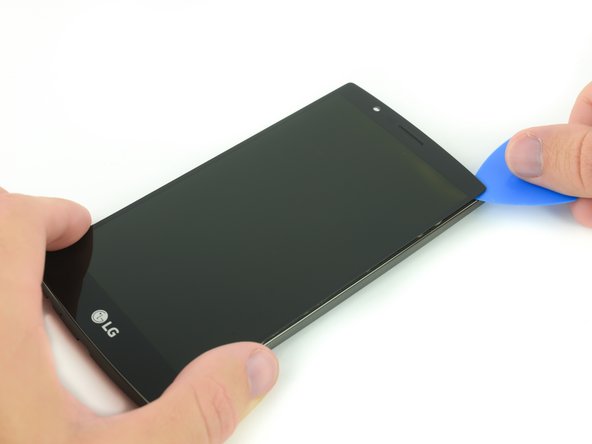
Use a heavy duty suction cup and firmly pull the screen away from the frame to create a small gap.
-
-
-
Insert a plastic opening pick into the gap between the screen and the plastic housing.
-
Slide the plastic opening pick along the border of the screen to break any additional adhesive and free the screen assembly.
-