Kodak EasyShare LS743 Removing LCD Replacement

What you need

  1. Kodak EasyShare LS743 Removing LCD Replacement, Battery: step 1, image 1 of 1
    • Using your fingernail, open the battery cover.

  2. Kodak EasyShare LS743 Removing LCD Replacement: step 2, image 1 of 1
    • Slide the orange latch sideways to eject the battery.

    • Remove the battery from the battery slot.

  3. Kodak EasyShare LS743 Removing LCD Replacement, Kodak EasyShare LS743 Camera Case Disassembly: step 3, image 1 of 3 Kodak EasyShare LS743 Removing LCD Replacement, Kodak EasyShare LS743 Camera Case Disassembly: step 3, image 2 of 3 Kodak EasyShare LS743 Removing LCD Replacement, Kodak EasyShare LS743 Camera Case Disassembly: step 3, image 3 of 3
    • Using a Phillips #00 screwdriver, remove two 5.39 mm screws next to the battery slot.

    • Remove the metal piece holding down the lanyard, then remove the lanyard.

  4. Kodak EasyShare LS743 Removing LCD Replacement: step 4, image 1 of 3 Kodak EasyShare LS743 Removing LCD Replacement: step 4, image 2 of 3 Kodak EasyShare LS743 Removing LCD Replacement: step 4, image 3 of 3
    • Using a Phillips #00 screwdriver, remove seven screws located on the outside case of the camera.

    • One 6.25 mm screw is located on the top right corner, right to the "OK" button.

    • Four 4.45 mm screws are on the bottom of the camera.

    • Two 2.95 mm screws are on the left side of the camera, above the USB port.

  5. Kodak EasyShare LS743 Removing LCD Replacement: step 5, image 1 of 2 Kodak EasyShare LS743 Removing LCD Replacement: step 5, image 2 of 2
    • Carefully remove the rear camera casing.

    • Carefully remove the front camera casing.

  6. Kodak EasyShare LS743 Removing LCD Replacement, Removing LCD: step 6, image 1 of 3 Kodak EasyShare LS743 Removing LCD Replacement, Removing LCD: step 6, image 2 of 3 Kodak EasyShare LS743 Removing LCD Replacement, Removing LCD: step 6, image 3 of 3
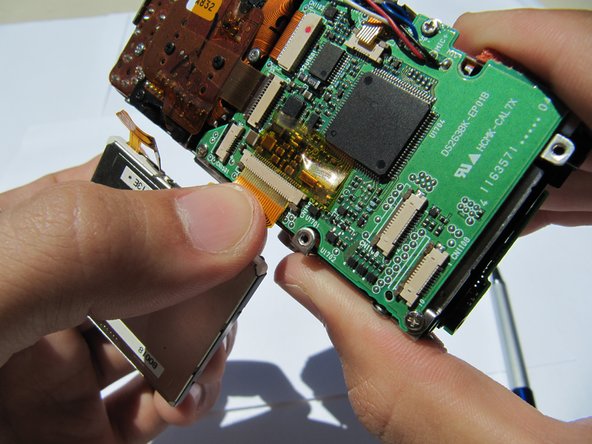
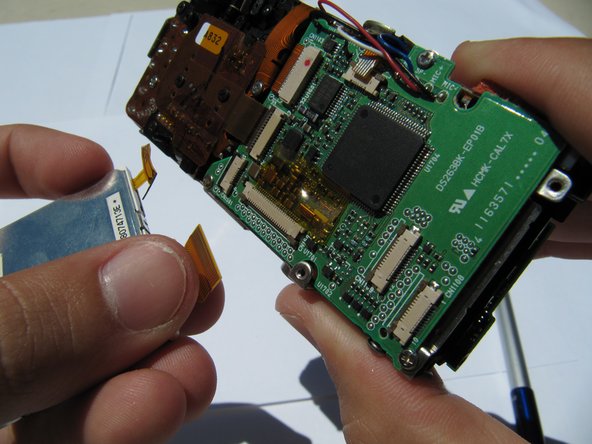
    • Flip up the LCD screen to reveal the two orange ribbon cables.

    • Disconnect the two ribbons cables from their sockets on the motherboard.

Justin Mancherje

Member since: 06/24/10

33 Reputation

2 Guides authored

Team

Cal Poly, Team 2-8, Johann Summer 2010 Member of Cal Poly, Team 2-8, Johann Summer 2010

CPSU-JOHANN-R10S2G8

5 Members

16 Guides authored

View Statistics:

Past 24 Hours: 0

Past 7 Days: 0

Past 30 Days: 4

All Time: 1,230