Introduction
Use this guide to install iFixit's Dual Hard Drive Kit in your Mid 2011 Mac mini.
What you need
-
-
Place your thumbs in the depressions cut into the bottom cover.
-
Rotate the bottom cover counter-clockwise until the white dot painted on the bottom cover is aligned with the ring inscribed on the outer case.
-
-
-
Tilt the mini enough to allow the bottom cover to fall away from the outer case.
-
Remove the bottom cover and set it aside.
-
-
-
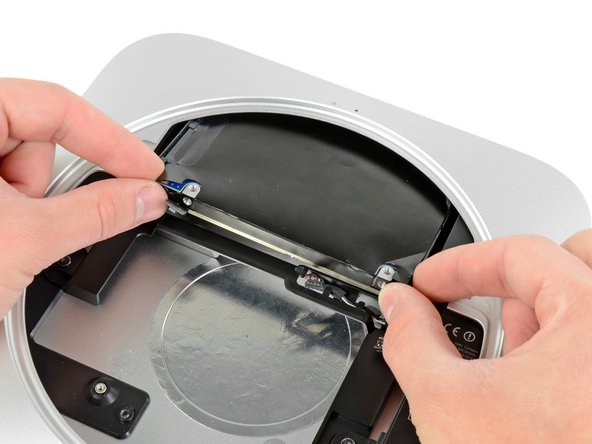
Remove the two 11.3 mm T6 Torx screws securing the fan to the logic board near the antenna plate.
-
-
-
Lift the fan out of the mini for enough clearance to access its connector.
-
Grab all the wires at once and gently pull straight up to disconnect the fan from the logic board.
-
Remove the fan.
-
-
-
Lift the cowling from the end nearest the antenna plate.
-
Rotate the cowling away from the outer case and remove it from the mini.
-
-
-
Remove the following screws securing the antenna plate to the mini:
-
Two 6.6 mm T8 Torx screws
-
Two 5.0 mm T8 Torx or 2.0 mm Hex screws (either screwdriver will work)
-
When putting back together:
-
-
-
Slightly lift the antenna plate from the end closest to the RAM.
-
Carefully pull the antenna plate away from the circular rim of the outer case.
-
-
-
Use the tip of a spudger to carefully pry the antenna connector up from its socket on the AirPort/Bluetooth board.
-
-
-
Use the flat end of a spudger to pry the hard drive connector up from its socket on the logic board.
-
-
-
Use the tip of a spudger to lift the IR sensor connector up and out of its socket on the logic board.
-
-
-
-
Remove the following three screws:
-
One 5.0 mm T8 Torx or 2.0 mm Hex screw (either screwdriver will work)
-
One 16.2 mm T6 Torx screw
-
One 26 mm T6 Torx standoff
-
-
-
Insert the Mac mini Logic Board Removal Tool into the two holes highlighted in red. Be sure it makes contact with the top side of outer case below the logic board before proceeding.
-
Carefully pull the tool toward the I/O board. The logic board and I/O board assembly should slightly slide out of the outer case.
-
Remove the Mac mini Logic Board Removal tool.
-
-
-
Pull the I/O board/logic board assembly out of the outer case enough to access the power connector.
-
Use your fingers to disconnect the DC-In cable from the logic board.
-
Pull the power cable connector toward the front side of the mini.
-
-
-
Carefully slide the logic board assembly out of the mini, minding any cables that may get caught.
-
-
-
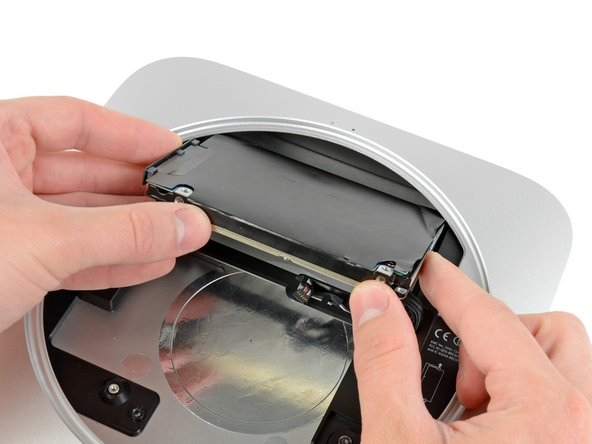
Pull the hard drive away from the front edge of the mini and remove it from the outer case.
-
-
-
Remove the 7.9 mm T6 Torx screw securing the power supply and hard drive tray to the outer case.
-
-
-
Pull the silver metal AC-In socket retainer away from the side of the outer case and remove it from the mini.
-
-
-
Remove the 7.9 mm T6 Torx screw securing the hard drive tray to the outer case.
-
-
-
In the next few steps you will be installing the grommets in the holes located along the brackets boxed in red.
-
-
-
While working from the inner side of the bracket, push the grommet through the hole in the side of the bracket.
-
Be sure the grommet is seated nicely in the bracket as seen in the third picture.
-
Repeat the process for the remaining three grommets on either sides of the brackets.
-
-
-
The bracket with all four grommets installed should look like the bracket shown in this picture.
-
-
-
Bend the ribbon cable along the dotted lines to help the connectors remain seated in their sockets.
-
Bend the ribbon cable 90 degrees at the SSD connector so that it is parallel to the connector.
-
-
-
Use the edge of the SSD connector to put a 90 degree downward bend in the cable along the first large dotted line.
-
Bend the ribbon cable back up 90 degrees along the second large dotted line.
-
-
-
Hold the ribbon cable on either side of the first small dotted line and bend it up 90 degrees.
-
-
-
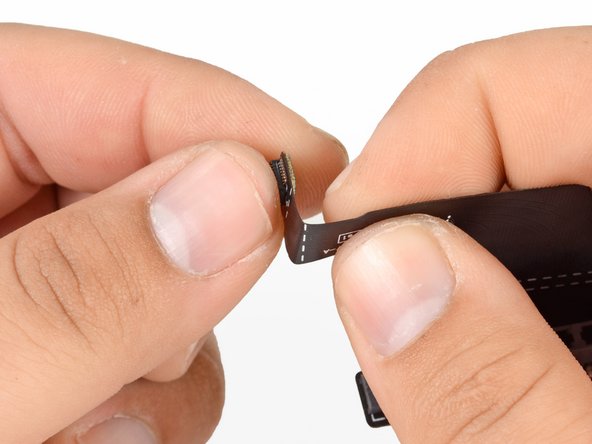
Attach the cable included in the kit to your second hard drive. In our case, we are using an SSD.
-
-
-
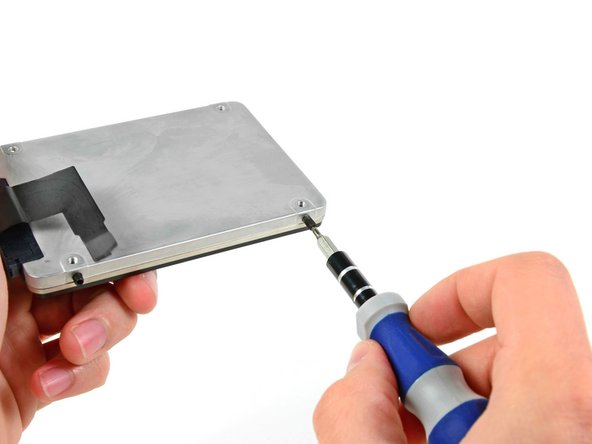
Use a T6 Torx screwdriver to install two of the set screws on the side of the hard drive closest to the end of the hard drive cable that attaches to the logic board.
-
Tighten the screws until they contact the end of the threaded holes in the side of the hard drive. They are shown correctly installed in the third picture.
-
-
-
In the next two steps, you will install the hard drive into its bracket.
-
Push the set screws into the grommets in the bracket and install the hard drive up into its bracket as seen in the second picture.
-
-
-
Use a T6 Torx screwdriver to install the remaining two set screws through the grommets and into the side of the hard drive.
-
-
-
Install the second hard drive assembly into the outer case.
-
Be sure that the mounting holes line up with the threaded holes in the outer case as seen in the second picture.
-
When the logic board is installed, simply connect the second hard drive cable to the free socket on the logic board.
-
-
-
When you start up your machine, you'll see both drives are recognized by the mini.
-
Xbench scores show that if you install hard drives in either the top or the bottom position, their speeds will remain the same.
-
After reassembly, boot the mini into Lion Recovery and use disk utility to erase your SSD. Then install Lion on your SSD. After rebooting, go into system preferences>startup disk and choose your SSD as the startup disk.
-