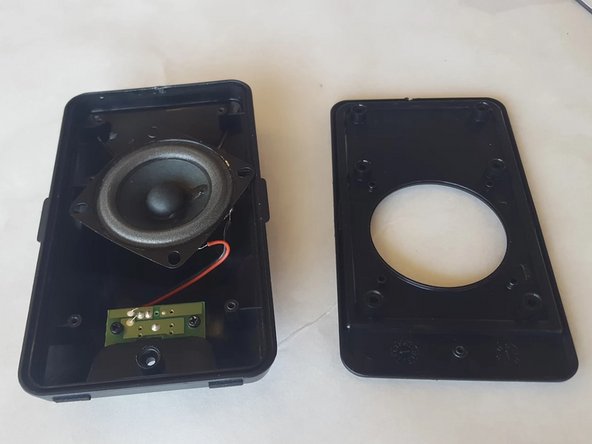
Insignia NS-PLTPSP13 Circuit Board Replacement

What you need

  1. Insignia NS-PLTPSP13 Circuit Board Replacement, Insignia NS-PLTPSP13 Disassembly: step 1, image 1 of 1
    • Use the tweezers to lift the corner of the mesh until a gap is created.
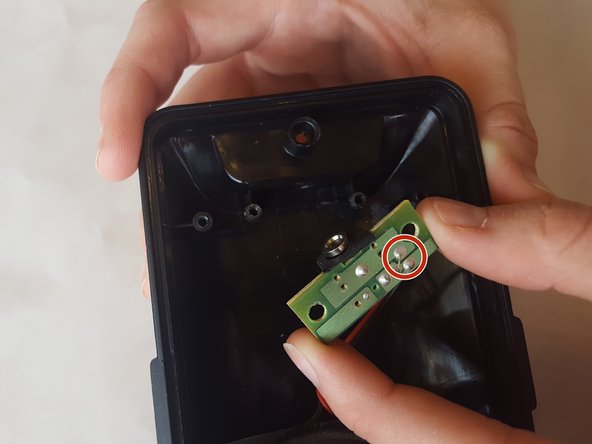
  2. Insignia NS-PLTPSP13 Circuit Board Replacement: step 2, image 1 of 2 Insignia NS-PLTPSP13 Circuit Board Replacement: step 2, image 2 of 2
    • Once there is a gap big enough, insert the metal spudger, and remove the tweezers.

  3. Insignia NS-PLTPSP13 Circuit Board Replacement: step 3, image 1 of 3 Insignia NS-PLTPSP13 Circuit Board Replacement: step 3, image 2 of 3 Insignia NS-PLTPSP13 Circuit Board Replacement: step 3, image 3 of 3
    • Now take the size J0 JIS screwdriver to remove the seven 5 mm screws on the plastic casing of the speaker.

    • Do not forget about the 5mm screw on the backside of the speaker, it may be covered by a white sticker, and it will prevent you from removing the plastic cover.

  4. Insignia NS-PLTPSP13 Circuit Board Replacement: step 4, image 1 of 2 Insignia NS-PLTPSP13 Circuit Board Replacement: step 4, image 2 of 2
    • Once all seven 5mm screws are taken off use the metal spudger again to pry off the plastic casing from the speaker.

  5. Insignia NS-PLTPSP13 Circuit Board Replacement: step 5, image 1 of 2 Insignia NS-PLTPSP13 Circuit Board Replacement: step 5, image 2 of 2
    • To further take apart the speaker, there are also two 5mm screws on the green circuit board which keep the speaker and circuit board attached. Unscrew these with the size J0 JIS screwdriver.

  6. Insignia NS-PLTPSP13 Circuit Board Replacement, Circuit Board: step 6, image 1 of 2 Insignia NS-PLTPSP13 Circuit Board Replacement, Circuit Board: step 6, image 2 of 2
Conclusion

To reassemble your device, follow these instructions in reverse order.

Matt Mrazik

Member since: 03/22/17

201 Reputation

2 Guides authored

Team

0 Comments

Add Comment

View Statistics:

Past 24 Hours: 0

Past 7 Days: 0

Past 30 Days: 5

All Time: 300