What you need
-
-
Turn the boombox around to see the back, and then flip it upside down.
-
Insert a 2.5mm flathead driver into the two holes next to the battery compartment.
-
Turn the driver counterclockwise several times to loosen and pull out the 17mm screw.
-
-
-
Peel off the two black square foams in front of the battery compartment to reveal a screw under each one.
-
-
-
Remove the two 8mm screws using a 2.5mm flathead driver.
-
The front grey panel will loosen up once the final screw is removed.
-
-
-
Turn the boombox on its back.
-
Release the front panel by pushing down on the latches holding the panels together.
-
There are four silver latches on the top side of the panel and one on the bottom.
-
-
-
-
Turn the boombox around to view the back and lift the handle up.
-
Using the same driver with 2.5mm flathead, remove the two 14mm screws under the handle.
-
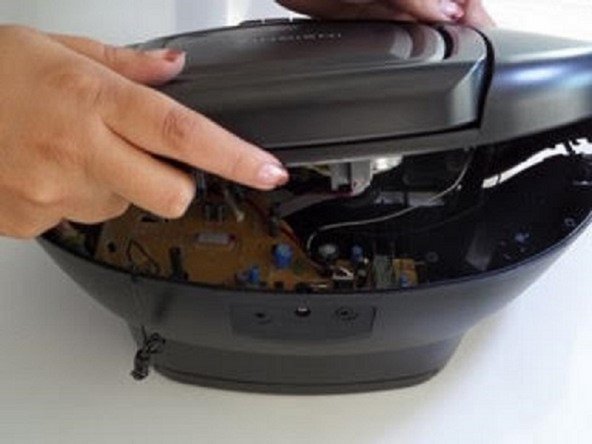
Gently lift the black top but do not pull completely away.
-
-
-
Face the bottom of the opened boombox, and detach the front panel from the back in the following order:
-
-
-
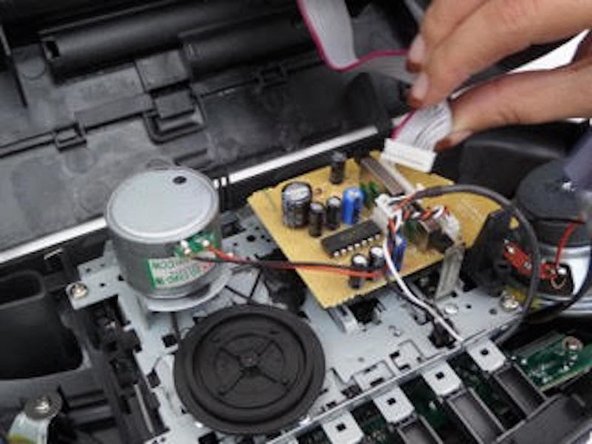
Unplug the 4 wires (1 red, 2 black, 1 white) from the yellow motherboard on the front panel, by pulling upwards.
-
Pull the black tape attached to the white plug on the yellow motherboard by tugging upwards.
-
Detach the thicker, white and pink cord on the smaller yellow plate on the front panel by pulling away.
-
-
-
Facing the inside of the front panel, on the corners of the grey plate, there are four screws. Unscrew these with a phillips 1.
-
-
-
Face the inside of the front panel. Push the buttons down gently to slide the cassette player unit out.
-
-
-
On the back of the unit to the right of the motherboard and between the motor and black circle, there is a rubber band that allows the spinning wheels to spin the knobs. Using tweezers, remove the rubber band and replace it.
-


Team

CSU Fullerton, Team 2-5, Bruce Fall 2016 Member of CSU Fullerton, Team 2-5, Bruce Fall 2016
CSUF-BRUCE-F16S2G5
4 Members
4 Guides authored