
IBM ThinkPad t43 WiFi Card Replacement

What you need

  1. IBM ThinkPad t43 WiFi Card Replacement, WiFi Card: step 1, image 1 of 2 IBM ThinkPad t43 WiFi Card Replacement, WiFi Card: step 1, image 2 of 2
    • Start with the laptop with the side with the logo facing down.

    • Next you will have to remove all the screws in the red circles

    • When removing the screws try to place them in order of removal on a magnetic pad. It will help when you put them back and lowers the chance of losing them

  2. IBM ThinkPad t43 WiFi Card Replacement: step 2, image 1 of 2 IBM ThinkPad t43 WiFi Card Replacement: step 2, image 2 of 2
    • Flip the laptop so that the logo is now facing up

    • locate the lock switch on the front right

    • Slide the switch to the right to unlock the laptop

    • Make sure to unlock the laptop before opening because the keyboard may still be attached

  3. IBM ThinkPad t43 WiFi Card Replacement: step 3, image 1 of 2 IBM ThinkPad t43 WiFi Card Replacement: step 3, image 2 of 2
    • Lift open the laptop

    • The keyboard should be detached from the bottom part of the laptop

    • Hold the edges of the keyboard and slowly pull up until it opens

    • Do not pull off the keyboard completely because there is a ribbon cable attached

  4. IBM ThinkPad t43 WiFi Card Replacement: step 4, image 1 of 2 IBM ThinkPad t43 WiFi Card Replacement: step 4, image 2 of 2
    • Disconnect the ribbon cable by simply lifting it up

  5. IBM ThinkPad t43 WiFi Card Replacement: step 5, image 1 of 1
    • The WiFi-Card is located towards the middle bottom of the laptop

  6. IBM ThinkPad t43 WiFi Card Replacement: step 6, image 1 of 2 IBM ThinkPad t43 WiFi Card Replacement: step 6, image 2 of 2
    • Locate the two wires connected at the top of the WiFi-Card

    • Hold the card down and use the tweezers to pinch the plug and pull up.

  7. IBM ThinkPad t43 WiFi Card Replacement: step 7, image 1 of 3 IBM ThinkPad t43 WiFi Card Replacement: step 7, image 2 of 3 IBM ThinkPad t43 WiFi Card Replacement: step 7, image 3 of 3
    • Place fingers on the two clips holding the card in place

    • Pull the clips outwards until the the card pops up

    • Pull the card out by pulling out away from your body

    • To replace, follow these steps in reverse order

    • Make sure that the side with the short end is on the left when you put it back in.

Conclusion

To reassemble your device, follow these instructions in reverse order.

2 other people completed this guide.

aLiX pIeRRe

Member since: 03/19/18

855 Reputation

5 Guides authored

Team

2 Comments

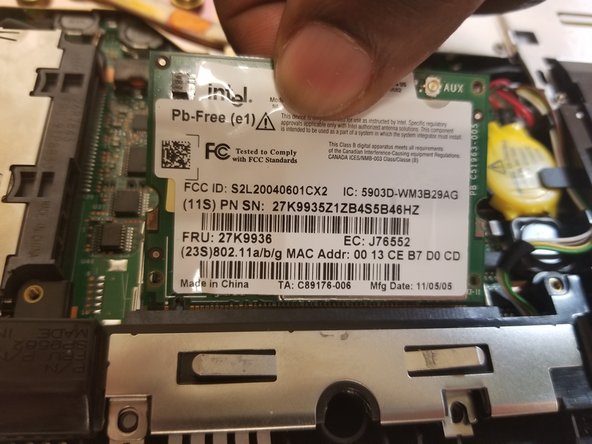
I need to know what's role of the cables AUX and MAIN because i cut one

M a n i _001 - Reply

AUX and MAIN cables are antenna cables. In this laptop there are two antennas, MAIN and AUX.

If you have a soldering iron, simply solder the two parts of the cable you cut and everything is gonna be fine.

I also recommend using shrink tubing to isolate the soldered part.

Note : laptop can work without this câble, but WiFi speed and stability will suffer.

If you can't solder the câble or can't by a new one, you can try to use only main by pluggin the only remaining antena câble to MAIN and leaving AUX unlpuged.

Brendan -

Add Comment

View Statistics:

Past 24 Hours: 3

Past 7 Days: 30

Past 30 Days: 140

All Time: 10,391