Introduction
Is the CMOS battery in your HP IQ506 dead (or need to quickly diagnose a motherboard or BIOS setting problem) this guide will show you how to quickly replace the battery without completely disassembling the system.
Note: While this method eliminates the need to disassemble the system, this procedure is slightly more difficult. If you are unsure this will work for you, disassemble the system to avoid dropping the battery behind the EMI shield. THIS METHOD IS AT LEAST GOING TO HAVE INTERMEDIATE DIFFICULTY.
Caution: ESD-safe tweezers are highly recommended for this procedure. If you do not use these and touch a component of the motherboard it may cause significant damage.
If you drop the CMOS battery, follow this guide to remove it from the system: IQ500 Series full disassembly. Read this before attempting this battery replacement method so you can decide which method you want to use.
What you need
-
-
Lock the system stand before starting. Hold the stand up, while pushing the locking tab towards the side that locked side.
-
-
-
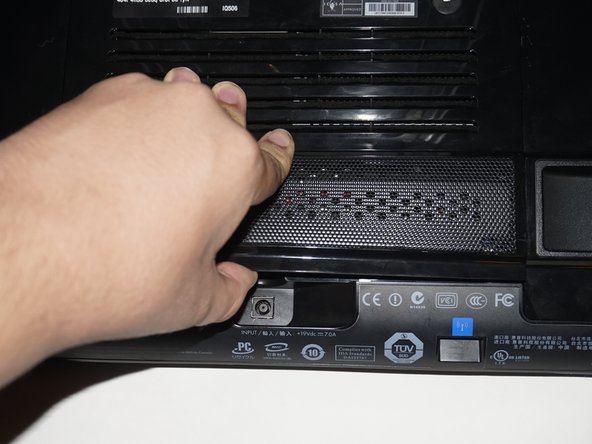
Remove the screw on the RAM door. Once you remove the screw, unclip the door.
-
-
-
Unclip the RAM from the RAM slots in the machine. If possible, put the RAM in a ESD safe area.
-
-
-
-
Remove the stand from the system. Use a Phillips #1 screwdriver to loosen the 4 screws.
-
-
-
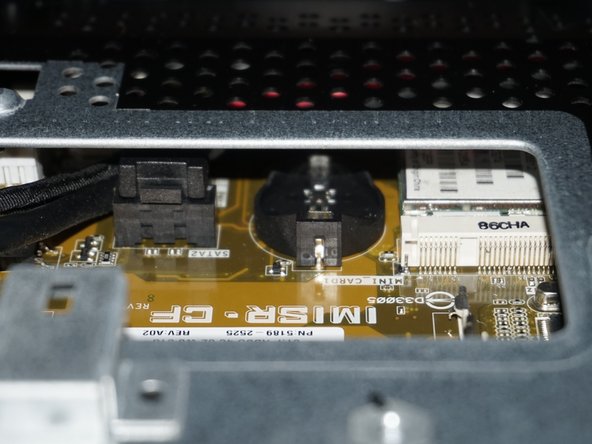
Unclip the top of the battery using your fingernails. You do not need to use tweezers yet.
-
-
-
With the battery unclipped, use the tweezers to grab the battery. Pull the battery out while keeping a firm grip to avoid dropping it.
-
-
-
Put a note on the RAM door out of sight or write when the battery was replaced on the new battery.
-
-
-
Open the new battery, and grab it with the tweezers. Do not grab too much so it will drop, but get enough you can keep a good grip on it.
-
-
-
With the battery in the tweezers, slowly slide the battery in the clip. Once you have it in, put one finger on the battery while removing the tweezers.
-
-
-
With the battery in the clip, push down on the battery to lock it in the system.
-


To reassemble your device, replace the stand, RAM and RAM door. You will also have to reconfigure the BIOS. The machine will resort to checksum defaults since the battery was removed.
To reassemble your device, replace the stand, RAM and RAM door. You will also have to reconfigure the BIOS. The machine will resort to checksum defaults since the battery was removed.
Cancel: I did not complete this guide.
4 other people completed this guide.

Team
