Introduction
The cord stopper is a small but useful part of a sleeping bag's adjustment mechanism. Over time it can get stuck or broken, but don't worry, replacing it is easy! We will walk you through the steps to fix it and get your sleeping bag back to normal in no time!
➡️Before you get started, please check the safety disclaimer at the bottom of the page.
What you need
-
-
-
Locate the damaged or broken stopper.
-
Prepare for removing the old stopper and make sure you have an available replacement.
 Ask FixBot
-
-
-
Press the button of the stopper to open the hole inside (red arrow).
-
Make sure that the circle of the hole is big enough for both cords to pass through.
-
-
-
Cut the cord in half along the middle to make sure it is divided into equal halves.
-
Gently slide down the stopper to remove it.
-
-
-
-
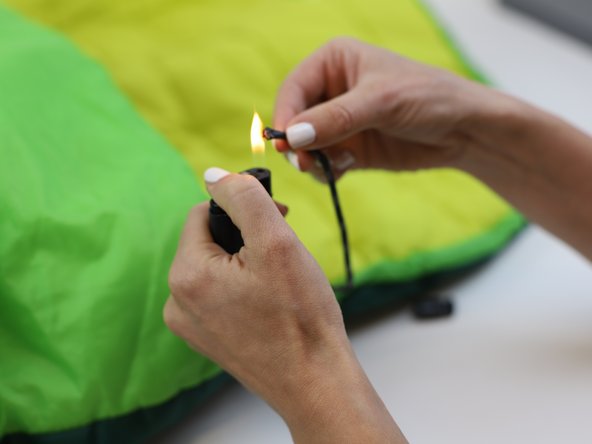
Use a lighter to slightly melt the material of the tip.
-
Tip: The flame does not need to touch the lace directly, only to melt the fibres through indirect heat.
-
While the tips are still semi-melted, press each tip together with your fingers while twisting gently to create a thin, rounded ending.
-
Once the tips have cooled, hold both ends of the cord and insert the new stopper.
-
-
-
Slide the stopper up to the end of the cords and secure the tips with a "sailors" knot.
-
Tip: For the knot:
-
Hold one end of the cord in each hand.
-
Cross the right end over the left end and bring it under, forming the first half of the knot.
-
Cross the left end over the right end (which is now on your left side) and bring it under, completing the knot.
-
Pull both ends to tighten the knot.
-
-
-
Pull the knot to check if it is sturdy enough.
-
Test again, this time pulling both the stopper and the knot.
-
-
-
🛠️🏆👏 Congratulations! The repair is complete, and you're ready to go!
-
-







In need of another repair? Don't worry! Check out our other guides to find quick solutions for your favourite clothing, footwear and equipment!
----------------------------------------
🚨🛠️🩹 IMPORTANT SAFETY NOTICE:
The repair guides provided on this site are intended to help you repair products on your own. While we have put a lot of care into them, all repair work carries some risk:
- Safety Precautions: When repairing your product, take all necessary precautions to ensure your safety. Use appropriate tools and follow the instructions carefully.
- Product Condition: Once your product has been repaired, it may not meet original compliance guidelines anymore and could potentially have issues.
- Liability: We are not responsible for any damage or injury that may occur during the repair process or as a result of using a repaired product. You, as the repairer, assume all risks and responsibilities associated with the repair.
By using these repair guides, you fully acknowledge and accept the potential risks and responsibilities involved.


