Introduction
Sometimes the cable starts peeling just at that place where it meets the AC Adapter. I've met too many people that throw away their chargers because of this. It takes time and patience but repair is possible!
What you need
-
-
Look at the line that goes though the charger. This is all glued with some super adhesive that prevents you from just taking it apart.
-
You will have to cut through that plastic, go all the way around following that small space with your knife.
-
This will take a while, you have to cut the plastic from all the 4 sides. You will notice when you have cut through most of it.
-
-
-
With a flat headed screwdriver start separating both plastic faces from the charger. You need to use a little force to do this.
-
Once you have separated all sides with the screw driver, it still wont come off. This thing is glued to all sides of the plastic.
-
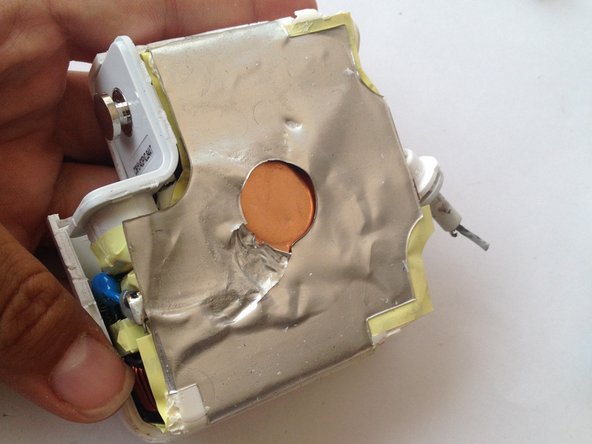
Insert the screwdriver into the top part of the charger and carefully separate the foil from the plastic enclosure. Be careful as to not rip off the foil from the inner part of the charger.
-
-
-
In this step I already took off one face of the plastic enclosure.
-
Use the screwdriver to loosen up the adhesive on both sides of the power connector.
-
Insert the screwdriver on the remaining face of the plastic enclosure and carefully loosen up the rest of the adhesive.
-
-
-
-
Grab the small plastic piece that attaches the cables to the AC charger.
-
Cut the cables as near as you can to the plastic piece.
-
-
-
Take the cable that connects to your mac book and carefully peel it off with a knife or a wire stripper.
-
Untangle the outer wire to reveal the white cable inside.
-
Twirl up nicely the outer wire and peel a small bit of the white cable to join the to the AC charger.
-
-
-
Join both white cable wires and solder them together.
-
The black insulated cover tube on the cable is to isolate the cable later, you can use heat to shrink it.
-
The last pic shows the black insulated cover tube, you can cut it up to fit the length you need.
-
-
-
Proceed to solder the black cable from the AC charger to the outer wire of your Macbook connector.
-
Isolate that wire. You don't need to cover up the whole extension of the outer wire, just enough so that it won't touch the white cable or the circuit board of the AC adapter.
-
-
-
Cover up with electrical tape the rest the white and black/outer cable you just soldered.
-
Join them together with electrical tape as to form one cable and place the AC charger in one of the faces of the plastic enclosure.
-
Take 3 small zip ties and tie them around the cable to stop it from being pulled out of the plastic enclosure.
-
-
-
Put small bits of super glue on the borders of the enclosures. Place the other face of the plastic enclosure and close up the AC charger.
-
-
-
Tie 4 large zip ties to close up the enclosure, 2 on each side.
-
Some people prefer to use only super glue because it looks nicer but zip ties make it safer. If you like it better without the zip ties, take them out after a few hours after the super glue has bonded completely.
-
-
-
Use a glue gun to close up the gap that remains.
-
Don't use too much, just enough so that there is no opening from the outside.
-