Free Shipping on Domestic Orders $75+

How to Repair a Torn Seam in your Patagonia Clothing

Views: 9.5K

View statistics:

Past 24 Hours:
3
Past 7 Days:
45
Past 30 Days:
148
All Time:
9,505
Comments: 1

1 guide comment.

Go to guide comments
Completed: 3

3 people have marked this guide "completed." Will you be next?

Favorites: 11

11 people have favorited (and subscribed to) this guide. Will you be next?

Time Required: 10 - 15 minutes
Difficulty: Easy
Patagonia

Patagonia and iFixit are celebrating the stories we wear by collaborating to provide guides for Patagonia's most popular apparel repairs.

How to Repair a Torn Seam in your Patagonia Clothing

Introduction

Go to step 1 ↓

Feeling torn as to whether or not you have the skills to repair a blown-out seam in your garment? Fear not. This guide will show you how to repair a rip along a straight seam. In this guide we'll be using contrasting thread for visibility. When it comes time to do your actual project, you'll want to use thread that matches the color of your fabric.

Return to the Patagonia Care & Repair homepage.

What you need

    1. How to Repair a Torn Seam in your Patagonia Clothing, How to Repair a Torn Seam in your Patagonia Clothing: step 1, image 1 of 2 How to Repair a Torn Seam in your Patagonia Clothing, How to Repair a Torn Seam in your Patagonia Clothing: step 1, image 2 of 2
      • Examine the damaged seam in your garment, checking for tears and removing any loose threads.

      Ask FixBot

      Add Comment

    2. How to Repair a Torn Seam in your Patagonia Clothing: step 2, image 1 of 3 How to Repair a Torn Seam in your Patagonia Clothing: step 2, image 2 of 3 How to Repair a Torn Seam in your Patagonia Clothing: step 2, image 3 of 3
      • Flatten out the garment around the torn seam, and align the fabric where the seam used to be.

      • Pin the two layers together. Be sure to catch only the two layers of fabric you wish to sew back together.

      Ask FixBot

      Add Comment

    3. How to Repair a Torn Seam in your Patagonia Clothing: step 3, image 1 of 3 How to Repair a Torn Seam in your Patagonia Clothing: step 3, image 2 of 3 How to Repair a Torn Seam in your Patagonia Clothing: step 3, image 3 of 3
      • Open the garment as much as possible, laying the seam flat.

      • Check your alignment and make sure the two edges of your fabric line up.

      • Put the garment in the machine, starting a few inches before the torn seam to overlap with the stitches.

      • Drop the presser foot. Align the first line of stitches with the needle.

      Ask FixBot

      Add Comment

    4. How to Repair a Torn Seam in your Patagonia Clothing: step 4, image 1 of 2 How to Repair a Torn Seam in your Patagonia Clothing: step 4, image 2 of 2
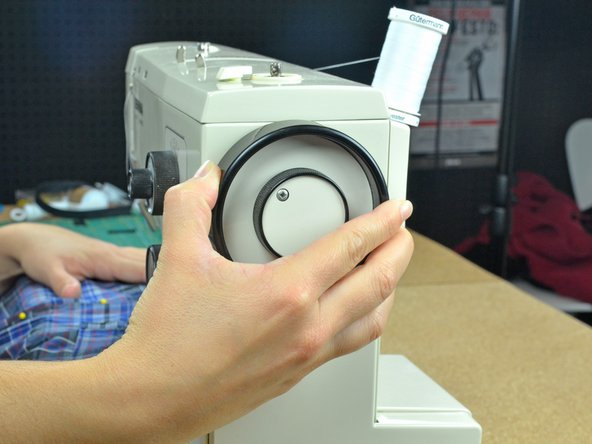
      • Use the balance wheel to sink the needle into the fabric.

      • Only turn the balance wheel in the direction that advances the machine. Turning the wheel the opposite direction can cause tangling or ruin the tension on the machine.

      Ask FixBot

      Add Comment

    5. How to Repair a Torn Seam in your Patagonia Clothing: step 5, image 1 of 2 How to Repair a Torn Seam in your Patagonia Clothing: step 5, image 2 of 2
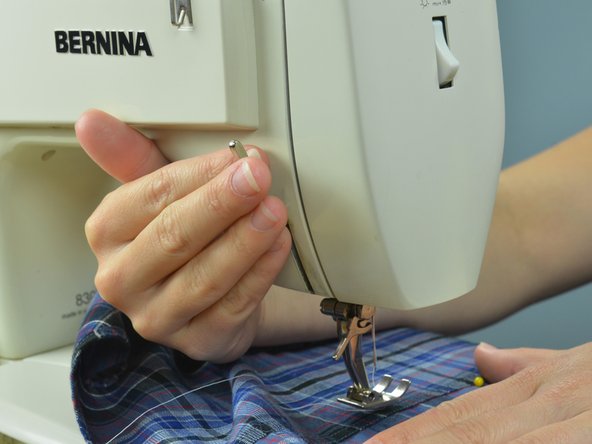
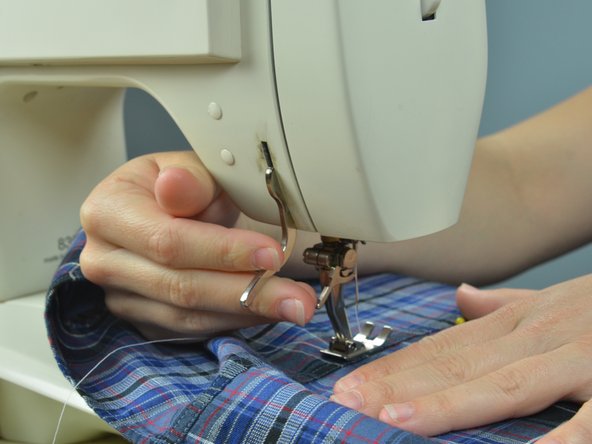
      • Sew along the first line of stitches, removing the pins before you get to them.

      • If you run over the pins, you risk breaking your needle.

      Ask FixBot

      Add Comment

    6. How to Repair a Torn Seam in your Patagonia Clothing: step 6, image 1 of 2 How to Repair a Torn Seam in your Patagonia Clothing: step 6, image 2 of 2
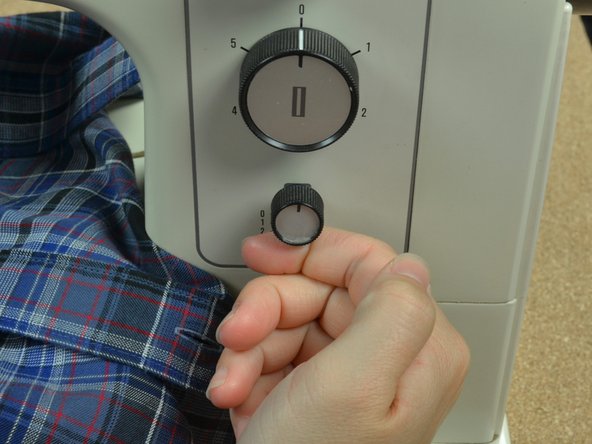
      • When you come to the end of the row of stitches, engage the backstitch function of your machine. Backstitching prevents the seam from unraveling.

      • Backstitch functions vary widely between machines and can come in the form of buttons, levers, and knobs. See your sewing machine manual for instructions on your backstitch function.

      • Depress the pedal slowly. Sew two or three stitches backwards. Release the pedal and disengage the backstitch function.

      Ask FixBot

      Add Comment

    7. How to Repair a Torn Seam in your Patagonia Clothing: step 7, image 1 of 2 How to Repair a Torn Seam in your Patagonia Clothing: step 7, image 2 of 2
      • After you've completely sewn over the torn seam, clip the threads and free the garment from the machine.

      Ask FixBot

      Add Comment

    8. How to Repair a Torn Seam in your Patagonia Clothing: step 8, image 1 of 3 How to Repair a Torn Seam in your Patagonia Clothing: step 8, image 2 of 3 How to Repair a Torn Seam in your Patagonia Clothing: step 8, image 3 of 3
      • Some clothes have two rows of stitching, If your garment does, reposition it in the sewing machine. Drop the needle into the second line of stitches at about where you began sewing your previous seam.

      • Repeat steps 3-7 of this guide to resew the second line of stitches.

      • You do not need to pin this seam, because the first seam will hold the garment in place.

      • If your garment only has a single line of stitches, skip this step and proceed to the next step.

      Ask FixBot

      Add Comment

    9. How to Repair a Torn Seam in your Patagonia Clothing: step 9, image 1 of 1
      • Check that your stitches are straight and secure.

      • Admire your work.

      Ask FixBot

      Add Comment

Finish Line

Cancel: I did not complete this guide.

3 other people completed this guide.

Brittany McCrigler

Member since: 03/05/12

91,111 Reputation

142 Guides authored

Team

iFixit Member of iFixit

Staff

121 Members

72,885 Guides authored

1 Guide Comment

You will want to put the pins in (if possible to catch all layers) perpendicular to the seam you are sewing. Then you can sew right over them without breaking your needle. Plus you will not poke yourself as they come at you in the line of travel!

AMY - Reply Share

Add Comment

View Statistics:

Past 24 Hours: 3

Past 7 Days: 45

Past 30 Days: 148

All Time: 9,505