
Holmes HEH8031 Fan Replacement

What you need

  1. Holmes HEH8031 Fan Replacement, Housing: step 1, image 1 of 1
    • Ensure the device is unplugged from the wall outlet.

  2. Holmes HEH8031 Fan Replacement: step 2, image 1 of 1
    • Remove eight 12-mm Phillips #2 screws from the back cover.

  3. Holmes HEH8031 Fan Replacement: step 3, image 1 of 2 Holmes HEH8031 Fan Replacement: step 3, image 2 of 2
    • Turn heater over so the controls are facing up.

    • Lift the front housing away from the back of the fan and slowly fold the front housing back down to the floor.

    • Internal wires are connected to both halves of the housing. Be careful when separating the housing.

  4. Holmes HEH8031 Fan Replacement, Circuit Board Removal: step 4, image 1 of 1
    • Remove four 12mm Phillips #2 screws from the circuit board.

  5. Holmes HEH8031 Fan Replacement, Circuit Board: step 5, image 1 of 3 Holmes HEH8031 Fan Replacement, Circuit Board: step 5, image 2 of 3 Holmes HEH8031 Fan Replacement, Circuit Board: step 5, image 3 of 3
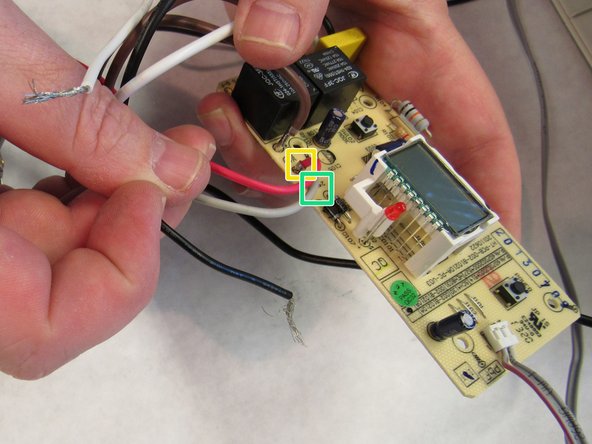
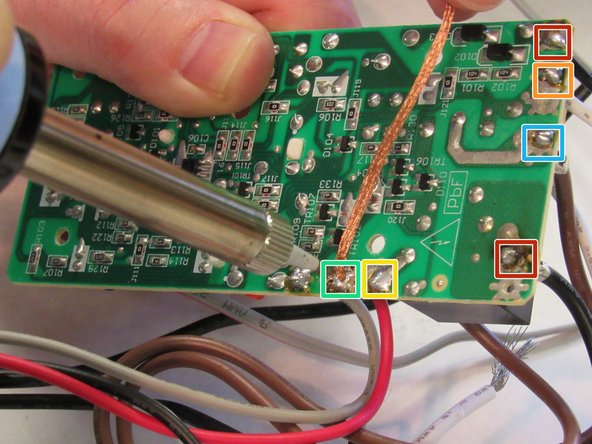
    • Desolder the BLACK wires from the "AC-L" point and "T/S" point.

    • Learn how to solder and desolder connections here!

    • Desolder the WHITE wire from the "AC-N" point.

    • Desolder the RED wire from the "FAN-RED".

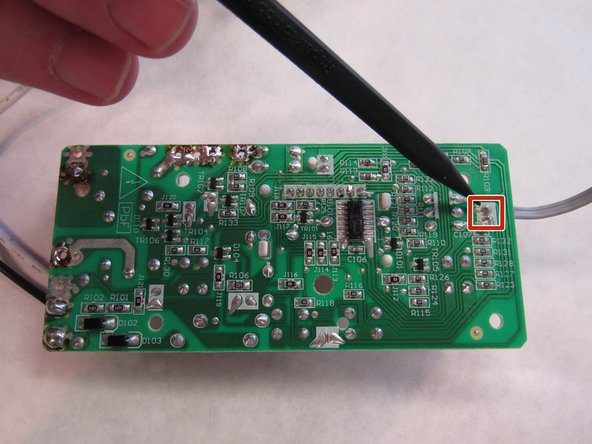
    • Desolder the GREY wire from the "24V" point.

    • Desolder the BROWN wires from "HEAT1," and "HEAT2" points.

    • Be sure to use desoldering wick when you remove the wire connections.

  6. Holmes HEH8031 Fan Replacement: step 6, image 1 of 2 Holmes HEH8031 Fan Replacement: step 6, image 2 of 2
    • Desolder the WHITE connector (attached to the GRAY wire coming of the thermostat) from the "NTC101" point.

  7. Holmes HEH8031 Fan Replacement, Fan: step 7, image 1 of 1
    • Remove two Phillips #2 12mm screws from housing

  8. Holmes HEH8031 Fan Replacement: step 8, image 1 of 1
    • Remove zip tie from wire with pliers

  9. Holmes HEH8031 Fan Replacement: step 9, image 1 of 1
    • Separate fan assembly from heating coil

Conclusion

To reassemble your device, follow these instructions in reverse order.

One other person completed this guide.

Torben Eid

Member since: 10/13/16

1 Reputation

1 Guide authored

Team

IUPUI, Team 2-1, Baechle Fall 2016 Member of IUPUI, Team 2-1, Baechle Fall 2016

IUPUI-BAECHLE-F16S2G1

4 Members

16 Guides authored

0 Comments

Add Comment

View Statistics:

Past 24 Hours: 0

Past 7 Days: 0

Past 30 Days: 2

All Time: 310