Heavily Modified or Homemade 3D Printer Heated Bed Connection Repair

What you need

  1. Heavily Modified or Homemade 3D Printer Heated Bed Connection Repair, Heated Bed: step 1, image 1 of 3 Heavily Modified or Homemade 3D Printer Heated Bed Connection Repair, Heated Bed: step 1, image 2 of 3 Heavily Modified or Homemade 3D Printer Heated Bed Connection Repair, Heated Bed: step 1, image 3 of 3
    • Remove the four screws from the corners of the panel covering the controller board.

    • This may be found in various places of the printer depending on the model of the printer. Refer to the user manual or trace back wires from the heated bed.

    • The most common areas include: mounted on the side of the printer, underneath in the base of the printer, and inside an externally located control box.

  2. Heavily Modified or Homemade 3D Printer Heated Bed Connection Repair: step 2, image 1 of 3 Heavily Modified or Homemade 3D Printer Heated Bed Connection Repair: step 2, image 2 of 3 Heavily Modified or Homemade 3D Printer Heated Bed Connection Repair: step 2, image 3 of 3
    • Locate the heated bed and temperature sensor connectors.

    • Here on the MKS Gen L V1.0 it is labeled H-BED and TB for Heated Bed and Thermistor Bed. Refer to a Pinout Diagram for your specific board.

    • Common boards include: Creality V1/V2, MKS Gen L V1.0/V1.4, MKS BASE V1.4, Einsy RAMBo, SKR v1.3/v1.4.

    • Remove the connection for the heated bed.

    • Remove the connector for the temperature sensor.

  3. Heavily Modified or Homemade 3D Printer Heated Bed Connection Repair: step 3, image 1 of 3 Heavily Modified or Homemade 3D Printer Heated Bed Connection Repair: step 3, image 2 of 3 Heavily Modified or Homemade 3D Printer Heated Bed Connection Repair: step 3, image 3 of 3
    • Remove four thumb nuts from the corners of the heated bed.

    • Use a screwdriver if needed to hold screws in place while removing the thumb nuts.

    • Remove the heated bed from the Y-carriage.

  4. Heavily Modified or Homemade 3D Printer Heated Bed Connection Repair: step 4, image 1 of 3 Heavily Modified or Homemade 3D Printer Heated Bed Connection Repair: step 4, image 2 of 3 Heavily Modified or Homemade 3D Printer Heated Bed Connection Repair: step 4, image 3 of 3
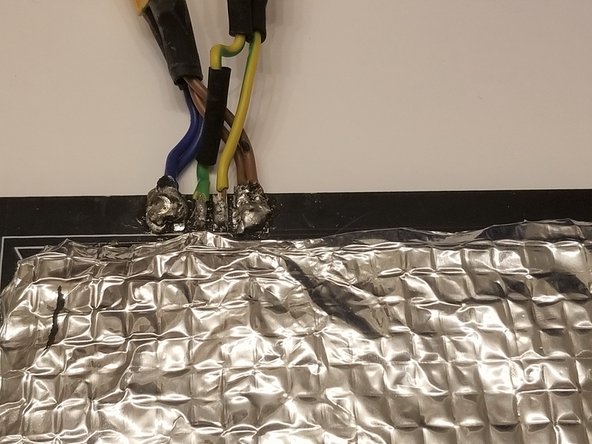
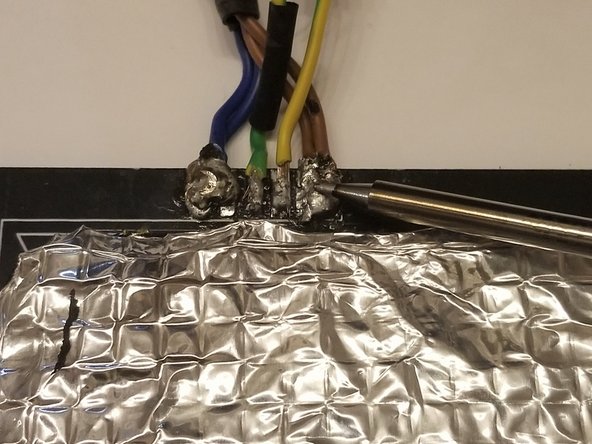
    • Desolder the damaged cable or connector.

    • For tips on soldering, check out the How To Solder and Desolder Connections guide.

    • Take note of the polarity and which is for power and the thermistor. You may wish to take a picture for future reference. Red is for '+', Black is for '-'.

    • Do not use force to remove the cable or connector; doing this may rip the pads out.

    • Work in a well ventilated area when soldering; a fume extractor is recommended.

  5. Heavily Modified or Homemade 3D Printer Heated Bed Connection Repair: step 5, image 1 of 2 Heavily Modified or Homemade 3D Printer Heated Bed Connection Repair: step 5, image 2 of 2
    Tool used on this step:
    Desoldering Pump
    $3.99
    Buy
    • Remove the old solder by using a solder pump or solder wick.

    • Re-tin the pads with fresh solder.

    • Use isopropyl alcohol to clean up any residue around the connections.

  6. Heavily Modified or Homemade 3D Printer Heated Bed Connection Repair: step 6, image 1 of 3 Heavily Modified or Homemade 3D Printer Heated Bed Connection Repair: step 6, image 2 of 3 Heavily Modified or Homemade 3D Printer Heated Bed Connection Repair: step 6, image 3 of 3
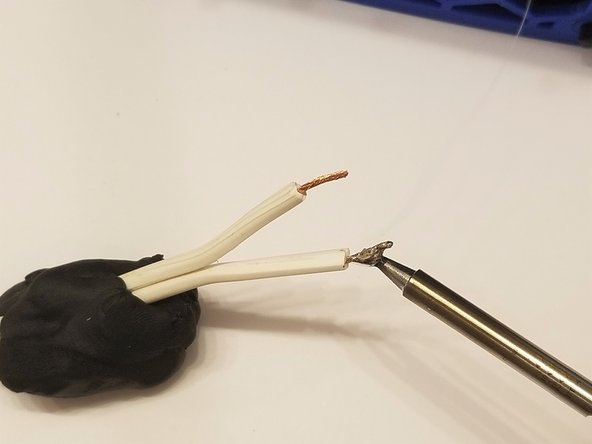
    • Strip 1/4" from both ends of the wire and tin.

    • Check out the following guide for help with stripping wires: Wire Stripping.

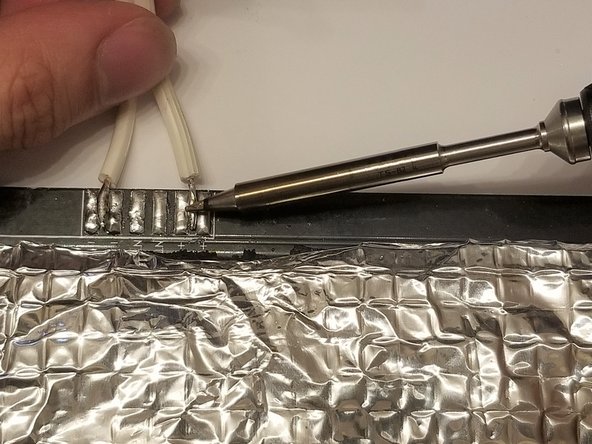
    • Solder the wire onto the heated bed.

    • It is safe to bridge the connection if both pads are of the same polarity.

    • If your bed has a built-in LED, polarity will matter, otherwise it does not matter. Polarity does not matter on thermistor.

  7. Heavily Modified or Homemade 3D Printer Heated Bed Connection Repair: step 7, image 1 of 2 Heavily Modified or Homemade 3D Printer Heated Bed Connection Repair: step 7, image 2 of 2
    • Apply Kapton Tape over the connection.

    • Solder an XT60 connector to the other end of the wire.

    • How to Use Heat Shrink Tubing

    • Terminate cables coming from the controller board with an XT60 connector as well.

    • If polarity matters, take note when soldering the XT60 connector.

  8. Heavily Modified or Homemade 3D Printer Heated Bed Connection Repair: step 8, image 1 of 1
    • Reinstall and calibrate the heated bed.

Conclusion

To reassemble your device, follow these instructions in reverse order. You may want to calibrate the Z-axis end stops and re-level the bed before printing.

Stephen Luu

Member since: 09/17/20

157 Reputation

1 Guide authored

0 Comments

Add Comment

View Statistics:

Past 24 Hours: 1

Past 7 Days: 5

Past 30 Days: 18

All Time: 857