
HTC One X LCD Display & Touch Screen Glass Digitizer Replacement

What you need

Video Overview

  1. HTC One X LCD Display & Touch Screen Glass Digitizer Replacement, LCD Display & Touchscreen: step 1, image 1 of 3 HTC One X LCD Display & Touch Screen Glass Digitizer Replacement, LCD Display & Touchscreen: step 1, image 2 of 3 HTC One X LCD Display & Touch Screen Glass Digitizer Replacement, LCD Display & Touchscreen: step 1, image 3 of 3
    • Switch-off the phone (if you can).

    • Remove the SIM tray.

    • The back cover is sticked to the phone with adhesive tape. Is good to use some hot air to do removing of the back cover easier.

  2. HTC One X LCD Display & Touch Screen Glass Digitizer Replacement: step 2, image 1 of 3 HTC One X LCD Display & Touch Screen Glass Digitizer Replacement: step 2, image 2 of 3 HTC One X LCD Display & Touch Screen Glass Digitizer Replacement: step 2, image 3 of 3
    • Start opening from the bottom side.

    • For separating the back cover, use only plastic tools.

  3. HTC One X LCD Display & Touch Screen Glass Digitizer Replacement: step 3, image 1 of 3 HTC One X LCD Display & Touch Screen Glass Digitizer Replacement: step 3, image 2 of 3 HTC One X LCD Display & Touch Screen Glass Digitizer Replacement: step 3, image 3 of 3
    • The mother board is held by 6x Philips screws.

  4. HTC One X LCD Display & Touch Screen Glass Digitizer Replacement: step 4, image 1 of 3 HTC One X LCD Display & Touch Screen Glass Digitizer Replacement: step 4, image 2 of 3 HTC One X LCD Display & Touch Screen Glass Digitizer Replacement: step 4, image 3 of 3
    • Disconnect one by one:

    • the Touchscreen flex cable

    • the Volume buttons & Mic flex cable

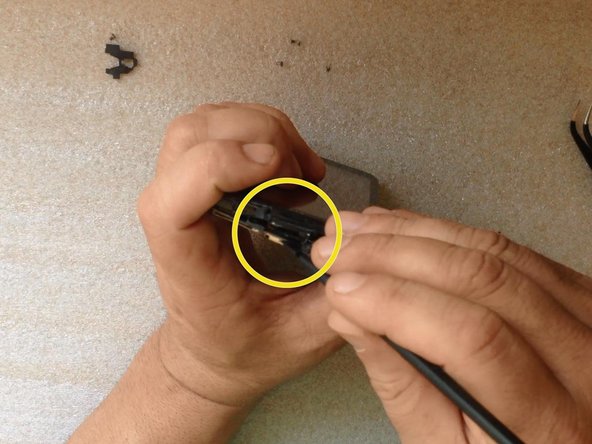
    • the Dock connector flex cable

    • Use a plastic tool to unstick the battery.

    • Be careful, there are flex cables under the battery. At the last picture in this step you can see the cables and the place were is adhesive tape.

    • Now you can separate the Dock flex cable.

  5. HTC One X LCD Display & Touch Screen Glass Digitizer Replacement: step 5, image 1 of 3 HTC One X LCD Display & Touch Screen Glass Digitizer Replacement: step 5, image 2 of 3 HTC One X LCD Display & Touch Screen Glass Digitizer Replacement: step 5, image 3 of 3
    • Lift the motherboard slightly to disconnect two flex cables:

    • the LCD Display flex cable

    • the Navigation buttons flex cable

    • Disconnect the Power On button flex cable at the upper side of the phone

    • Now the mainboard and the battery are free.

    • Disconnect the battery from the mainboard.

  6. HTC One X LCD Display & Touch Screen Glass Digitizer Replacement: step 6, image 1 of 3 HTC One X LCD Display & Touch Screen Glass Digitizer Replacement: step 6, image 2 of 3 HTC One X LCD Display & Touch Screen Glass Digitizer Replacement: step 6, image 3 of 3
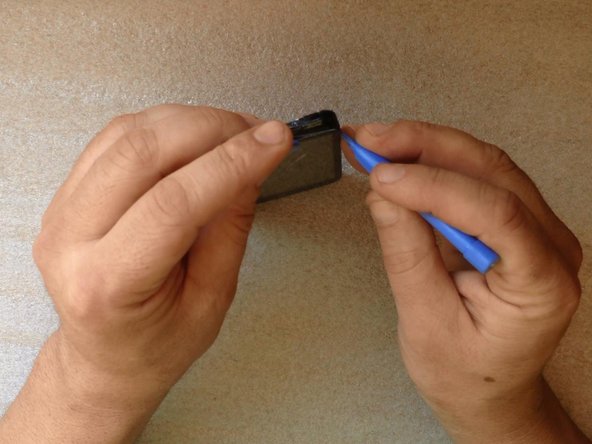
    • At the beginning you can use a cutter to make a room for the plastic tool.

    • During the procedure of the separating the LCD Display & Touchscreen from the frame, you can use again hot air. This will make separating more easy.

  7. HTC One X LCD Display & Touch Screen Glass Digitizer Replacement: step 7, image 1 of 3 HTC One X LCD Display & Touch Screen Glass Digitizer Replacement: step 7, image 2 of 3 HTC One X LCD Display & Touch Screen Glass Digitizer Replacement: step 7, image 3 of 3
    • The original adhesive tape is left on the frame, but I prefer to put new. I put it onto the original.

    • Gently assemble the screen to the frame.

  8. HTC One X LCD Display & Touch Screen Glass Digitizer Replacement: step 8, image 1 of 1

ZFix

Member since: 12/09/13

191,182 Reputation

330 Guides authored

Team

Master Techs Member of Master Techs

Community

322 Members

2,521 Guides authored

View Statistics:

Past 24 Hours: 1

Past 7 Days: 7

Past 30 Days: 13

All Time: 38,259