HP iPAQ H2200 faceplate replacement

What you need

  1. HP iPAQ H2200 faceplate replacement, Battery: step 1, image 1 of 1
    • Press and slide the battery cover tab to remove battery cover.

  2. HP iPAQ H2200 faceplate replacement: step 2, image 1 of 2 HP iPAQ H2200 faceplate replacement: step 2, image 2 of 2
    • Pull on the black tab to lift the battery out of the battery compartment.

  3. HP iPAQ H2200 faceplate replacement, Main Board: step 3, image 1 of 1
    • Remove the stylus by sliding it out of the slot.

  4. HP iPAQ H2200 faceplate replacement: step 4, image 1 of 1
    • Remove the CF card by sliding it out of the slot at the top of the device.

  5. HP iPAQ H2200 faceplate replacement: step 5, image 1 of 1
    • Press down and push the black side strips toward the top of the device to remove them.

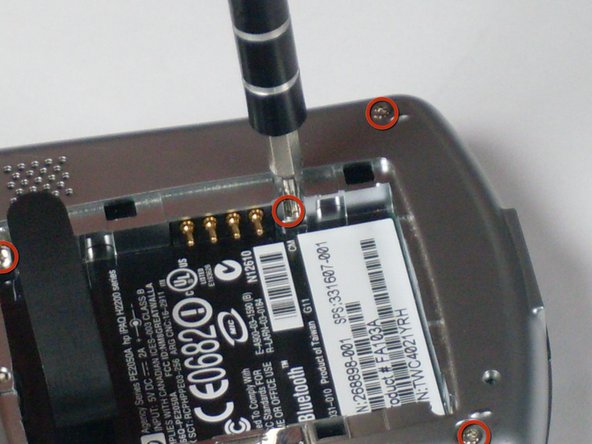
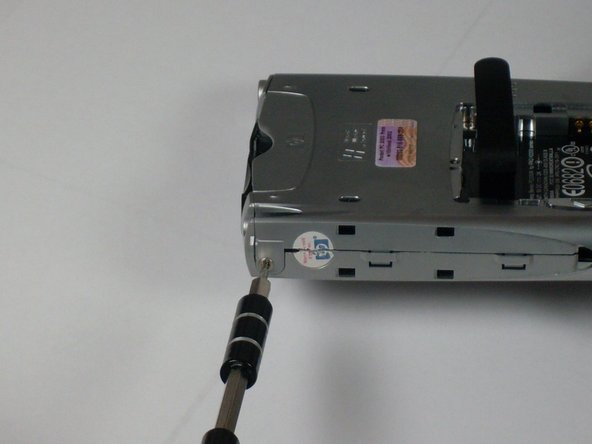
  6. HP iPAQ H2200 faceplate replacement: step 6, image 1 of 3 HP iPAQ H2200 faceplate replacement: step 6, image 2 of 3 HP iPAQ H2200 faceplate replacement: step 6, image 3 of 3
    • Using the T5 Torx screwdriver, remove all six screws on the back and all screws on each side of the device.

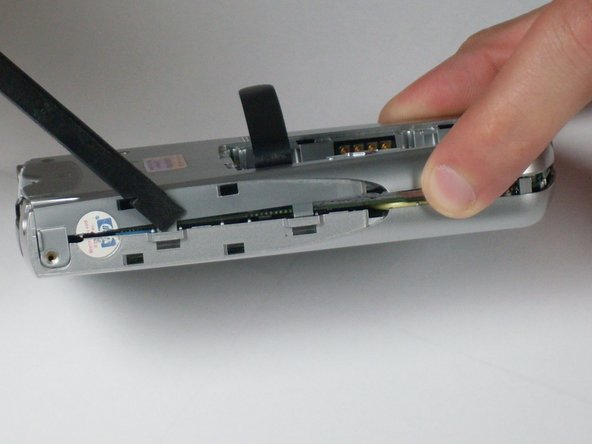
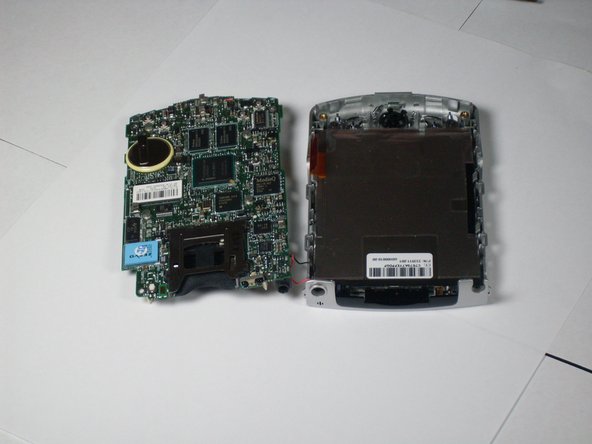
  7. HP iPAQ H2200 faceplate replacement: step 7, image 1 of 2 HP iPAQ H2200 faceplate replacement: step 7, image 2 of 2
    • Remove the back faceplate by pushing and loosening the 4 side slots (2 on each side).

  8. HP iPAQ H2200 faceplate replacement: step 8, image 1 of 1
    • Open the LCD connector, where the orange strip attaches to the main board.

  9. HP iPAQ H2200 faceplate replacement: step 9, image 1 of 1
    • Carefully remove the orange LCD strip from the connector.

  10. HP iPAQ H2200 faceplate replacement: step 10, image 1 of 1
    • Unscrew the 2 screws located at each top corner of the main board.

  11. HP iPAQ H2200 faceplate replacement: step 11, image 1 of 1
    • Remove the main board by pushing outward on the two tabs located on each side near the bottom of the device.

  12. HP iPAQ H2200 faceplate replacement, LCD Screen: step 12, image 1 of 1
    • Unscrew the two bottom screws on LCD screen that were previously located under the main board.

  13. HP iPAQ H2200 faceplate replacement: step 13, image 1 of 2 HP iPAQ H2200 faceplate replacement: step 13, image 2 of 2
    • Press on side tabs to loosen and remove the LCD screen.

  14. HP iPAQ H2200 faceplate replacement, Faceplates: step 14, image 1 of 1
    • Remove the faceplate by unscrewing the green screw located on the top right of the front faceplate.

Tyler Andrews

Member since: 01/13/10

209 Reputation

5 Guides authored

Team

Cal Poly, Team 4-12, Forte Winter 2010 Member of Cal Poly, Team 4-12, Forte Winter 2010

CPSU-FORTE-W10S4G12

3 Members

5 Guides authored

View Statistics:

Past 24 Hours: 2

Past 7 Days: 3

Past 30 Days: 5

All Time: 1,498