HP Split 13-r010dx Hard Drive Replacement

What you need

  1. HP Split 13-r010dx Hard Drive Replacement, Front and Back Panel: step 1, image 1 of 2 HP Split 13-r010dx Hard Drive Replacement, Front and Back Panel: step 1, image 2 of 2
    • Locate the four screws at the bottom of the device. (Note that the keyboard attachment is missing from this device.)

    • Use a Philips head #0 screwdriver to remove each of the screws (Size: 4mm)

  2. HP Split 13-r010dx Hard Drive Replacement: step 2, image 1 of 2 HP Split 13-r010dx Hard Drive Replacement: step 2, image 2 of 2
    • Gently wedge the plastic opening tool in between where the display and back panel meet.

    • Slowly and gently apply force to the plastic opening tool in a downwards motion to loosen the front panel from the back panel.

    • Rotate the device so that the side is facing up and repeat the previous step for the sides.

    • Do NOT attempt to wedge the plastic opening tool on the bottom . Once the sides and top are loose you are ready to continue to the next step.

  3. HP Split 13-r010dx Hard Drive Replacement: step 3, image 1 of 1
    • Gently and slowly pull the front and back panel away from each other (in opposite directions). ( Pulling them apart will not separate the two panels)

    • Only separate the panels by a few inches from each other so that there is room to separate the front and back panel in the next step. Proceed to the next step.

  4. HP Split 13-r010dx Hard Drive Replacement: step 4, image 1 of 1
    • Hold the back panel firmly and pull the front panel upwards to completely separate the front panel from the back panel.

    • The device is now ready to be repaired or replacements installed.

  5. HP Split 13-r010dx Hard Drive Replacement, Hard Drive: step 5, image 1 of 1
    • Locate the hard drive. (The hard drive is located in the center of the device)

  6. HP Split 13-r010dx Hard Drive Replacement: step 6, image 1 of 3 HP Split 13-r010dx Hard Drive Replacement: step 6, image 2 of 3 HP Split 13-r010dx Hard Drive Replacement: step 6, image 3 of 3
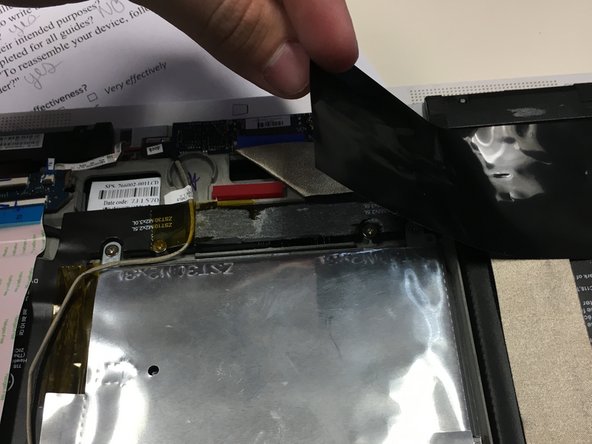
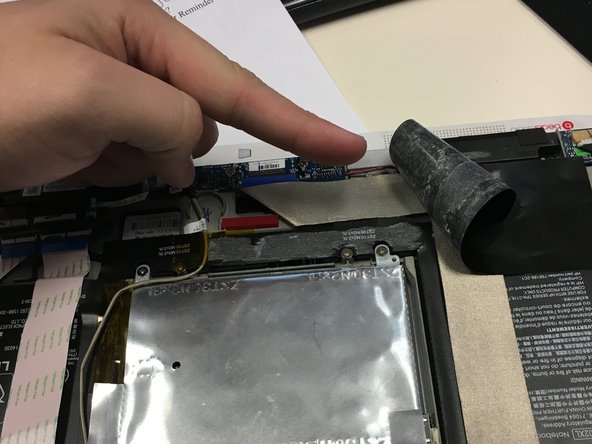
    • Locate the black strip of thermal resistant tape that is covering the upper right portion of the hard drive.

    • Gently lift up with the tape.

    • Fold the tape back away from the hard drive.

  7. HP Split 13-r010dx Hard Drive Replacement: step 7, image 1 of 2 HP Split 13-r010dx Hard Drive Replacement: step 7, image 2 of 2
    • Locate the four screws (Size: 4mm) at each of the four corners of the hard drive.

    • Remove the four screws using a #0 Phillips head screwdriver.

  8. HP Split 13-r010dx Hard Drive Replacement: step 8, image 1 of 2 HP Split 13-r010dx Hard Drive Replacement: step 8, image 2 of 2
    • Locate the lift tab. (The lift tab is located at the bottom left corner of the hard drive).

    • Gently lift up on the lift tab

    • Be cautious when lifting the hard drive from its designated slot, the hard drive is still connected to the device

  9. HP Split 13-r010dx Hard Drive Replacement: step 9, image 1 of 3 HP Split 13-r010dx Hard Drive Replacement: step 9, image 2 of 3 HP Split 13-r010dx Hard Drive Replacement: step 9, image 3 of 3
    • Locate the connection of the hard drive to the device.

    • Gently grasp the connector cord and pull horizontally to the right. (Very little force is needed to disconnect the cord).

    Me pueden ayudar con el nĂºmero de parte de del cable que va hacia el hdd

    wladi Clau - Reply

  10. HP Split 13-r010dx Hard Drive Replacement: step 10, image 1 of 2 HP Split 13-r010dx Hard Drive Replacement: step 10, image 2 of 2
    • The hard drive is no longer connected to the device. Lift the hard drive up vertically and set aside.

    • The hard drive removal is completed.

    Hello, I liked the tutorial a lot because I solved a problem, but I wanted to ask you a question ... where the RAM memories are located in this model of equipment.

    Thank you.

    Atte. Jose Esquivel.

    Jose Esquivel - Reply

Conclusion

To reassemble your device, follow these instructions in reverse order.

4 other people completed this guide.

Kim

Member since: 09/26/17

201 Reputation

2 Guides authored

One Comment

Is it possible to change the Wd5000m21k disk for a Wd5000m22k?

Pablo Cesar Zacarias - Reply

Add Comment

View Statistics:

Past 24 Hours: 0

Past 7 Days: 6

Past 30 Days: 16

All Time: 4,518