
HP Pavilion x2 10-n113dx Hinge Connector Replacement

Archived Guide
This guide is retained solely for historical purposes. Use the updated version of the guide to perform your repair.

What you need

  1. HP Pavilion x2 10-n113dx Hinge Connector Replacement, Battery: step 1, image 1 of 3 HP Pavilion x2 10-n113dx Hinge Connector Replacement, Battery: step 1, image 2 of 3 HP Pavilion x2 10-n113dx Hinge Connector Replacement, Battery: step 1, image 3 of 3
    • Before starting, please turn off your laptop.

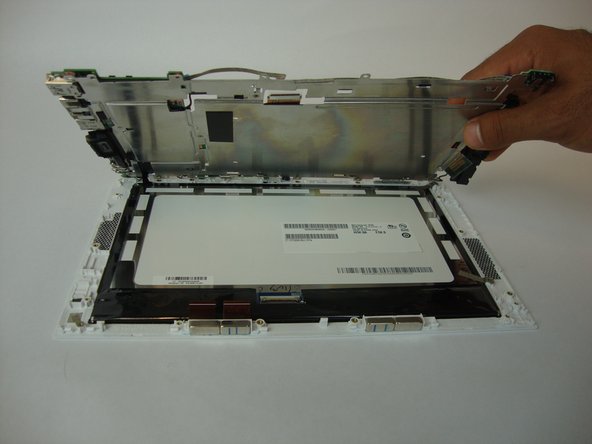
    • Using the blue plastic opening tool or a flat bladed tool, carefully slide the blade in between the display panel and gently slide to prop open the assembly.

  2. HP Pavilion x2 10-n113dx Hinge Connector Replacement: step 2, image 1 of 2 HP Pavilion x2 10-n113dx Hinge Connector Replacement: step 2, image 2 of 2
    • Gently lift and remove the display panel from the assembly.

    • Remove the translucent yellow tape that covers the battery connector on the mainboard.

    • The tape will be in the way for a future step.

  3. HP Pavilion x2 10-n113dx Hinge Connector Replacement: step 3, image 1 of 3 HP Pavilion x2 10-n113dx Hinge Connector Replacement: step 3, image 2 of 3 HP Pavilion x2 10-n113dx Hinge Connector Replacement: step 3, image 3 of 3
    • Flip up the small white colored locking flap using the tip of a spudger or your fingernail. Then the ribbon cable can be removed easily without much effort.

    • Carefully disconnect the white ribbon cable from the mainboard.

  4. HP Pavilion x2 10-n113dx Hinge Connector Replacement: step 4, image 1 of 3 HP Pavilion x2 10-n113dx Hinge Connector Replacement: step 4, image 2 of 3 HP Pavilion x2 10-n113dx Hinge Connector Replacement: step 4, image 3 of 3
    • Carefully disconnect the battery cable from its connector on the mainboard.

  5. HP Pavilion x2 10-n113dx Hinge Connector Replacement: step 5, image 1 of 3 HP Pavilion x2 10-n113dx Hinge Connector Replacement: step 5, image 2 of 3 HP Pavilion x2 10-n113dx Hinge Connector Replacement: step 5, image 3 of 3
    • Using the Phillips #0 screwdriver, carefully remove the 4 corner screws that hold the battery to the display panel.

    • 3 screws are 3.12 mm head, 2.40 mm length, and 1 screw is 5.85mm head, 2.5mm length.

    • Remove the battery from the device.

  6. HP Pavilion x2 10-n113dx Hinge Connector Replacement, Screen: step 6, image 1 of 3 HP Pavilion x2 10-n113dx Hinge Connector Replacement, Screen: step 6, image 2 of 3 HP Pavilion x2 10-n113dx Hinge Connector Replacement, Screen: step 6, image 3 of 3
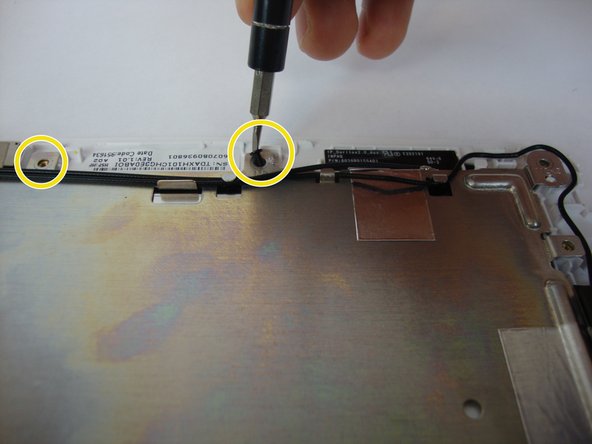
    • Using the Phillips #0 screwdriver, carefully remove the 21 screws that hold the screen to the display panel. 3.32 mm head, 3.99 mm length (RED) , 2.82 head 3.5 mm length (YELLOW), and 4.15 mm head, 2.35 mm length (BLUE).

    • 3.32 mm head, 3.99 mm length.

    • 2.82 head 3.5 mm length.

    • 4.15 mm head, 2.35 mm length.

  7. HP Pavilion x2 10-n113dx Hinge Connector Replacement: step 7, image 1 of 3 HP Pavilion x2 10-n113dx Hinge Connector Replacement: step 7, image 2 of 3 HP Pavilion x2 10-n113dx Hinge Connector Replacement: step 7, image 3 of 3
    • Very carefully lift the circuit board in order to keep everything attached. Be careful with any cables that may still be connected.

  8. HP Pavilion x2 10-n113dx Hinge Connector Replacement, Hinge connector: step 8, image 1 of 2 HP Pavilion x2 10-n113dx Hinge Connector Replacement, Hinge connector: step 8, image 2 of 2
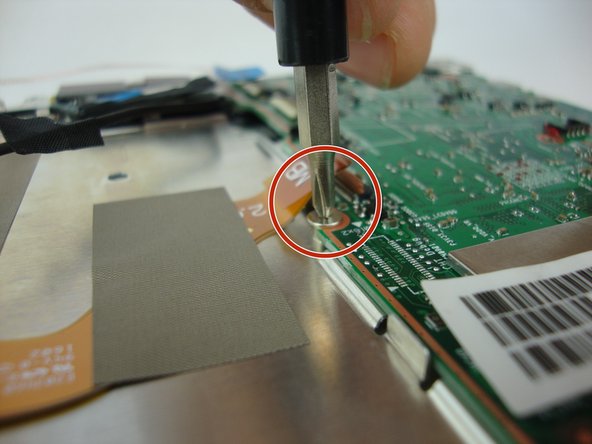
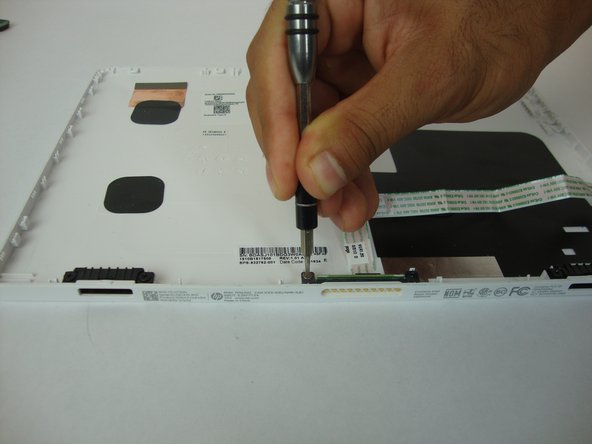
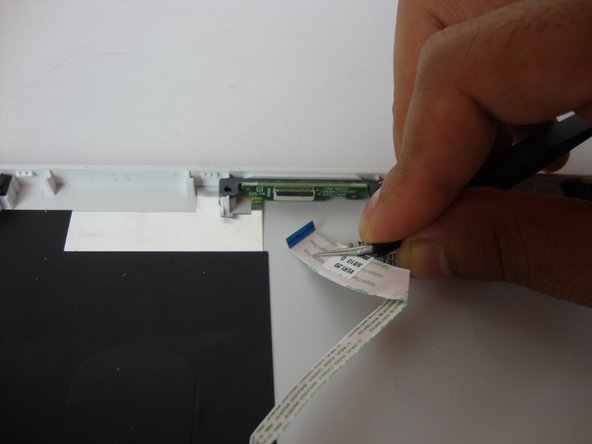
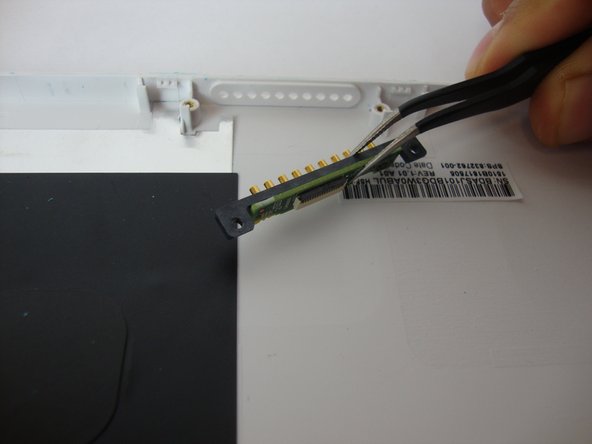
    • Use the Phillips #0 screwdriver to unscrew 2 screws 2.82 mm head 3.5 mm length from the hinge connector

  9. HP Pavilion x2 10-n113dx Hinge Connector Replacement: step 9, image 1 of 2 HP Pavilion x2 10-n113dx Hinge Connector Replacement: step 9, image 2 of 2
    • Use the tweezers to gently remove the white pogo board ribbon from the hinge connector.

  10. HP Pavilion x2 10-n113dx Hinge Connector Replacement: step 10, image 1 of 2 HP Pavilion x2 10-n113dx Hinge Connector Replacement: step 10, image 2 of 2
    • Gently remove the hinge connector from the display panel.

Conclusion

To reassemble your device, follow these instructions in reverse order.

One other person completed this guide.

David Zambrano

Member since: 09/28/17

822 Reputation

5 Guides authored

Team

USF Tampa, Team S13-G4, Boczar Fall 2017 Member of USF Tampa, Team S13-G4, Boczar Fall 2017

USFT-BOCZAR-F17S13G4

4 Members

5 Guides authored

One Comment

THANK YOU SO MUTCH !!! My keyboard was broken but this is just that the cable wasn’t connected ! but i have only make step 1,2,3 and 4

baptiste.r1807 - Reply

Add Comment

View Statistics:

Past 24 Hours: 0

Past 7 Days: 0

Past 30 Days: 0

All Time: 643