Introduction
The hard drive houses your operating system and all your files and information. This is a very important component.
What you need
-
-
Press and hold the release switch, and then slide the battery out. Insert the new battery into the slot and you're done!
-
-
-
-
In the battery compartment, find the phillips screw that is holding the rear panel onto the computer. Unscrew it.
-
With the battery compartment closest to you, push the panel away from you. Once it slides back until it stops, gently lift it and put it to the side.
-
Please note that this particular screw does not completely come out, it stays with the rear panel and that is ok.
-
-
-
Remove the two silver phillips screws from the hard drive.
-
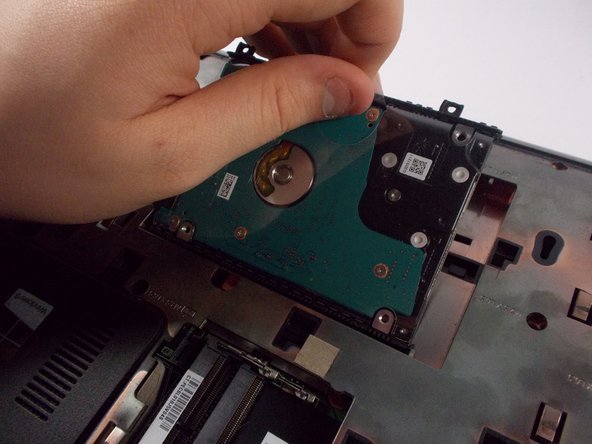
Using the plastic tab, remove the hard drive from its socket.
-
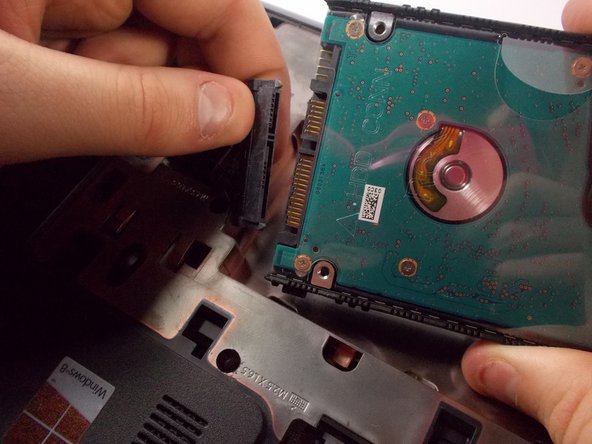
Unplug the hard drive from the wire connecting it to the motherboard.
-


To reassemble your device, follow these instructions in reverse order.
To reassemble your device, follow these instructions in reverse order.
Team

UMass Dartmouth, Team 1-6, Miles Spring 2016 Member of UMass Dartmouth, Team 1-6, Miles Spring 2016
UMASSD-MILES-S16S1G6
3 Members
9 Guides authored