HP G71t-300 Wi-Fi Card Replacement

What you need

  1. HP G71t-300 Wi-Fi Card Replacement, Wi-Fi Card: step 1, image 1 of 3 HP G71t-300 Wi-Fi Card Replacement, Wi-Fi Card: step 1, image 2 of 3 HP G71t-300 Wi-Fi Card Replacement, Wi-Fi Card: step 1, image 3 of 3
    Tool used on this step:
    Anti-Static Wrist Strap
    $7.95
    Buy
    • Ground yourself by either touching an unpainted metal surface or by using the Anti-Static wrist strap.

    • Turn off the computer and remove the charger from the charging port.

    • Turn the laptop over and slide the battery release catch to the right. The battery will pop up from its slot. Remove the battery using your fingers.

  2. HP G71t-300 Wi-Fi Card Replacement: step 2, image 1 of 1
    • Remove the 6mm screw from the cover above the battery using a Phillips #0 screwdriver.

  3. HP G71t-300 Wi-Fi Card Replacement: step 3, image 1 of 1
    • Pull off the bottom cover to reveal the Wi-Fi card.

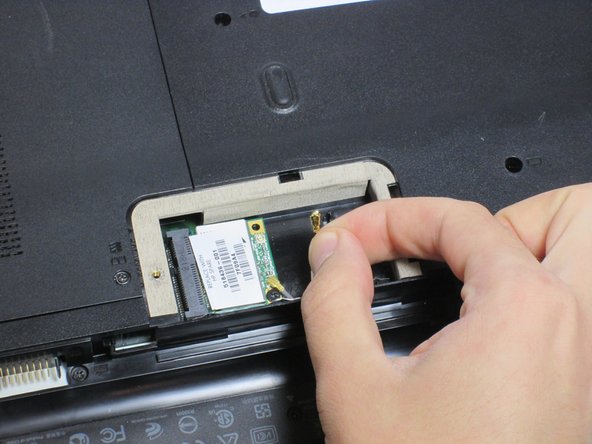
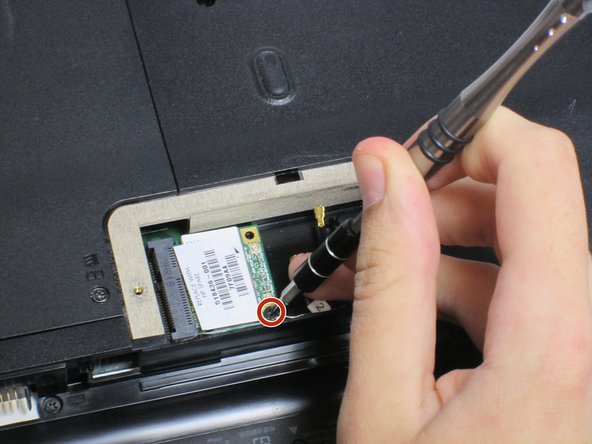
  4. HP G71t-300 Wi-Fi Card Replacement: step 4, image 1 of 3 HP G71t-300 Wi-Fi Card Replacement: step 4, image 2 of 3 HP G71t-300 Wi-Fi Card Replacement: step 4, image 3 of 3
    • Gently remove the 2 cables clips to avoid damage.

    • Remove the 3mm screw holding the Wi-Fi module using a Phillips #0 screwdriver.

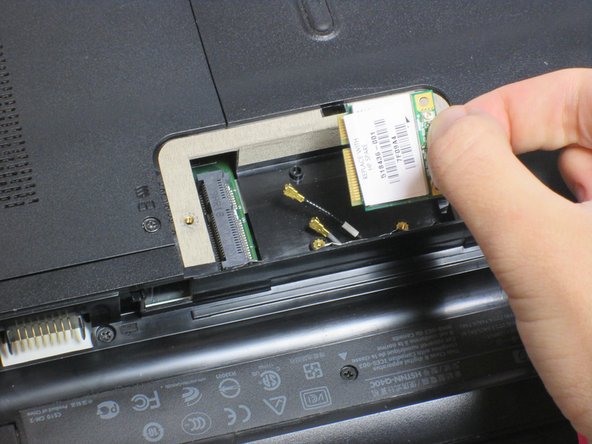
  5. HP G71t-300 Wi-Fi Card Replacement: step 5, image 1 of 2 HP G71t-300 Wi-Fi Card Replacement: step 5, image 2 of 2
    • Gently pull the module out of the slot.

Conclusion

To reassemble your device, follow these instructions in reverse order.

Cecil Lam

Member since: 09/22/16

113 Reputation

1 Guide authored

Team

UC Davis, Team 2-3, Oliver Fall 2016 Member of UC Davis, Team 2-3, Oliver Fall 2016

UCD-OLIVER-F16S2G3

5 Members

6 Guides authored

0 Comments

Add Comment

View Statistics:

Past 24 Hours: 0

Past 7 Days: 1

Past 30 Days: 2

All Time: 172