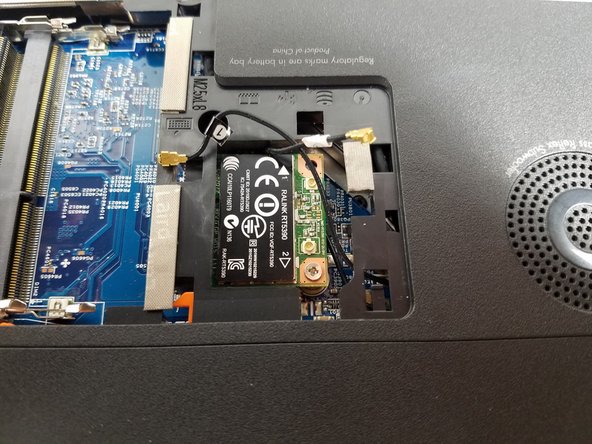
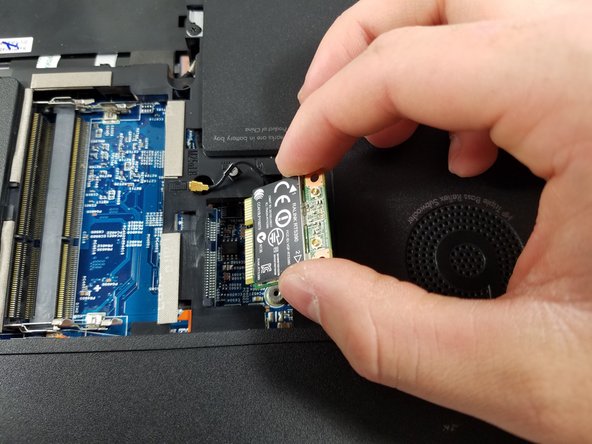
HP Envy dv6-7363cl Wi-fi Card Replacement

What you need

  1. HP Envy dv6-7363cl Wi-fi Card Replacement, Battery: step 1, image 1 of 1
    • Flip the device upside-down so that its bottom is facing up.

  2. HP Envy dv6-7363cl Wi-fi Card Replacement: step 2, image 1 of 1
    • Push the lever underneath the battery to the left.

  3. HP Envy dv6-7363cl Wi-fi Card Replacement: step 3, image 1 of 2 HP Envy dv6-7363cl Wi-fi Card Replacement: step 3, image 2 of 2
    • Lift the battery up out of its socket.

  4. HP Envy dv6-7363cl Wi-fi Card Replacement, Wi-Fi Card: step 4, image 1 of 1
    • After removing the battery, remove the circled screw.

  5. HP Envy dv6-7363cl Wi-fi Card Replacement: step 5, image 1 of 1
    • Remove the back cover.

  6. HP Envy dv6-7363cl Wi-fi Card Replacement: step 6, image 1 of 1
    • With the back cover removed, locate the Wi-Fi card which is positioned next to the Beats logo.

  7. HP Envy dv6-7363cl Wi-fi Card Replacement: step 7, image 1 of 2 HP Envy dv6-7363cl Wi-fi Card Replacement: step 7, image 2 of 2
    • Carefully remove gold-headed, black wires from Wi-Fi card with tweezers.

  8. HP Envy dv6-7363cl Wi-fi Card Replacement: step 8, image 1 of 2 HP Envy dv6-7363cl Wi-fi Card Replacement: step 8, image 2 of 2
    • After removing wires, remove circled screws from card.

    • Note: Laptop shown only has one screw holding in Wi-Fi card. Some models may have both.

  9. HP Envy dv6-7363cl Wi-fi Card Replacement: step 9, image 1 of 2 HP Envy dv6-7363cl Wi-fi Card Replacement: step 9, image 2 of 2
    • Wi-Fi card will raise out of device when screw is removed.

    • Gently pull card to the right to remove from device.

Conclusion

To reassemble your device, follow these instructions in reverse order.

One other person completed this guide.

dylananthony

Member since: 10/20/16

564 Reputation

3 Guides authored

Team

0 Comments

Add Comment

View Statistics:

Past 24 Hours: 0

Past 7 Days: 2

Past 30 Days: 5

All Time: 354